XHERE 灾备预配置
XHERE 灾备预配置
为灾备目标创建与配置 XHERE 账户
创建用户并授予权限
XHERE 云平台部署完成后,默认账户通常为管理员账户,该账户拥有执行所有操作的权限。
管理用户访问密钥

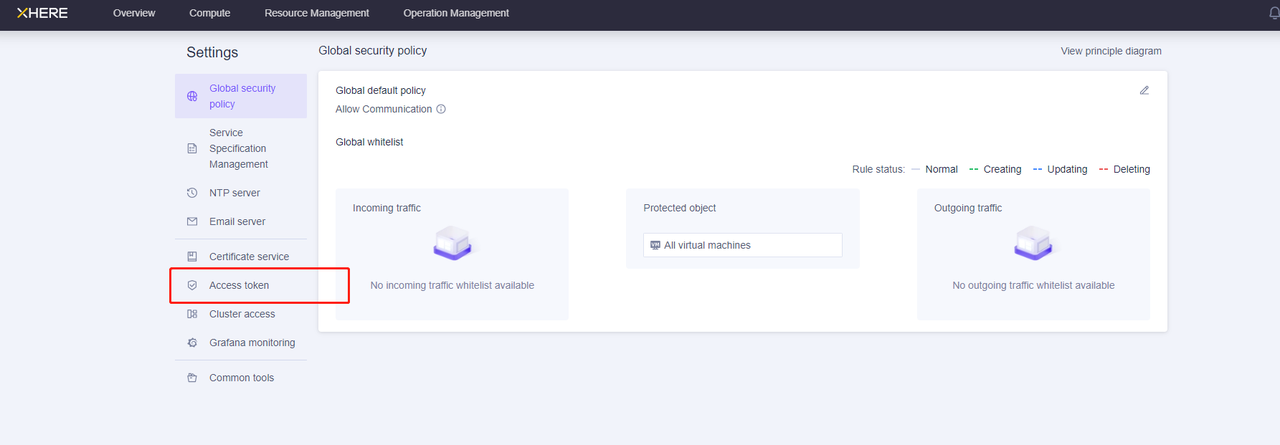
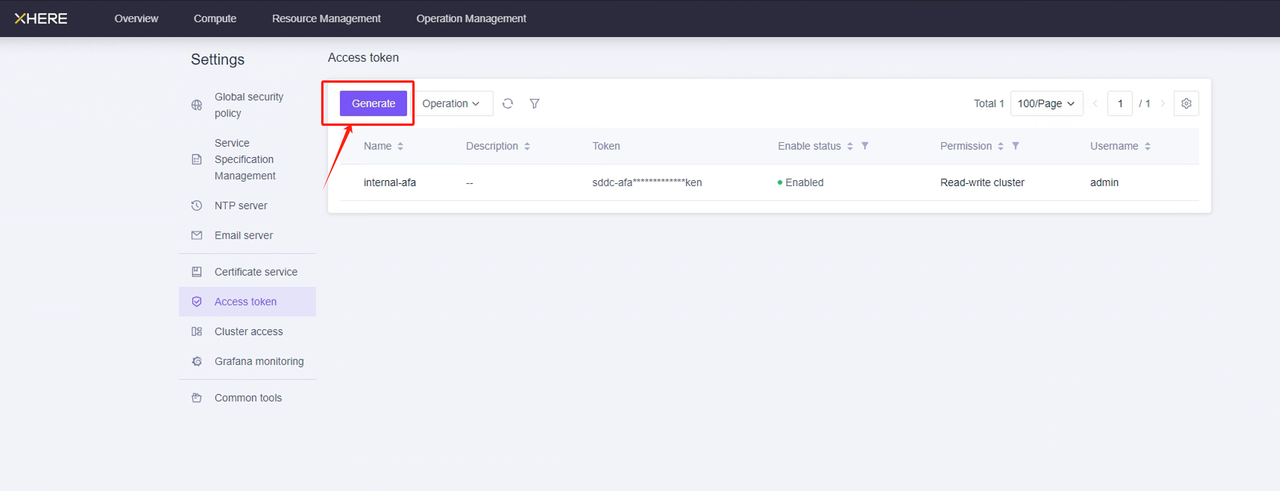
点击"生成"后,只需输入名称即可为"admin"账户创建令牌。
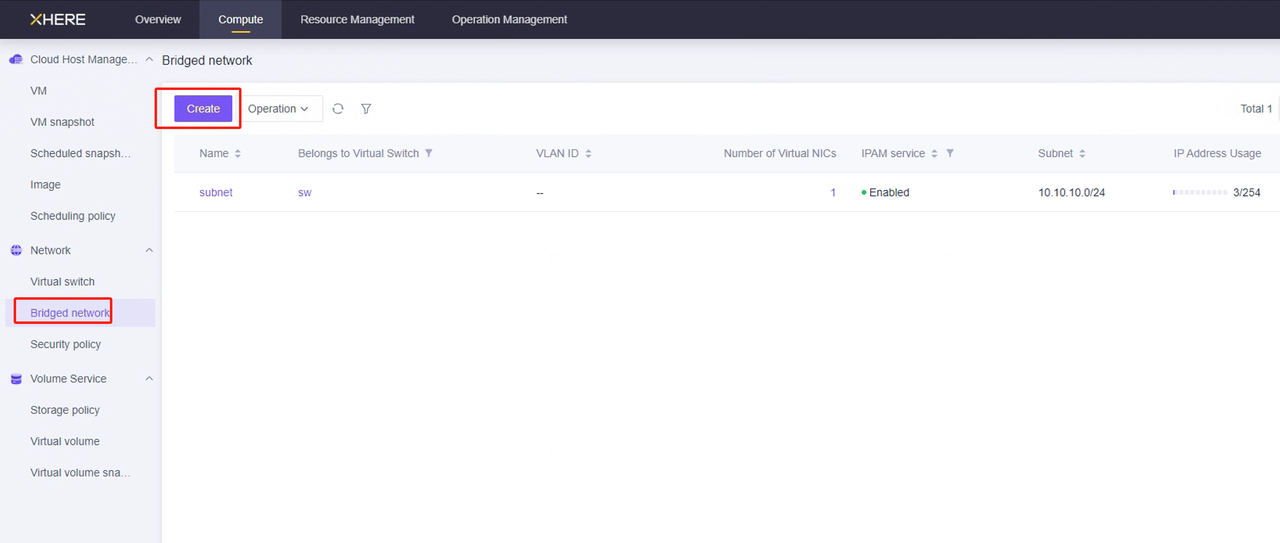
桥接网络设置
为满足灾备要求,需提前创建网络。
所需网络包括:
HyperBDR 灾备工具所在的网络
云同步网关(Cloud Sync Gateway)所在的网络
灾备服务所在的网络
创建网络的方法如下:
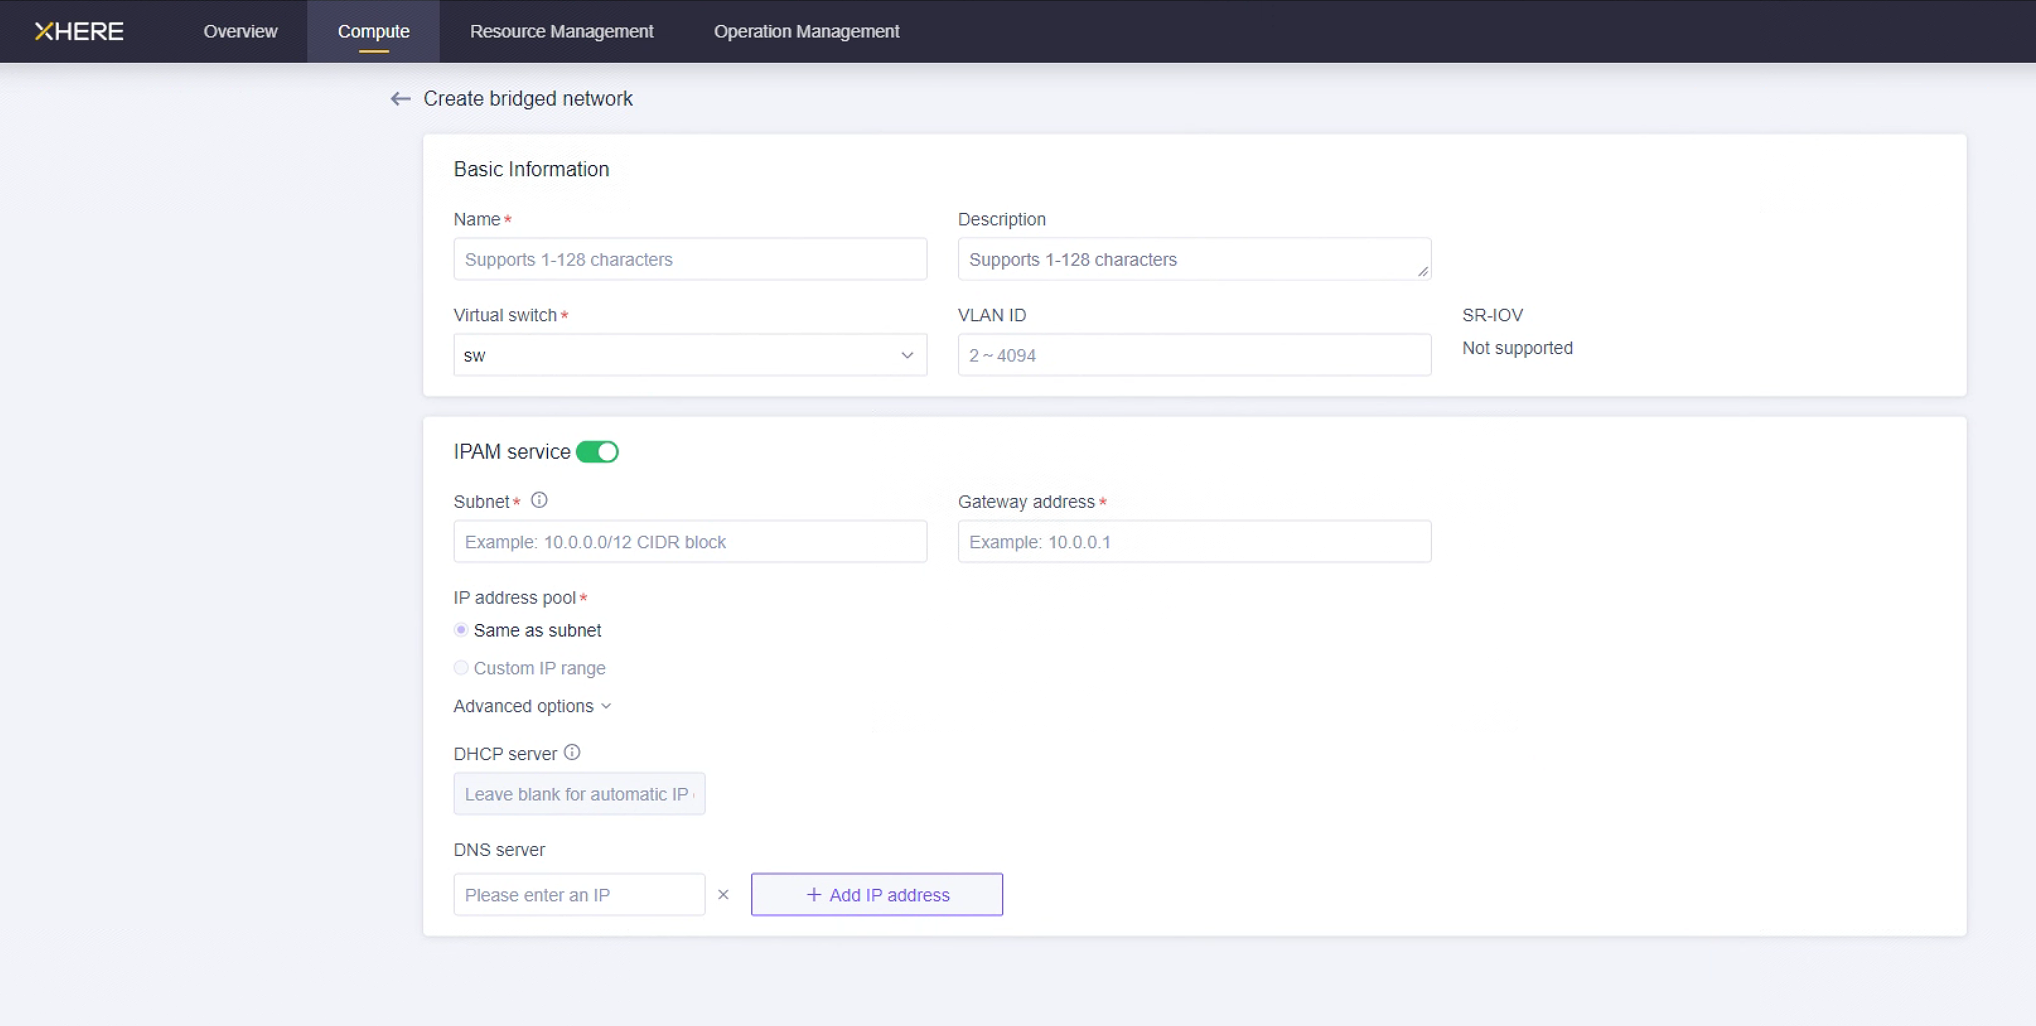
说明:请根据以下灾备网络场景建立您的网络。
- HyperBDR 桥接网络:
如果通过内网访问,请创建一个灾备桥接网络,并将 HyperBDR 虚拟机实例置于此网络中。
- 数据备份桥接网络:
专用于数据备份的桥接网络和子网,通过内网与本地数据中心(IDC)互联。
- 业务桥接网络:
用于灾备接管和演练的业务桥接网络和子网。
测试桥接网络间的网络访问
预先创建的桥接网络需要确保彼此之间的网络通信
测试本地 IDC 网络与 HyperBDR 桥接网络之间的连通性
步骤1:登录 XHERE,在 XHERE 上创建实例 A 用于部署 HyperBDR 灾备工具。配置网络时,选择 HyperBDR 桥接网络和子网。确保此新创建实例的安全组具有允许端口 10443 和 30080 的入站访问策略。
步骤2:部署 HyperBDR 灾备工具,并确保程序正常运行。
步骤3:从源 IDC 数据中心选择一台主机,测试其到 XHERE 上实例 A 的端口 10443 和 30080 的连接。
在源主机上执行命令:
ssh -v -p 10443 <实例 A 的内网 IP 地址>
ssh -v -p 30080 <实例 A 的内网 IP 地址>
测试结果:如果能够成功访问并输入密码,则表示访问正常。
测试 HyperBDR 桥接网络与数据备份桥接网络之间的连通性
步骤1:在 XHERE 上创建一个新的实例 B。配置网络时,选择数据备份桥接网络和子网。确保此新创建的虚拟机测试实例的安全组具有允许端口 22、16100 和 10729 的入站访问策略。
步骤2:登录到 HyperBDR 所在的实例。
然后执行命令:
ssh -v -p 22 <实例 B 的内网 IP 地址>
ssh -v -p 10729 <实例 B 的内网 IP 地址>
ssh -v -p 16100 <实例 B 的内网 IP 地址>
测试结果:
如果能够成功访问并输入密码,则表示访问正常。
测试本地 IDC 网络与数据备份桥接网络之间的连通性
- 步骤1:从源 IDC 数据中心选择一台主机,测试其到 XHERE 上实例 B 的端口 3260 的连接。此实例 B 即上文提到的实例。
在源主机上执行命令:
ssh -v -p 3260 <实例 B 的内网 IP 地址>测试结果:如果能够成功访问并输入密码,则表示访问正常。
测试 HyperBDR 桥接网络与业务桥接网络之间的连通性
步骤1:创建一个新的虚拟机实例 C。配置网络时,选择业务桥接网络和子网。确保此新创建的虚拟机测试实例的安全组具有允许端口 22 和 10729 的入站访问策略。
步骤2:登录到 HyperBDR 所在的实例。
然后执行命令:
ssh -v -p 22 <实例 C 的内网 IP 地址>
ssh -v -p 10729 <实例 C 的内网 IP 地址>
测试结果:
如果能够成功访问并输入密码,则表示访问正常。
创建 HyperBDR 安全策略
在 XHERE 中,可以为特定主机设置安全策略。例如:

注意:对于源 IP 范围,建议使用安全范围替代 0.0.0.0/0。例如,如果您的公网 IP 地址是 110.242.68.66,源可配置为 110.242.68.66/32。
如果是公网环境,建议在端口 22 上设置白名单访问以确保安全。
上传Ubuntu24.04镜像到XHERE平台
该镜像用来部署容灾工具,且后续用来创建"云同步网关",比较重要
因为XHERE平台,无法通过cloud-init服务为镜像注入密码,所以上传的镜像需要满足以下条件:
- 镜像开启root用户远程登录
- 镜像有root用户的默认密码
若无合适镜像,可以利用已有ubuntu24.04镜像,手动制作一个满足条件的镜像。
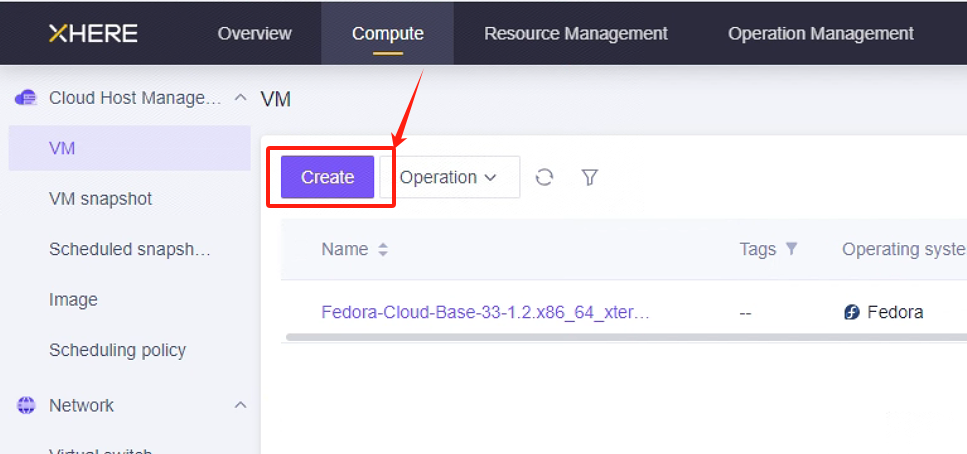
为 HyperBDR 创建虚拟机
登录 XHERE 控制台
基于配置信息创建云实例
HyperBDR 服务器的资源配置如下:
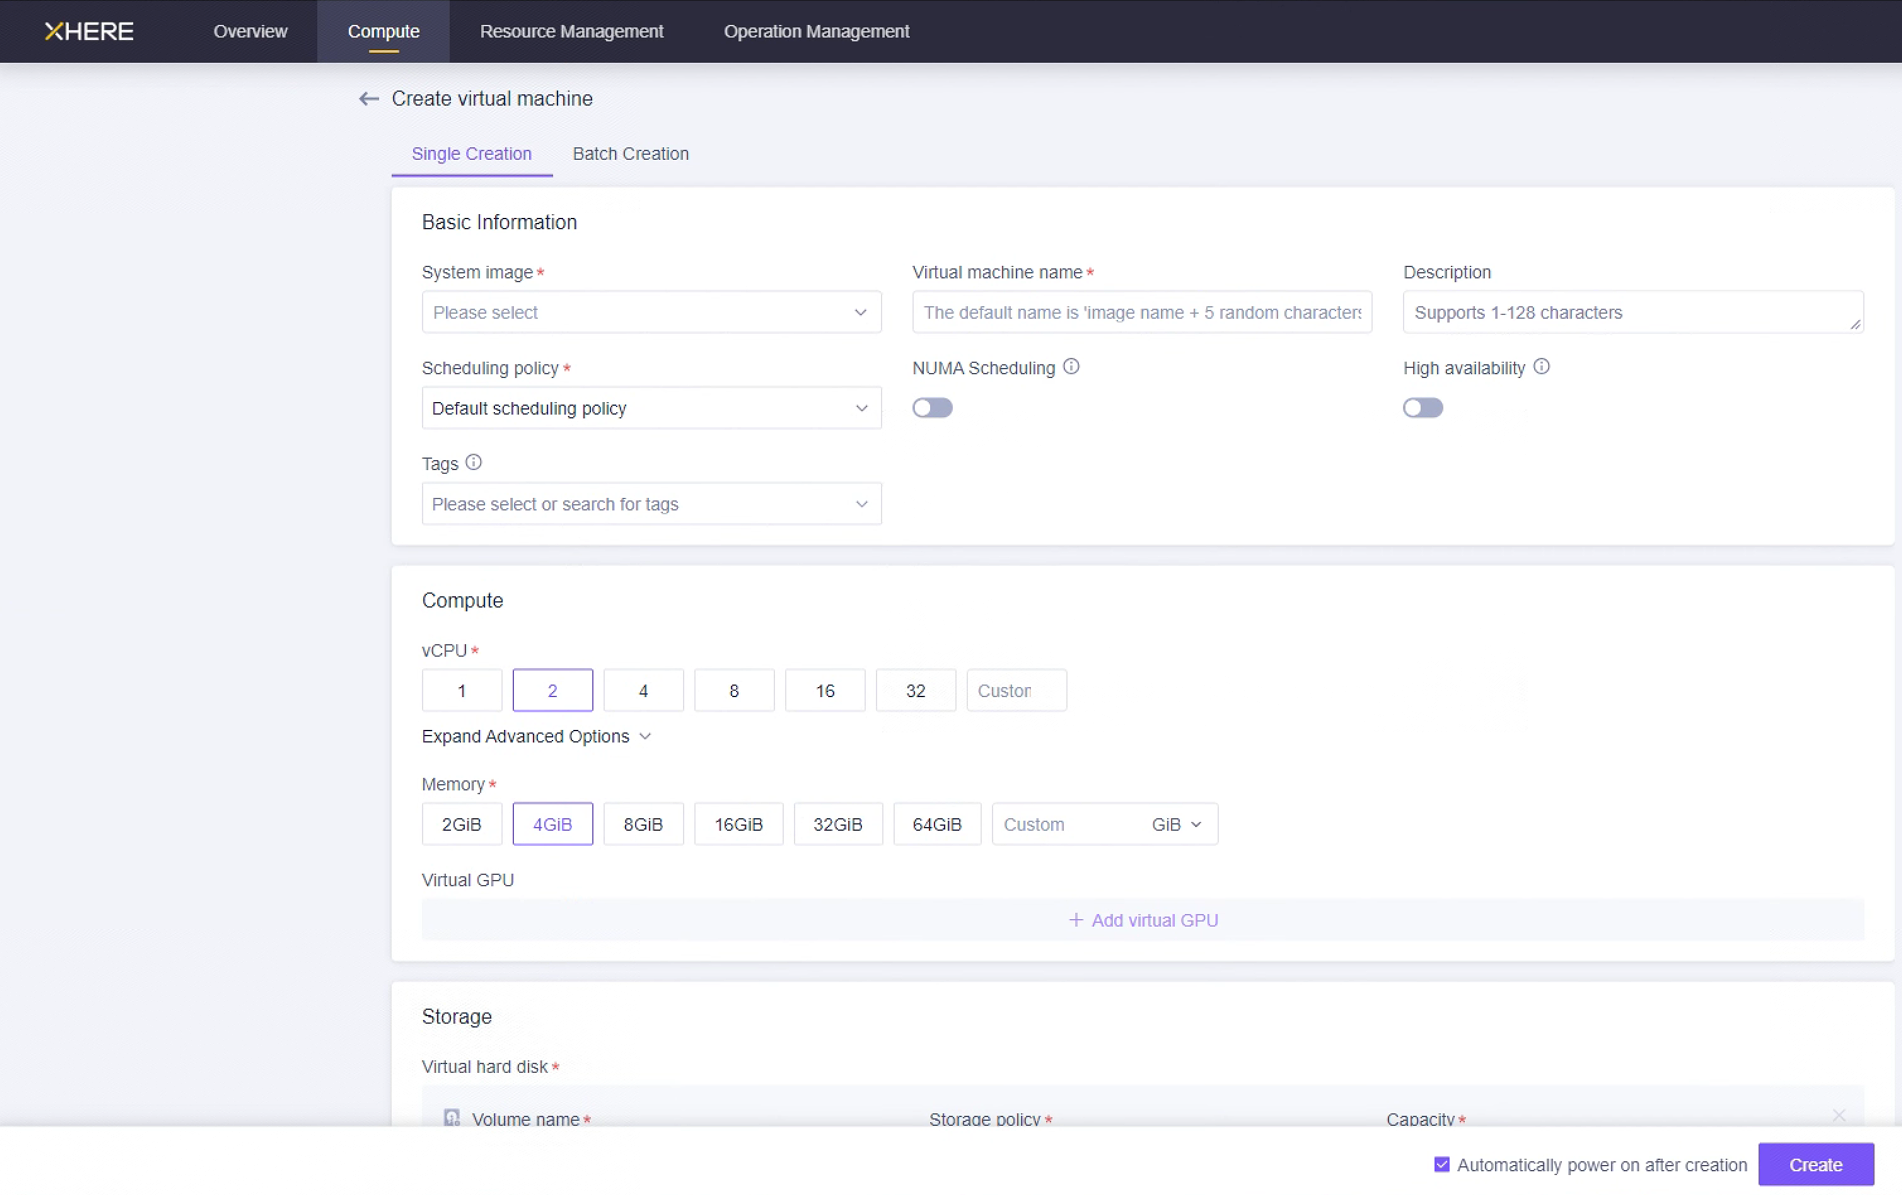
在此页面,您可以选择 Ubuntu 20.04 镜像来创建用于安装 HyperBDR 工具的主机。为此主机选择 8U16G500G 的实例规格。
XHERE 平台账户配额检查
在灾备过程中,必须确保云账户拥有足够的资源配额来支持数据同步和灾备。为防止因配额不足导致灾备失败,需要在启动灾备前执行资源配额检查。
如果 XHERE 账户中的剩余配额不足,则需要清理账户中不必要的资源或申请扩大 XHERE 资源配额。
源主机资源盘点
需要收集待灾备主机系统的计算和存储资源信息,并将详细信息填入表格。
| 资源类型 | 大小 |
|---|---|
| 源端主机的总数量 | |
| 源端主机的总CPU数量 | |
| 源端主机的总内存大小 | |
| 源端主机的总磁盘数量 | |
| 源端主机磁盘的总容量 |
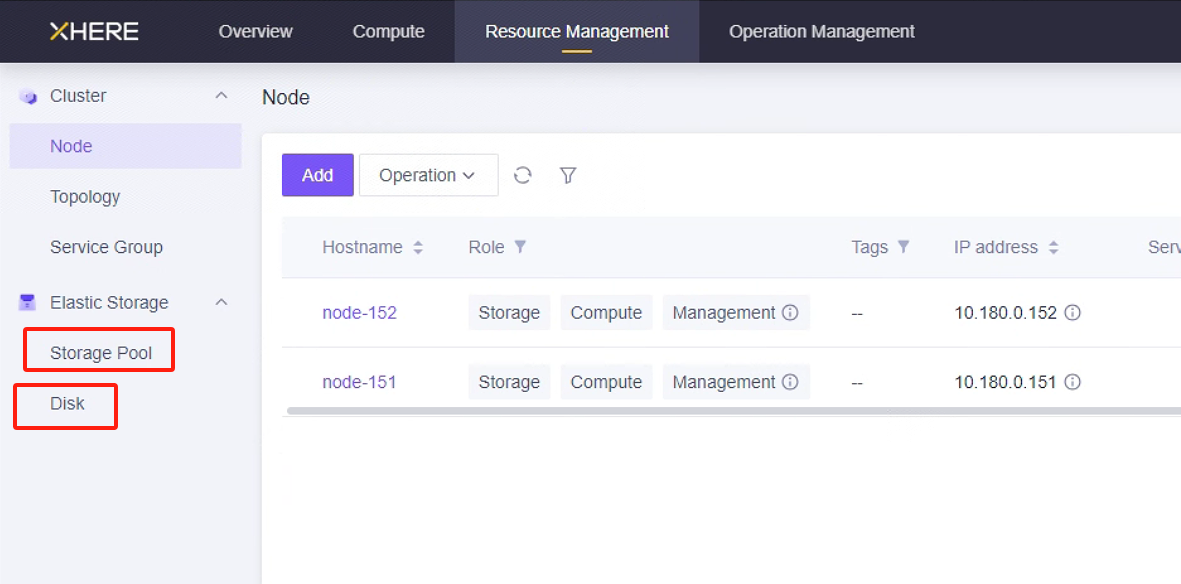
XHERE 账户资源配额检查
在"资源管理"中查看相关资源。
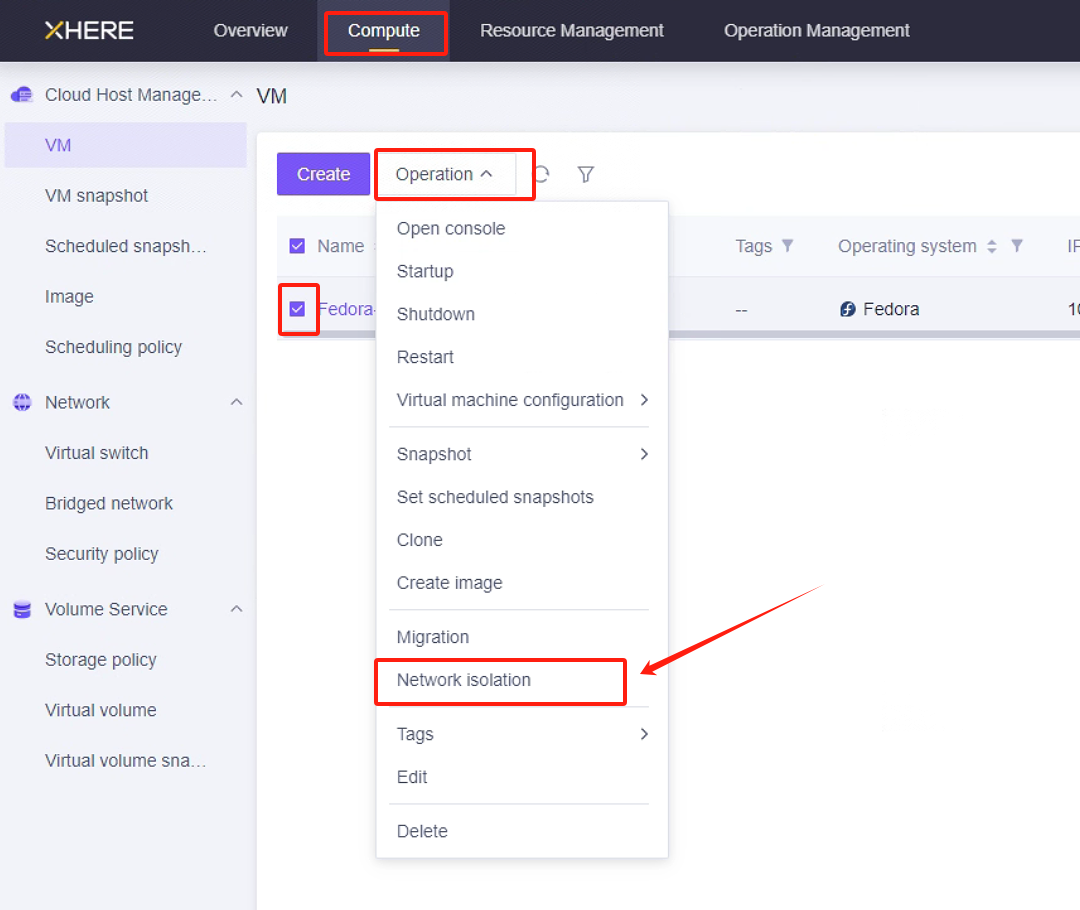
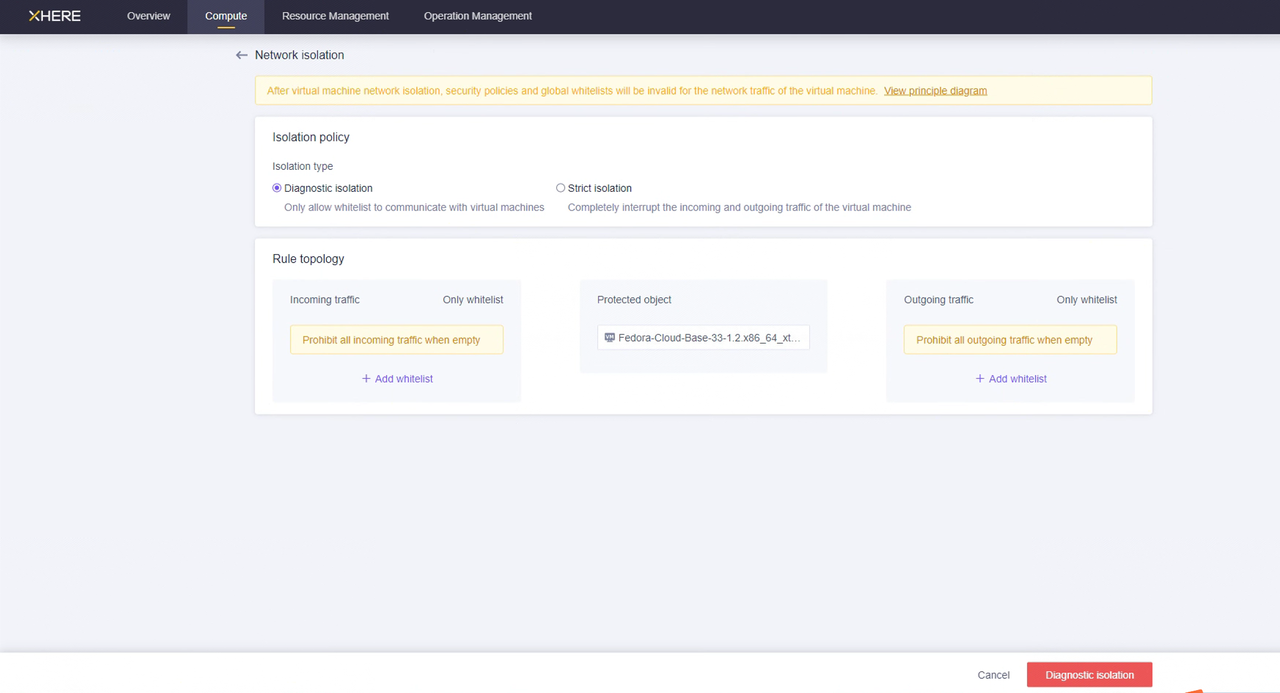
修改云同步网关实例安全组的 SSH 策略
您可以配置"云同步网关"实例的"网络隔离",并通过白名单设置入站和出站流量的规则。