

Production Site
Production Site
In the HyperBDR disaster recovery architecture, a Production Site represents the source environment hosting your core business workloads. The system supports two data replication modes to balance universal compatibility with agentless, non-intrusive deployment:
- Agent Mode: A lightweight Agent program is installed inside the source operating system. It is suitable for complex heterogeneous environments, including x86 physical servers, standalone private cloud virtual machines (such as KVM, Xen, Hyper-V), and public cloud hosts.
- Agentless Mode: Requires zero software installation inside workload hosts. It captures differential disk block changes directly via native hypervisor/cloud APIs and snapshot mechanisms. Currently supported platforms include: VMware, OpenStack + Ceph, AWS EC2, FusionCompute, Oracle Cloud, HCS 8.0.2, HCS Online, and Huawei Cloud.
OS Compatibility Support Matrix
DR
VMware
The VMware page is used to configure and manage the VMware agentless (Agentless) production platform, including platform authentication, Sync Proxy binding, and connection status monitoring.
Add VMware Platform
In the left navigation bar of the console, click "Production Site" > "VMware", and click the "Add" button. Follow the wizard in the pop-up window to complete platform connection.

Deploy Sync Proxy
The VMware platform uses agentless (Agentless) mode and requires deploying a Source Sync Proxy (Sync Proxy) in the source VMware cluster:
- Download OVA Template:
- Click the download link in the wizard, or download directly via the following link: https://downloads.oneprocloud.com/proxy-agent_BaseOS.ova
- Import Virtual Machine:
- Import the OVA file into the source VMware cluster, deploy one or more Source Sync Proxy virtual machines, and configure network IP addresses.
- Log in to the Virtual Machine:
- Log in to the newly created Sync Proxy VM. The system default initial credentials are
root/Acb@132.Inst.
- Log in to the newly created Sync Proxy VM. The system default initial credentials are
- One-Click Installation & Registration:
- Copy the installation command from the wizard interface, paste and execute it in the Sync Proxy terminal. Upon completion, the node will automatically register with the HyperBDR platform.
Note: The recommended specification for Sync Proxy is 4 vCPU / 8 GB RAM / 50 GB Disk, supporting concurrent mounting and synchronization of up to 50 disks per node. For detailed specifications and multi-node scale-out instructions, see Source Sync Proxy.

Create VMware Production Platform
In step 2 of the wizard, configure VMware connection authentication details and verify network connectivity:
- Authentication Parameter Configuration
| Parameter | Example / Format | Description |
|---|---|---|
| Auth Address | https://<vCenter_or_ESXi_IP_or_Domain>:443 | Access address of the vCenter or standalone ESXi host. If using a domain name, configure the corresponding hosts resolution in the HyperBDR console in advance. |
| Username | Administrator or backup account | Username with necessary API invocation permissions (e.g., administrator@vsphere.local or a custom role account). |
| Password | Account password | Password used to connect to vCenter or ESXi. |
| Source Sync Proxy | Select from dropdown | Select the deployed Source Sync Proxy node from the dropdown list, no need to enter the IP manually. |
- Network Policy Requirements
| Source | Target | Port / Protocol | Description |
|---|---|---|---|
| Sync Proxy | vCenter / ESXi | 443 / TCP | Management authentication and virtual machine metadata exchange |
| Sync Proxy | ESXi Hosts | 902 / TCP | VMware native data stream channel. If protected virtual machines are distributed across multiple ESXi hosts, ensure bidirectional connectivity between Sync Proxy and port 902 on all relevant ESXi hosts. |
- Permissions and CBT Mechanism
HyperBDR relies on VMware's native CBT (Changed Block Tracking) technology to achieve fast incremental backups. The vCenter account used must possess minimum permissions for snapshot management, virtual machine configuration, and CBT. For a detailed permission list, see VMware User Permission Requirements.
After confirming all configurations are correct, click "Confirm" to submit.

Complete VMware Addition
After adding, return to the VMware production platform list. Wait until the platform status becomes "Normal" and the number of cluster hosts and virtual machines is successfully retrieved, indicating a successful connection. You can then proceed with subsequent disaster recovery protection.
Note: Repeat the above steps to add multiple vCenter clusters or standalone ESXi hosts.
Action
In the VMware production platform list, click the "Action" dropdown menu on the right side of the target platform row to perform operations such as Settings, Bind, Unbind, Reload Virtual Machine, Modify Authentication Information, and Delete. For detailed instructions, refer to Production Site Management.
OpenStack
The OpenStack page is used to configure and manage the OpenStack + Ceph agentless (Agentless) production platform, including Keystone authentication, Ceph storage pool integration, Sync Proxy binding, and connection status monitoring.
Add OpenStack Platform
In the left navigation bar of the console, click "Production Site" > "OpenStack", and click the "Add" button. Follow the wizard to complete platform connection.

Deploy Sync Proxy
Create a cloud virtual machine in the OpenStack environment to deploy the Source Sync Proxy (Sync Proxy):
- Prepare Image:
- Use a standard native Ubuntu 24.04 image from OpenStack, or download the official QCOW2 image and import it into the image repository:
- Download Ubuntu 24.04 QCOW2 Image
Note: This QCOW2 image has no preset static password and relies on
cloud-initto inject passwords or SSH Keys. Ensure the platform supports cloud-init. - Create Cloud Host:
- Launch a virtual machine in OpenStack based on this image and associate a network IP. Recommended specification: 4 vCPU / 8 GB RAM / 50 GB Disk.
- One-Click Installation & Registration:
- Log in to the cloud host, paste and execute the installation command provided in the wizard terminal. Upon completion, the node will automatically register with the HyperBDR platform.
Note: For detailed specifications and network planning, see Source Sync Proxy.

Create OpenStack Production Platform
- Keystone Authentication Configuration
| Parameter | Example / Format | Description |
|---|---|---|
| Auth Address | http://<Keystone_IP>:5000/v3 | OpenStack Keystone Public Endpoint (v3 recommended). If using a domain name, configure DNS resolution in advance. |
| User Domain ID | default | Domain ID to which the user belongs. |
| Username | Administrator account | Username with platform query and volume management permissions. |
| Password | Account password | Login password for the user account. |
| Project Domain ID | default | Domain ID to which the project belongs. |
| Project Name | admin | Tenant project name to which the user belongs. |
| Region | RegionOne | Region name of the target OpenStack cluster. |
| Source Sync Proxy | Select from dropdown | Select the deployed Source Sync Proxy node from the dropdown list. |
- OpenStack Service Network Policy Requirements:
| Source | Target | Port / Protocol | Description |
|---|---|---|---|
| Sync Proxy | OpenStack Controller Nodes | 5000, 9696, 8774, 8776, 9292 / TCP | Corresponding to Keystone, Neutron, Nova, Cinder, and Glance API endpoints respectively |

- Ceph Storage Cluster Authentication Configuration
In OpenStack scenarios, HyperBDR directly connects to the underlying Ceph storage pools to read differential snapshot data without agents:
| Parameter | Example / Format | Description |
|---|---|---|
| Control Node Addresses | 10.0.0.201,10.0.0.202 | Ceph Monitor node IPs, separated by commas ,. |
| Enable CephX Auth | Yes | Whether to enable CephX authentication (recommended). |
| Username | cinder or admin | Ceph username used to access the specified storage pool. |
| Keyring | AQBBY9hf...== | Client access key. Run cat /etc/ceph/ceph.client.cinder.keyring on a Ceph node to obtain it. |
| Storage Pool | volumes | Ceph Pool where protected virtual machine disks reside (view via ceph osd ls pools). |
| Incremental Fetch Type | rbd diff | Incremental read mode: + rbd diff: Snapshot-based precise differential comparison, high data accuracy (recommended);+ rbd du: Fast overview comparison. |
| Cluster Name | ceph | Ceph cluster name, defaults to ceph. |
| OpenStack Volume Types | DEFAULT_VOLUME_TYPE, ssd | Associated Cinder Volume Types, queried via openstack volume type list. |
- Ceph Storage Network Policy Requirements:
| Source | Target | Port / Protocol | Description |
|---|---|---|---|
| Sync Proxy | Ceph Monitor / OSD | 6789, 3300, 6800-7300 / TCP | Ceph Mon authentication communication and direct disk block data retrieval from OSD nodes |

Complete OpenStack Addition
After clicking "Confirm" to save, the platform automatically validates Keystone and Ceph cluster connectivity. Wait until the platform status becomes "Normal" and the number of cluster cloud hosts is retrieved, indicating a successful connection.
Note: If the system contains multiple backend Ceph storage pools or multiple OpenStack clusters, repeat the steps to add and bind them.
Action
In the OpenStack production platform list, click the "Action" dropdown menu on the right side of the target platform row to perform operations such as Settings, Bind, Unbind, Reload Virtual Machine, Modify Authentication Information, and Delete. For detailed instructions, refer to Production Site Management.
AWS
The AWS page is used to configure and manage the AWS agentless (Agentless) production platform, including IAM credentials, region selection, Sync Proxy binding, and connection status monitoring.
Add AWS Platform
In the left navigation bar of the console, click "Production Site" > "AWS", and click the "Add" button. Follow the wizard to complete platform connection.

Deploy Sync Proxy
Launch an EC2 instance in the target AWS Region to deploy the Source Sync Proxy (Sync Proxy):
- Launch EC2 Instance:
- In the AWS EC2 console, launch an instance using the official native Ubuntu 24.04 LTS image (recommended instance types such as
t3.xlarge/c6i.xlargeor meeting the 4 vCPU / 8 GB RAM / 50 GB Disk specification).
- In the AWS EC2 console, launch an instance using the official native Ubuntu 24.04 LTS image (recommended instance types such as
- Configure Network & Security Group:
- Ensure the instance can access the HyperBDR Console (ports 10443 and 30080) and has outbound access to AWS service endpoints (port 443).
- One-Click Installation & Registration:
- Log in to the EC2 instance, paste and execute the installation command provided in the wizard terminal. Upon completion, the instance will automatically register with the platform as a Sync Proxy.
Note: For detailed specifications and network planning, see Source Sync Proxy.

Create AWS Production Platform
- AWS Authentication Information Configuration
| Parameter | Example / Format | Description |
|---|---|---|
| Access Key ID | AKIAIOSFODNN7EXAMPLE | AWS IAM user access key ID with necessary permissions. |
| Secret Access Key | wJalrXUtnFEMI/K7MDENG/bPxRfiCYEXAMPLEKEY | Secret access key paired with the Access Key ID. |
| Region | ap-southeast-1 | AWS Region where the target EC2 instances are located (select from dropdown or enter manually). |
| Source Sync Proxy | Select from dropdown | Select the deployed Source Sync Proxy EC2 instance from the dropdown list. |
| Platform Name | Custom name (optional) | Identifier name for the production platform, supporting custom input or system auto-generation. |
- Network Policy & Endpoint Requirements
| Source | Target | Port / Protocol | Description |
|---|---|---|---|
| Sync Proxy | AWS EC2 / EBS Service Endpoints | 443 / TCP (HTTPS) | Interacting with the AWS control plane and reading snapshot block data via EBS Direct APIs. + Public Network Access: Assign an EIP to the Sync Proxy and allow outbound port 443 in the security group; + Private Network / Direct Connect / VPC: Configure VPC Endpoints for EC2 and EBS within the VPC for high-efficiency internal transmission without public IPs. |
- IAM Permission Policy Requirements
When calling AWS EBS Direct APIs for agentless snapshot differential backups, the IAM account must be granted minimum permissions for EC2, EBS snapshot read/write, and related resources. For detailed IAM Policy configuration, see AWS IAM Preparation Guide.
After confirming all configurations are correct, click "Confirm" to submit.

Complete AWS Addition
After adding, return to the AWS production platform list. Wait until the platform status becomes "Normal" and the total number of managed EC2 instances in the target Region is retrieved, indicating a successful connection.
Note:
- To protect workloads across multiple AWS Regions or different AWS accounts, repeat the steps above to add each environment independently.
Action
In the AWS production platform list, click the "Action" dropdown menu on the right side of the target platform row to perform operations such as Settings, Bind, Unbind, Reload Virtual Machine, Modify Authentication Information, and Delete. For detailed instructions, refer to Production Site Management.
FusionCompute
The FusionCompute page is used to configure and manage the Huawei FusionCompute agentless (Agentless) production platform, including VRM authentication, Sync Proxy binding, and connection status monitoring.
Add FusionCompute Platform
In the left navigation bar of the console, click "Production Site" > "FusionCompute", and click the "Add" button. Follow the wizard to complete platform connection.

Deploy Sync Proxy
Import the OVA template into the FusionCompute cluster to deploy the Source Sync Proxy (Sync Proxy):
- Download OVA Template:
- Click the download link in the wizard, or download directly via the internet: https://downloads.oneprocloud.com/proxy-agent_BaseOS.ova
- Import Virtual Machine:
- Import the OVA file into the FusionCompute cluster, deploy one or more Source Sync Proxy virtual machines, and configure network IP addresses (recommended version: FusionCompute 8.6.0 or higher).
- Log in to the Virtual Machine:
- Log in to the newly created Sync Proxy VM. The system default initial credentials are
root/Acb@132.Inst.
- Log in to the newly created Sync Proxy VM. The system default initial credentials are
- One-Click Installation & Registration:
- Copy the installation command from the wizard interface, paste and execute it in the Sync Proxy terminal. Upon completion, the node will automatically register with the HyperBDR platform.
Note: The recommended specification for Sync Proxy is 4 vCPU / 8 GB RAM / 50 GB Disk. For detailed specifications and multi-node scale-out instructions, see Source Sync Proxy.
- FusionCompute Platform Usage Conditions & Limitations:
| Category | Key Requirements & Limitations |
|---|---|
| Prerequisites | 1. Install and Run Tools: Protected VMs must have Huawei VM Tools installed and running properly; this is a prerequisite for creating CBT differential snapshots; 2. Snapshot Limit: A single VM supports up to 32 snapshots; 3. VM Status: VMs must be in "Running", "Suspended", or "Stopped" state to create snapshots. |
| Limitations | 1. Unsupported Snapshot Scenarios: VMs using shared disks, independent disks, linked clones, or template VMs do not support snapshot backups; 2. CBT Failure Scenarios: CBT will fail when a VM undergoes HA migration, snapshot restoration, disk expansion, or host reboot, requiring the system to automatically trigger a full verification scan; 3. Storage Space Requirements: The source storage pool must reserve snapshot merge buffer space during backup; a single compute node supports up to 8 concurrent backup socket connections. |

Create FusionCompute Production Platform
- FusionCompute Authentication Configuration
| Parameter | Example / Format | Description |
|---|---|---|
| Auth Address | https://<VRM_IP_or_Domain>:7443 | FusionCompute VRM management node access address (default port 7443). If using a domain name, configure DNS or hosts resolution in advance. |
| Username | Administrator account | Administrator username with platform query and snapshot management permissions. |
| Password | Account password | Password used to connect to FusionCompute. |
| Source Sync Proxy | Select from dropdown | Select the deployed Source Sync Proxy node from the dropdown list. |
- Network Policy Requirements
| Source | Target | Port / Protocol | Description |
|---|---|---|---|
| Sync Proxy | FusionCompute VRM Management Node | 7443 / TCP | Management authentication and snapshot API communication |
| Sync Proxy | CNA Compute Nodes | 21064 / TCP | Data stream channel. Used to read VM disk data directly from compute node underlying storage. Ensure connectivity to port 21064 on all relevant compute nodes. |
After confirming all configurations are correct, click "Confirm" to submit.

Complete FusionCompute Addition
After adding, return to the FusionCompute production platform list. Wait until the platform status becomes "Normal" and the number of cluster hosts and virtual machines is successfully retrieved, indicating a successful connection.
Note:
- Repeat the above steps to add multiple FusionCompute clusters or standalone sites.
Action
In the FusionCompute production platform list, click the "Action" dropdown menu on the right side of the target platform row to perform operations such as Settings, Bind, Unbind, Reload Virtual Machine, Modify Authentication Information, and Delete. For detailed instructions, refer to Production Site Management.
Oracle
The Oracle page is used to configure and manage the Oracle Cloud Infrastructure (OCI) agentless (Agentless) production platform, including OCI tenancy credentials, region configuration, Sync Proxy binding, and connection status monitoring.
Add Oracle Platform
In the left navigation bar of the console, click "Production Site" > "Oracle", and click the "Add" button. Follow the wizard to complete platform connection.

Deploy Sync Proxy
Launch a compute instance in the target OCI Region to deploy the Source Sync Proxy (Sync Proxy):
- Launch OCI Compute Instance:
- In the Oracle Cloud console, launch an instance using the official standard Ubuntu 24.04 image (recommended specification: 4 OCPU / 8 GB RAM / 50 GB Boot Volume).
- Configure Network & Security List:
- Ensure the instance can access the HyperBDR Console (ports 10443 and 30080) and has outbound access to OCI API endpoints (port 443).
- One-Click Installation & Registration:
- Log in to the compute instance, paste and execute the installation command provided in the wizard terminal. Upon completion, the instance will automatically register as a Sync Proxy.
Note: For detailed specifications and network planning, see Source Sync Proxy.

Create Oracle Production Platform
- OCI Authentication Configuration
| Parameter | Example / Format | Description & Acquisition Method |
|---|---|---|
| Tenancy OCID | ocid1.tenancy.oc1..aaaaaaaaxxxx | Unique identifier for the OCI tenancy. Log in to the OCI console → click the user avatar in the upper right corner → copy the OCID under [Tenancy: Overview]. |
| User OCID | ocid1.user.oc1..aaaaaaabbbbb | OCID of the OCI IAM user with API access permissions. Copy from [User Settings] or [Identity & Security] > [Users] details in the console. |
| Private Key | Content of oci_api_key.pem | API private key for connecting to OCI services. Generate or upload a public key under [API Keys] on the user details page, and paste the corresponding private key content here. |
| Fingerprint | 20:3b:97:13:55:1c:8c:... | Fingerprint string of the corresponding API key, copied directly from the API key list in the OCI console. |
| Region | ap-singapore-1 | OCI Region identifier where target cloud hosts are located (e.g., ap-singapore-1, us-ashburn-1, etc.). |
| Source Sync Proxy | Select from dropdown | Select the deployed Source Sync Proxy compute instance from the dropdown list. |
| Platform Name | Custom name (optional) | Identifier name for the production platform, supporting custom input or system auto-generation. |
- Network Policy Requirements
| Source | Target | Port / Protocol | Description |
|---|---|---|---|
| Sync Proxy | OCI Service API Endpoints | 443 / TCP (HTTPS) | Authenticating and interacting with OCI Identity, Compute, and Block Volumes APIs and reading block data |
After confirming all configurations are correct, click "Confirm" to submit.

Complete Oracle Addition
After adding, return to the Oracle production platform list. Wait until the platform status becomes "Normal" and the total number of managed OCI cloud hosts in that Region is retrieved, indicating a successful connection.
Note:
- To protect workloads across multiple OCI Regions or different tenancies, repeat the steps above to add each environment independently.
Action
In the Oracle production platform list, click the "Action" dropdown menu on the right side of the target platform row to perform operations such as Settings, Bind, Unbind, Reload Virtual Machine, Modify Authentication Information, and Delete. For detailed instructions, refer to Production Site Management.
HCS 8.0.2
The HCS 8.0.2 page is used to configure and manage the Huawei Cloud Stack (HCS) 8.0.2 agentless (Agentless) production platform, including ManageOne authentication, Dorado storage integration, Sync Proxy binding, and connection status monitoring.
Version Compatibility Notice:
- Currently, the interface architecture of Huawei Cloud Stack (HCS) 8.2.x / 8.3.x differs significantly from HCS 8.0.2. This section exclusively supports HCS 8.0.2;
- The current version is deeply adapted to Huawei OceanStor Dorado all-flash storage backends by default.
Add HCS 8.0.2 Platform
In the left navigation bar of the console, click "Production Site" > "HCS 8.0.2", and click the "Add" button. Follow the wizard to complete platform connection.

Deploy Sync Proxy
Import the OVA template into the HCS 8.0.2 cluster to deploy the Source Sync Proxy (Sync Proxy):
- Download OVA Template:
- Click the download link in the wizard, or download directly via the internet: https://downloads.oneprocloud.com/proxy-agent_BaseOS.ova
- Import Virtual Machine:
- Import the OVA file into the HCS cluster, deploy one or more Source Sync Proxy virtual machines, and configure network IP addresses. Recommended specification: 4 vCPU / 8 GB RAM / 50 GB Disk.
- Log in to the Virtual Machine:
- Log in to the newly created Sync Proxy VM. The system default initial credentials are
root/Acb@132.Inst.
- Log in to the newly created Sync Proxy VM. The system default initial credentials are
- One-Click Installation & Registration:
- Copy the installation command from the wizard interface, paste and execute it in the Sync Proxy terminal. Upon completion, the node will automatically register with the HyperBDR platform.
Note: For detailed specifications and network planning, see Source Sync Proxy.

Create HCS 8.0.2 Production Platform
- HCS Platform Connection Authentication Information
| Parameter | Example / Format | Description & Acquisition Method |
|---|---|---|
| Auth Address | https://iam-apigateway-proxy.<external_global_domain_name>/v3 | HCS unified IAM APIG access address, formatted as iam-apigateway-proxy.{external_global_domain_name}. Replace with your actual external global domain name and configure hosts resolution in HyperBDR in advance. |
| Tenant ID | HPUAAG0B2... | Log in to ManageOne Operation Portal → click the username in the upper-right corner → view [Tenant ID] under [Personal Settings]. |
| Username | Administrator account | Username for logging in to the ManageOne Operation Portal (requires tenant management permissions). |
| Password | Account password | User login password. |
| Project Domain ID | HPUAAG0B2... | Domain ID to which the project belongs, typically identical to the Tenant ID. |
| Project Name | admin or project name | Project name listed under [Project List] in the ManageOne Operation Portal. |
| Project (Region) | RegionOne or mx-ags-1 | Physical Region identifier to which the project belongs. |
| Source Sync Proxy | Select from dropdown | Select the deployed Source Sync Proxy node from the dropdown list. |

- Storage Backend Configuration (Dorado)
Click "+ Add Storage" on the page to configure underlying storage access authentication:
| Parameter | Example / Format | Description |
|---|---|---|
| Storage Type | DORADO | Select the connected Huawei OceanStor Dorado storage series from the dropdown list. |
| Storage Node Address | https://172.22.192.212:8088 | Management address and port of the storage device DeviceManager (default 8088). |
| Username | Storage admin account | Username for logging in to the storage system DeviceManager. |
| Password | Account password | Password for the storage system user. |
| User Type | Local User | Account type (supports Local User, LDAP User, RADIUS User). |
- Network Policy Requirements:
| Source | Target | Port / Protocol | Description |
|---|---|---|---|
| Sync Proxy | HCS APIG Unified Gateway | 443 / TCP | Accessing HCS APIs for identity authentication and virtual machine metadata management |
| Sync Proxy | Dorado Storage Management Plane | 8088 / TCP | Accessing Dorado storage management interfaces for LUN queries and snapshot management |

Complete HCS 8.0.2 Addition
After confirming all authentication details and storage backend configurations are correct, click "Confirm" to submit. Wait until the platform status becomes "Normal" and the number of managed ECS cloud hosts is retrieved, indicating a successful connection.
Note:
- Repeat the above steps to add multiple HCS regions or tenant environments.
Action
In the HCS 8.0.2 production platform list, click the "Action" dropdown menu on the right side of the target platform row to perform operations such as Settings, Bind, Unbind, Reload Virtual Machine, Modify Authentication Information, and Delete. For detailed instructions, refer to Production Site Management.
HCS Online
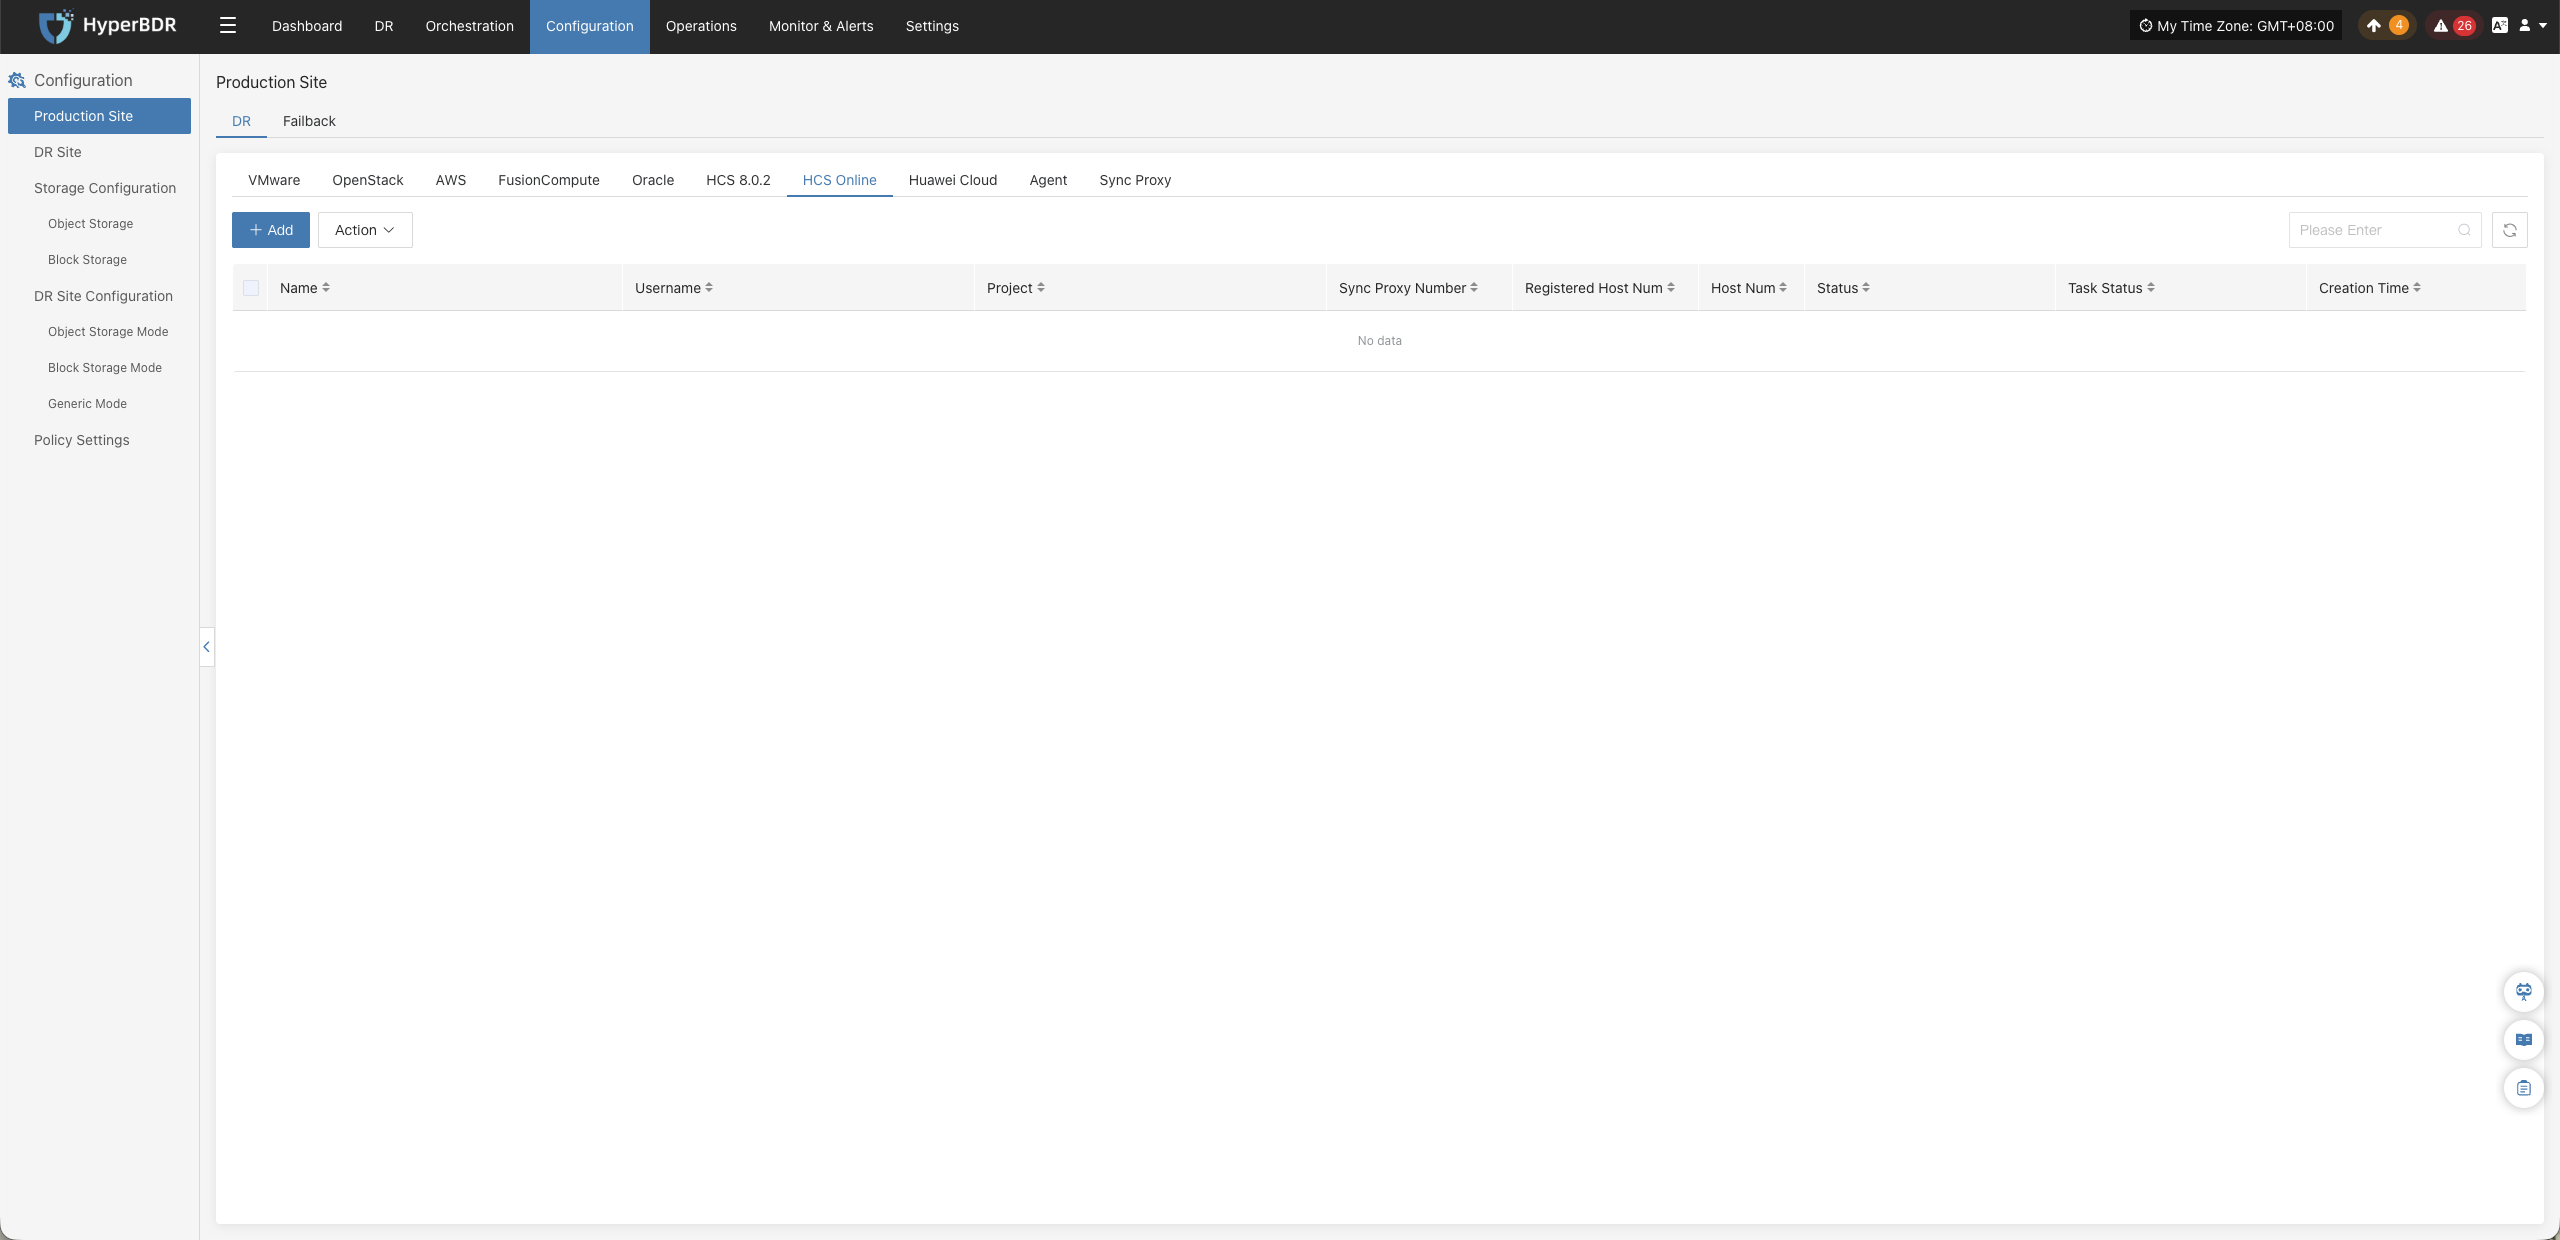
The HCS Online platform page on the production site is mainly used for adding, deleting, updating, and other related management operations for the HCS Online platform.
Add HCS Online Platform
Click "Production Site" in the left navigation bar, select HCS Online, and click the "Add" button. Follow the steps in the pop-up window to add the platform.
Deploy Sync Proxy
Deploy the Source Sync Proxy in your HCS Online environment:
- Prepare Image & Create Cloud Host:
- Create a cloud host in the HCS Online platform using the official Ubuntu 24.04 OS image;
- Recommended specifications: 4 vCPU / 8 GB RAM / 50 GB Disk.
- Network Connectivity Check:
- Ensure the instance can access the HyperBDR Console (ports 10443 and 30080) and has access permissions to HCS Online internal API endpoints.
- One-Click Installation & Registration:
- Copy the installation command from the wizard, log in to the Sync Proxy terminal as
root, and execute it; - Once completed, the node will automatically register with HyperBDR.
- Copy the installation command from the wizard, log in to the Sync Proxy terminal as
Note: For detailed node specifications and network planning, see Source Sync Proxy.
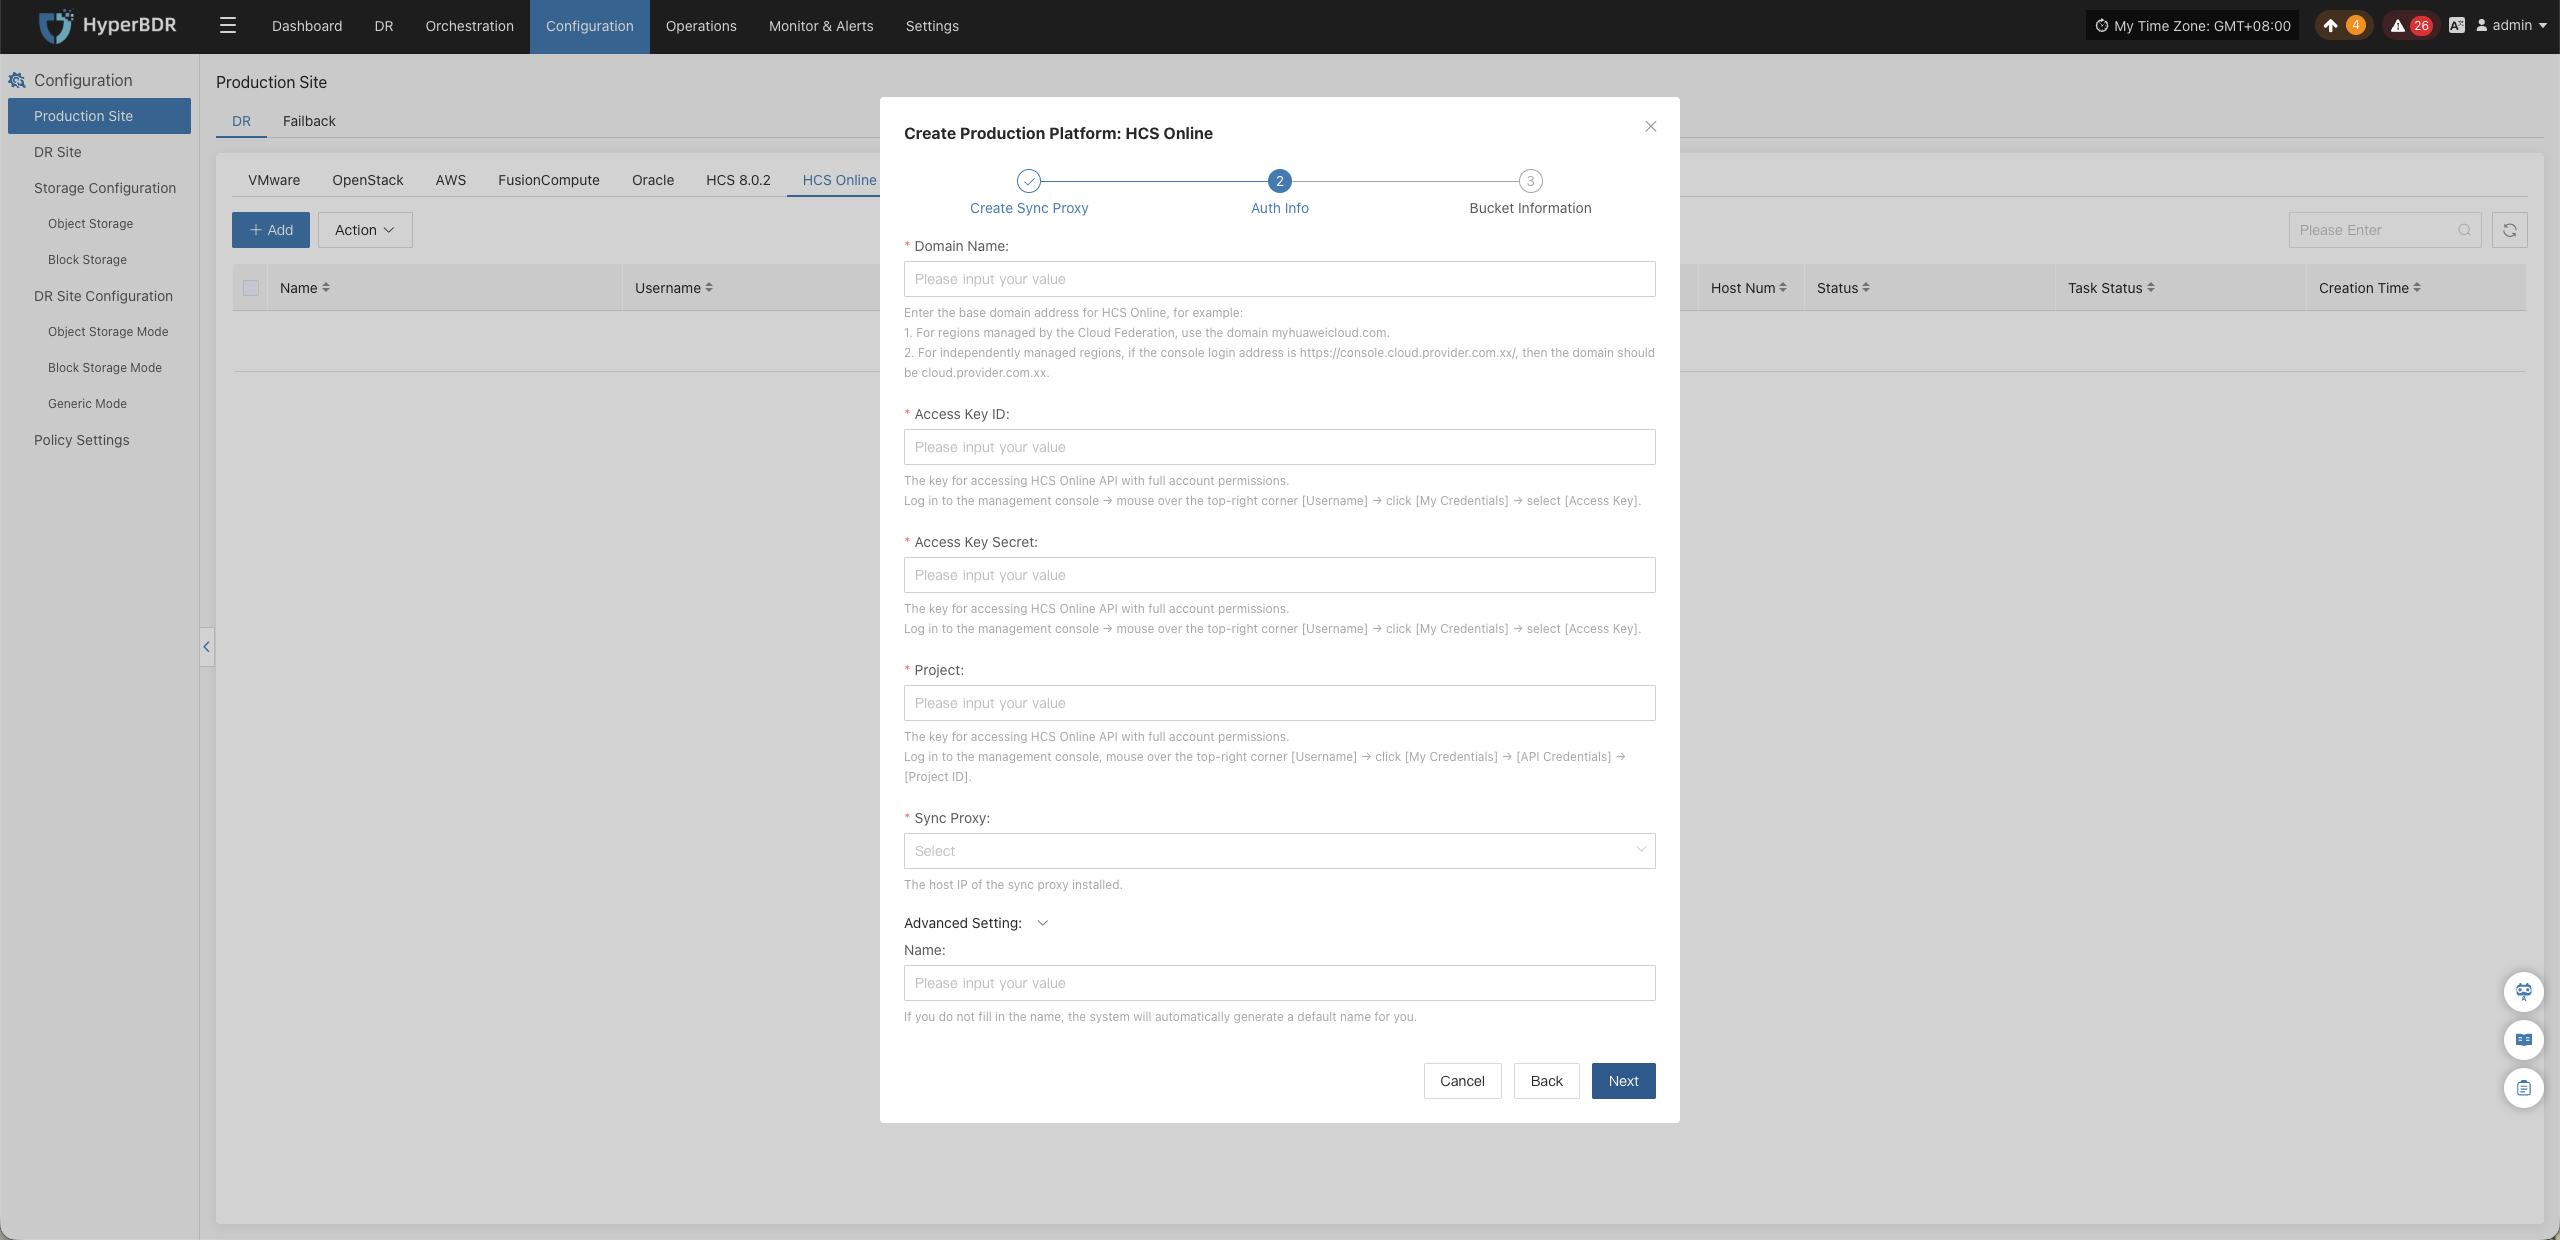
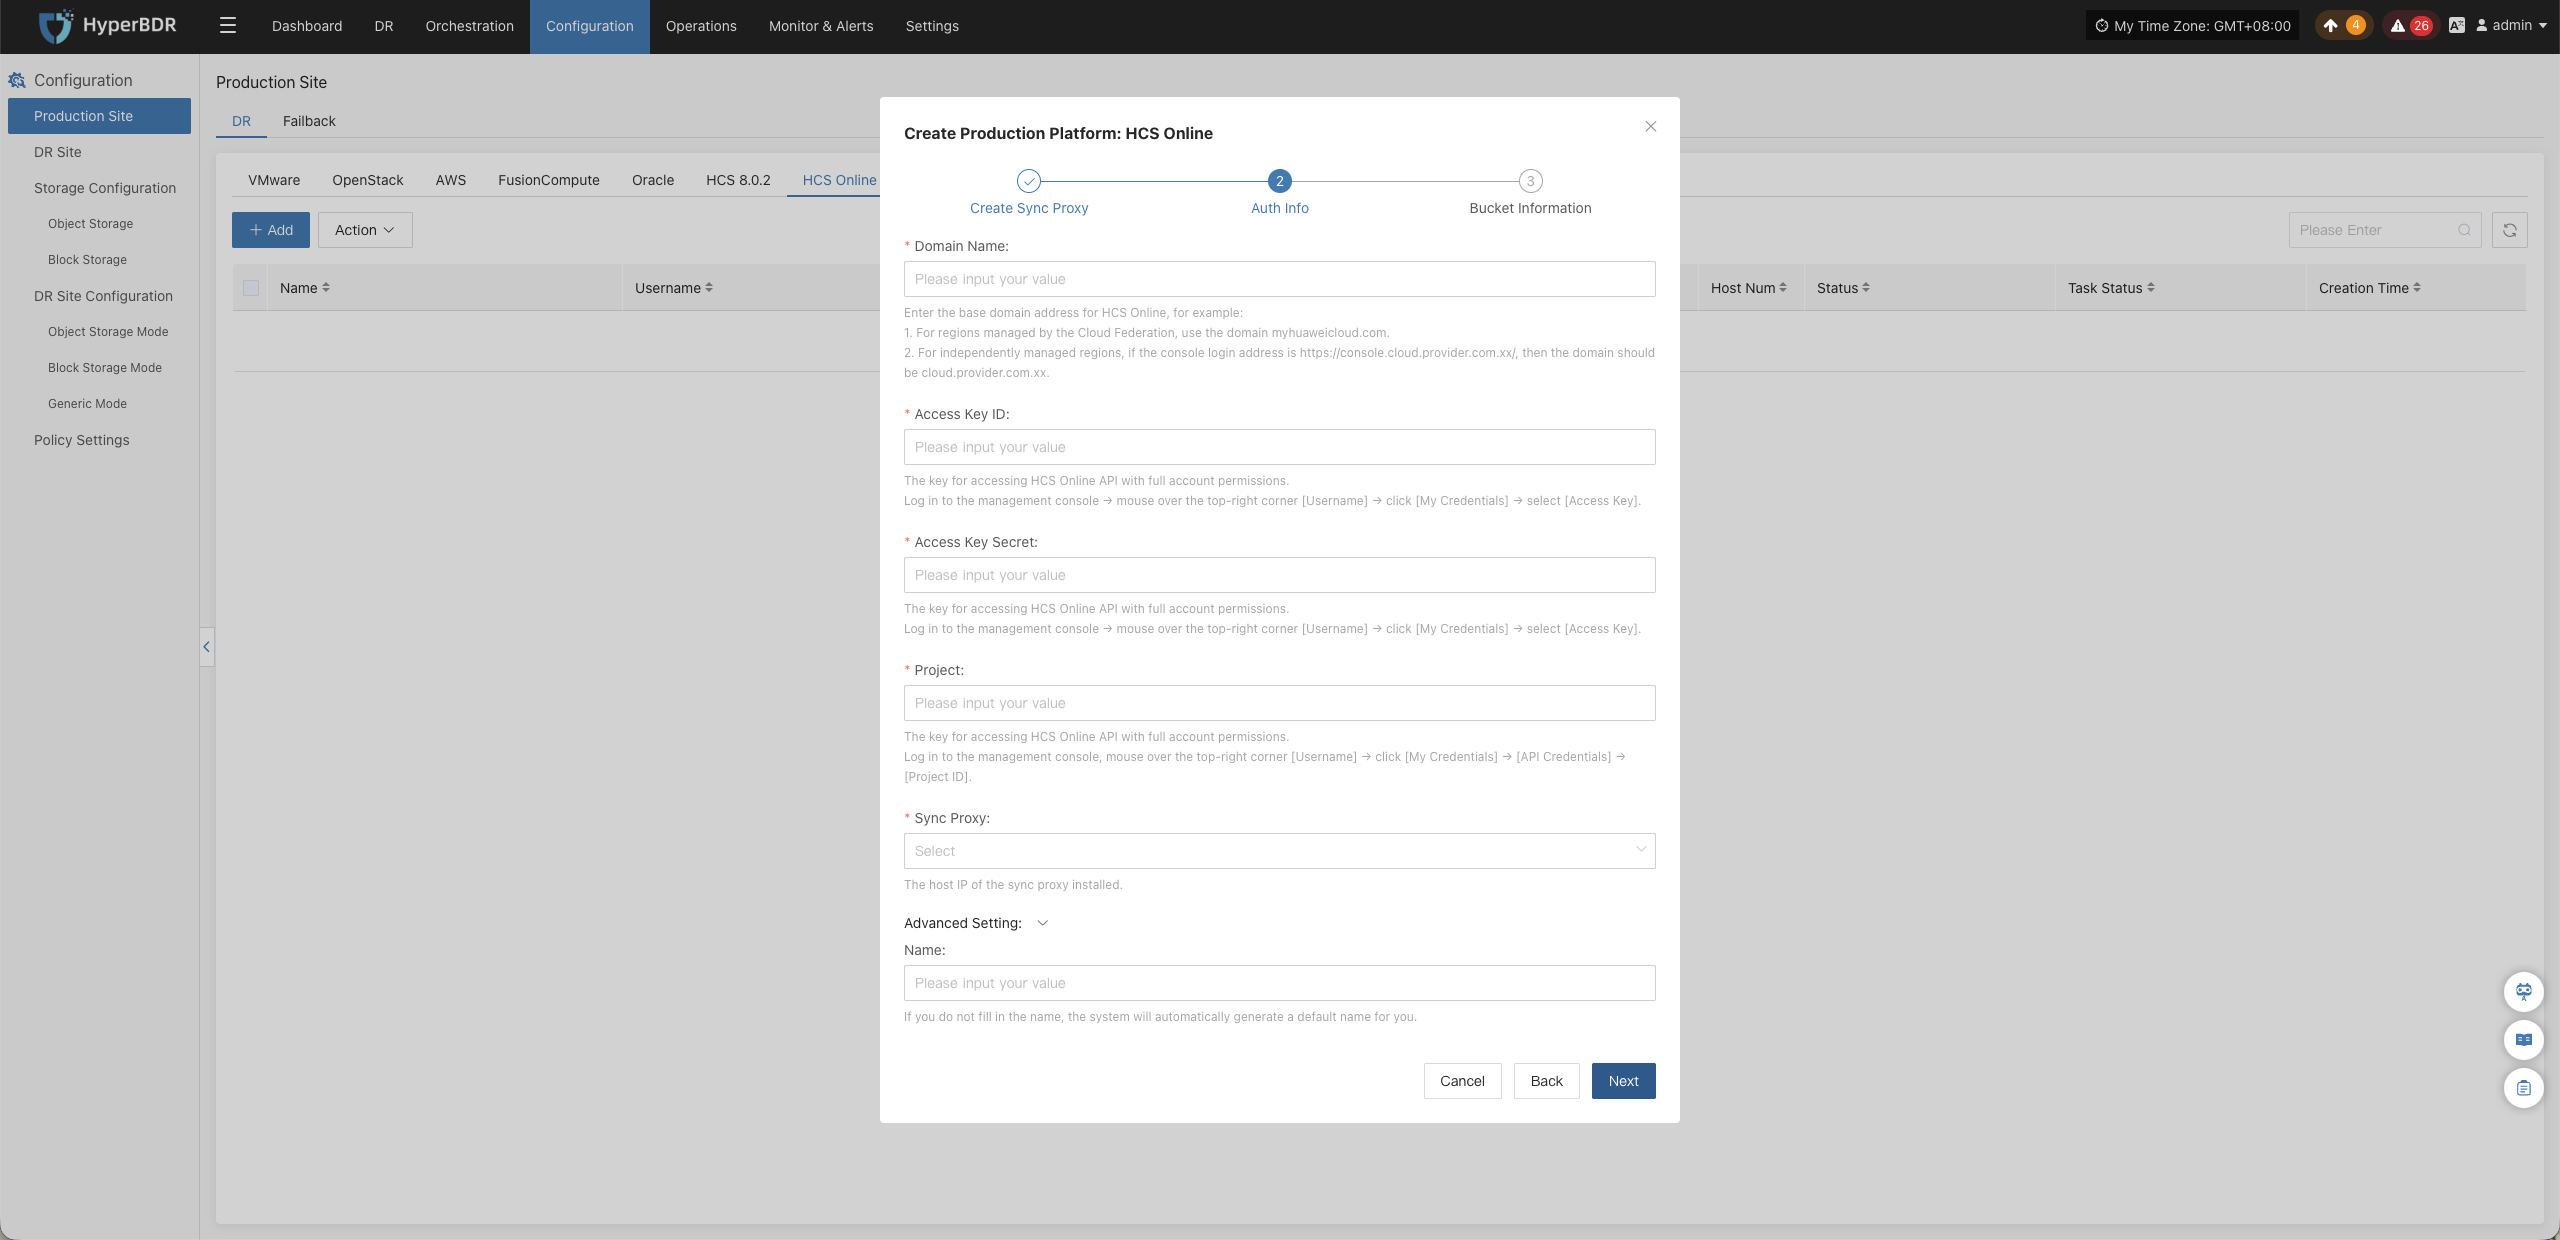
Create HCS Online Production Platform
- HCS Online Connection and Authentication Information
| Parameter | Input Method | Description & Acquisition Method |
|---|---|---|
| Domain | Enter domain name | Enter the base domain of HCS Online. For example: for regions uniformly managed by Cloud Federation, enter myhuaweicloud.com; for independently managed regions, enter the corresponding base domain based on the console login address. For example, if the console address is https://console.cloud.provider.com.xx/, enter cloud.provider.com.xx. |
| Access Key ID | Enter Access Key ID | Used for identity authentication when accessing HCS Online APIs. Log in to the management console, click the username in the upper-right corner, and go to "My Credentials" > "Access Keys" to obtain it. |
| Access Key Secret | Enter Access Key Secret | The secret access key paired with the Access Key ID for HCS Online API authentication. Log in to the management console, click the username in the upper-right corner, and go to "My Credentials" > "Access Keys" to obtain it. |
| Project | Enter project name or identifier | Enter the project required for calling HCS Online APIs. Log in to the management console, click the username in the upper-right corner, and go to "My Credentials" > "API Credentials" > "Projects" to view and obtain it. |
| Source Sync Proxy | Select proxy node | Select the host IP where the Source Sync Proxy is deployed. |
| Name | Optional | Identifier name for the connected production platform. If omitted, the system automatically generates a default name. |
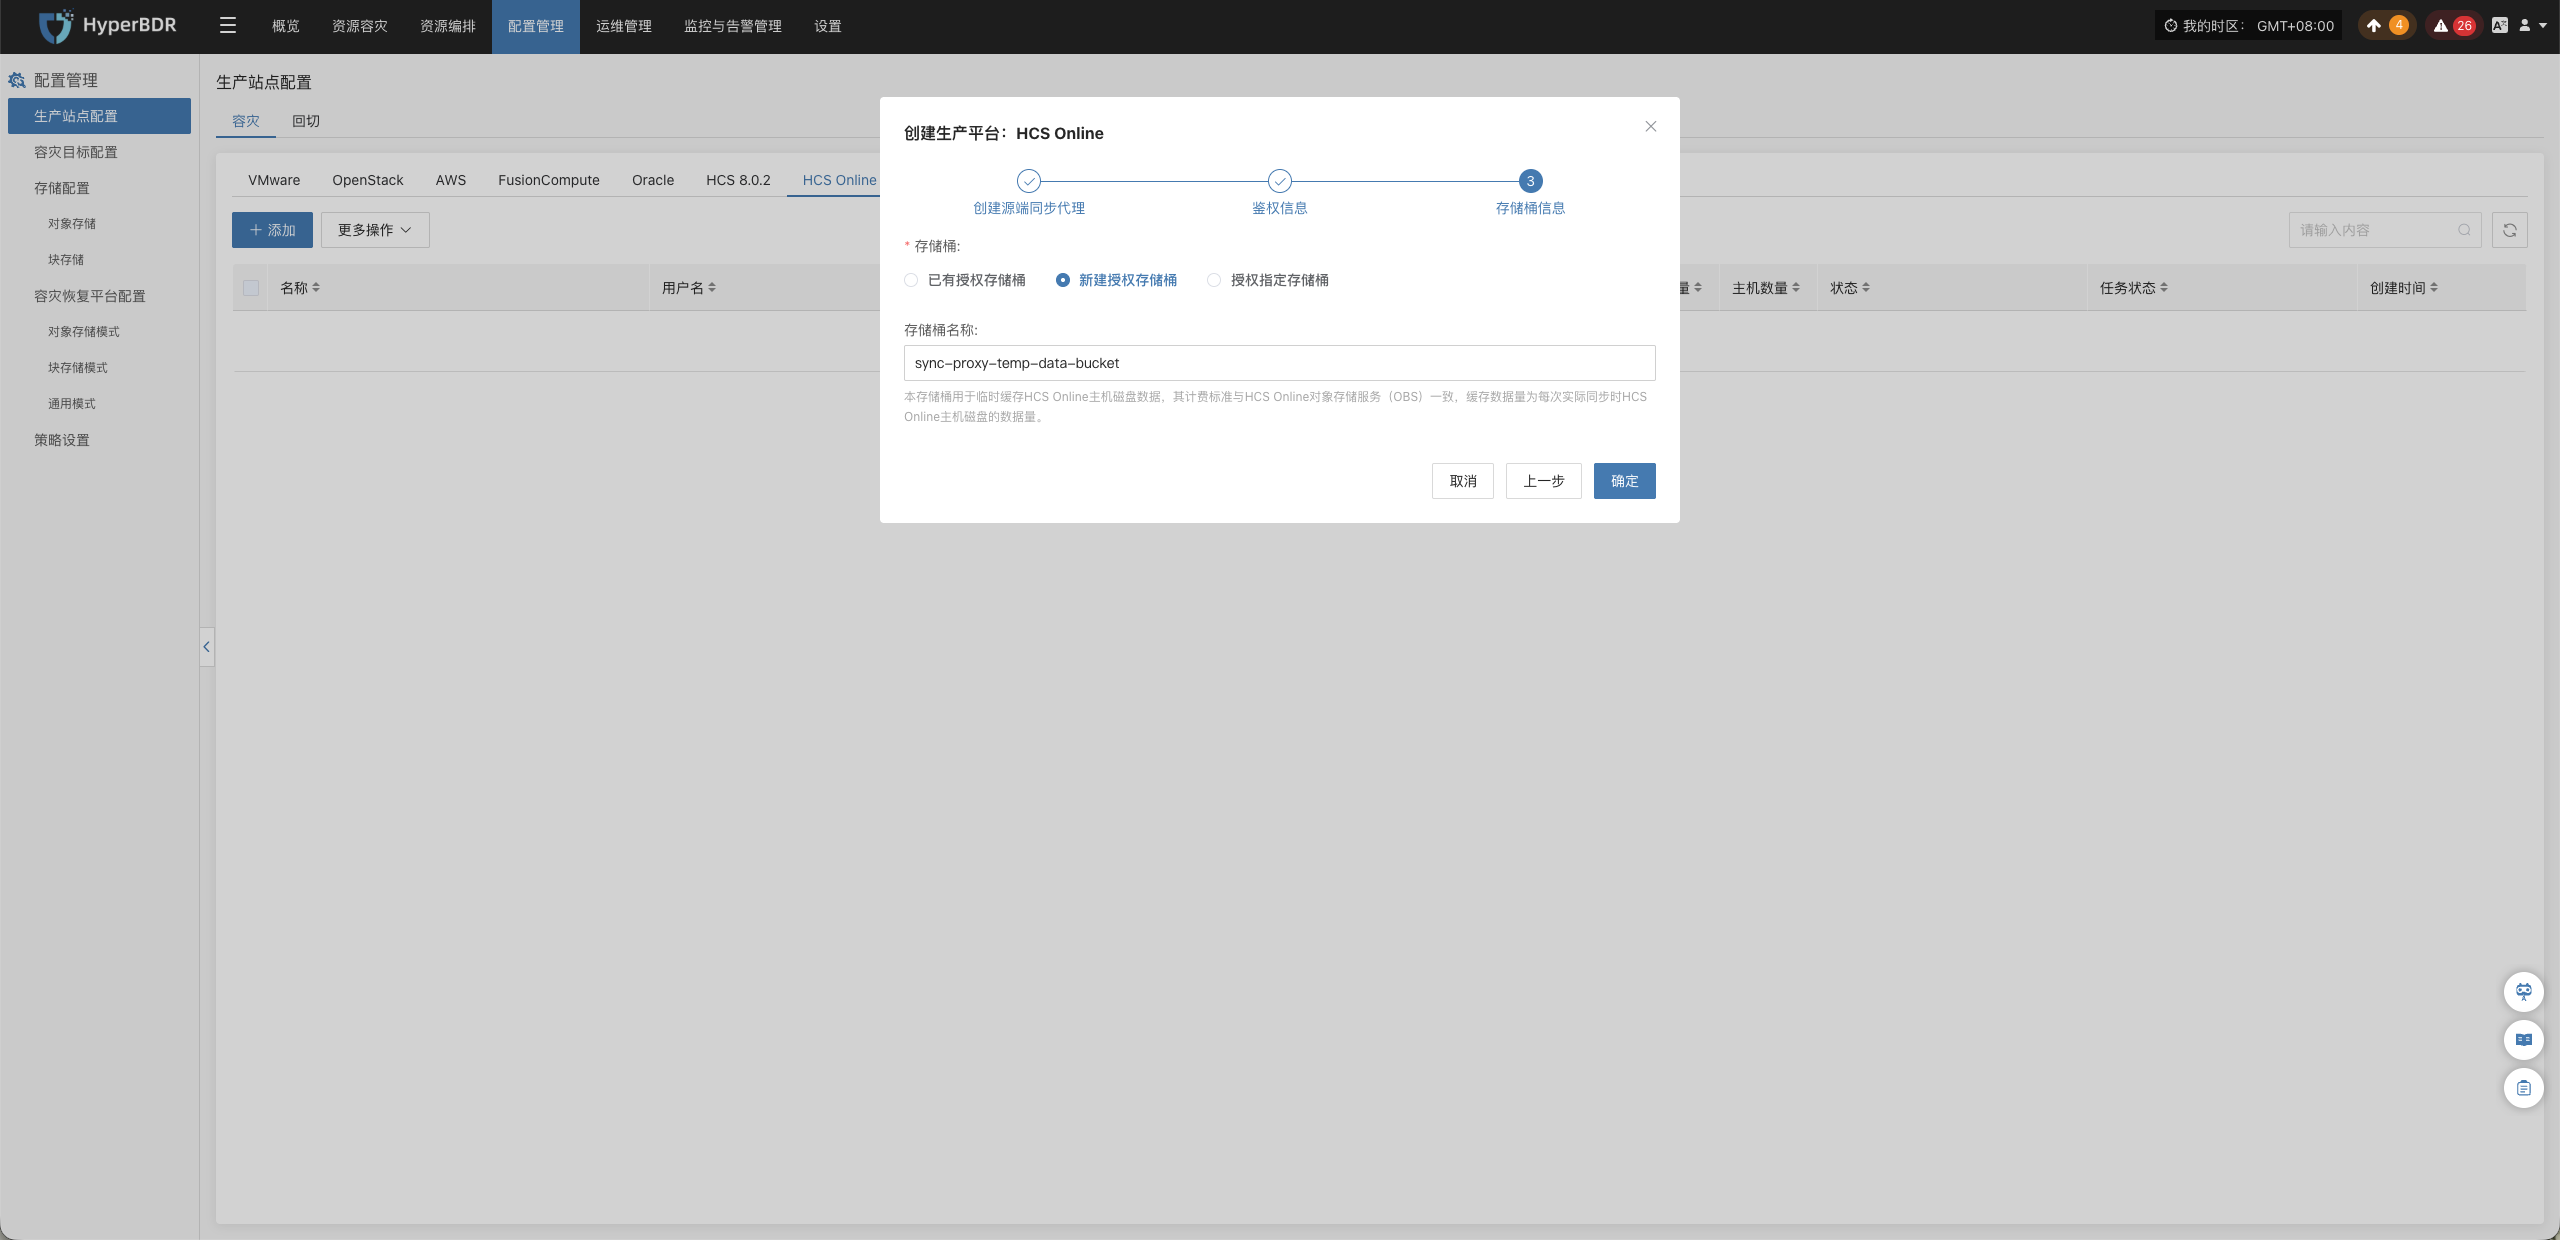
- Bucket Information
| Parameter | Description |
|---|---|
| Bucket Type | Supports three types: Existing Authorized Bucket, Create New Authorized Bucket, and Authorize Specified Bucket. Choose according to actual requirements. |
| Bucket Name | Select an existing bucket from the dropdown list, or create a new bucket as needed. |
- Network Policy Requirements:
| Source | Target | Port / Protocol | Description |
|---|---|---|---|
| Sync Proxy | HCS Online API / OBS Endpoint | 443 / TCP (HTTPS) | Accessing HCS Online APIs for authentication and communicating with OBS buckets for data transfer |
Complete HCS Online Addition
Once the HCS Online production platform configuration is complete, wait until the platform status becomes "Normal" and the number of managed ECS instances is retrieved before proceeding with subsequent steps.
Note:
- To protect workloads across multiple regions or tenant environments, repeat the steps above to add each environment independently.
Action
In the HCS Online production platform list, click the "Action" dropdown menu on the right side of the target platform row to perform operations such as Settings, Bind, Unbind, Reload Virtual Machine, Modify Authentication Information, and Delete. For detailed instructions, refer to Production Site Management.
Huawei Cloud
The Huawei Cloud page is used to configure and manage the Huawei Cloud agentless (Agentless) production platform, including access keys, project endpoints, OBS staging bucket configuration, Sync Proxy binding, and connection status monitoring.
Warning
The Huawei Cloud agentless mode relies on the Huawei Cloud CBR (Cloud Backup and Recovery) standard snapshot export API and CBR bucket agency interface. Access to these features in certain regions requires submitting a service ticket to Huawei Cloud for whitelist approval.
Add Huawei Cloud Platform
In the left navigation bar of the console, click "Production Site" > "Huawei Cloud", and click the "Add" button. Follow the wizard to complete platform connection.

Deploy Sync Proxy
Launch an ECS instance in the target Huawei Cloud Region to deploy the Source Sync Proxy (Sync Proxy):
- Launch ECS Instance:
- In the Huawei Cloud console, launch an ECS instance using the official native Ubuntu 24.04 image (recommended specification: 4 vCPU / 8 GB RAM / System Disk 50 GB or larger, filesystem recommended as ext4 or xfs, non-LVM partition).
- Configure Network & Security Group:
- Ensure the instance can access the HyperBDR Console (ports 10443 and 30080) and has outbound network permissions to access Huawei Cloud IAM, ECS, and OBS service endpoints.
- One-Click Installation & Registration:
- Log in to the ECS instance, paste and execute the installation command provided in the wizard terminal as
root. Upon completion, the instance will automatically register as a Sync Proxy.
- Log in to the ECS instance, paste and execute the installation command provided in the wizard terminal as
Note: For detailed specifications and network planning, see Source Sync Proxy.

Create Huawei Cloud Production Platform
- Huawei Cloud Credentials & Parameter Configuration
| Parameter | Example / Format | Description & Acquisition Method |
|---|---|---|
| Access Key ID | H******************K | Access Key ID for accessing Huawei Cloud APIs. Log in to the Huawei Cloud console → click [Username] in the upper-right corner → [My Credentials] → [Access Keys] to obtain it. |
| Secret Access Key | 4*************************A | Private secret access key paired with the Access Key ID. |
| Project (Region/Project) | cn-north-4 or tr-west-1 | Project region identifier where the target workload resides. View the [Project] name under [My Credentials] → [API Credentials] (please enter the project name like cn-north-4, not the project ID). |
| Source Sync Proxy | Select from dropdown | Select the deployed Source Sync Proxy node from the dropdown list. |
| Platform Name | Custom name (optional) | Identifier name for the production platform, supporting custom input or system auto-generation. |

- Temporary Staging Bucket Configuration (OBS)
Huawei Cloud agentless mode utilizes an OBS temporary staging bucket to transfer and read ECS disk snapshot data:
| Parameter | Example / Format | Description |
|---|---|---|
| Bucket Name | sync-proxy-temp-data-bucket-xxx | Supports creating a new bucket or selecting an existing OBS bucket. Used for temporary backup data staging; occupies transient storage only during synchronization and is automatically freed upon transfer completion. |
- Network Policy Requirements:
| Source | Target | Port / Protocol | Description |
|---|---|---|---|
| Sync Proxy | Huawei Cloud IAM / ECS / OBS Endpoints | 443 / TCP (HTTPS) | Calling Huawei Cloud APIs and communicating with OBS buckets to read data |

Complete Huawei Cloud Addition
Click "Confirm" to submit. Wait until the platform status becomes "Normal" and the total number of managed ECS instances in the target Region is retrieved, indicating a successful connection.
Note:
- To protect workloads across multiple Huawei Cloud regions or under different primary accounts, repeat the steps above to add each environment independently.
Action
In the Huawei Cloud production platform list, click the "Action" dropdown menu on the right side of the target platform row to perform operations such as Settings, Bind, Unbind, Reload Virtual Machine, Modify Authentication Information, and Delete. For detailed instructions, refer to Production Site Management.
Production Site Management
After an agentless (Agentless) production platform is connected, in the corresponding platform list, click the "Action" dropdown menu in the target platform row to perform routine management and lifecycle maintenance operations:
The following operations take the VMware platform as an example. The workflows and functions for other platforms are basically identical; refer to the actual capabilities provided by each platform.
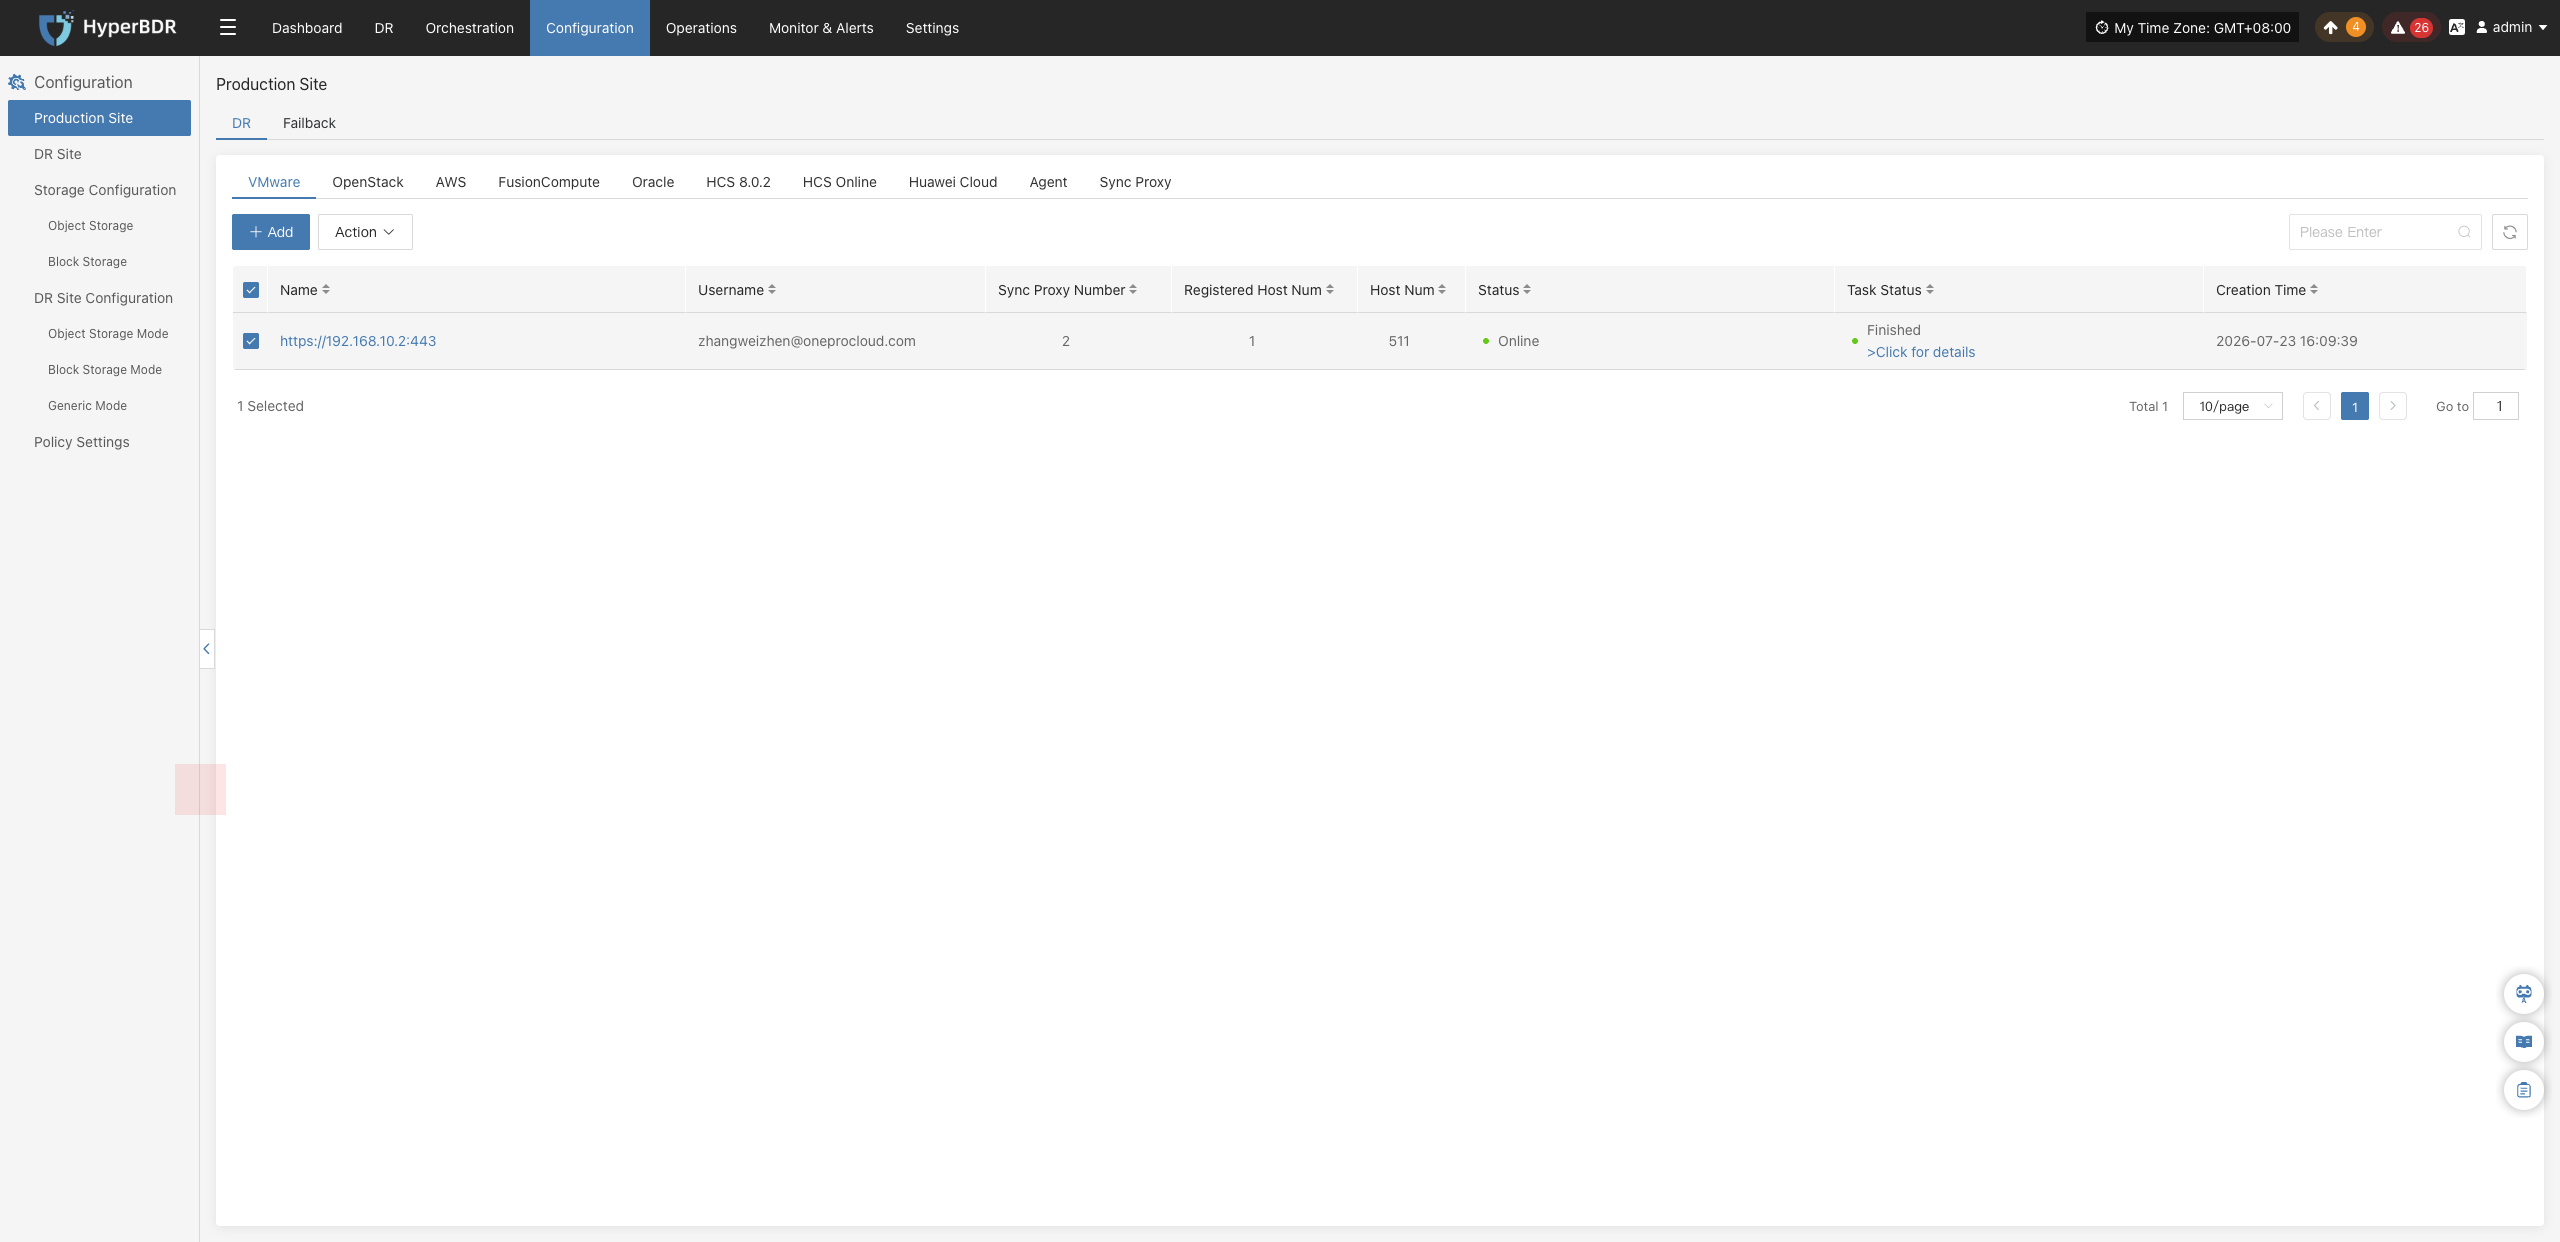
Settings
Click "Action" > "Settings" to adjust synchronization parameters for the current production platform:
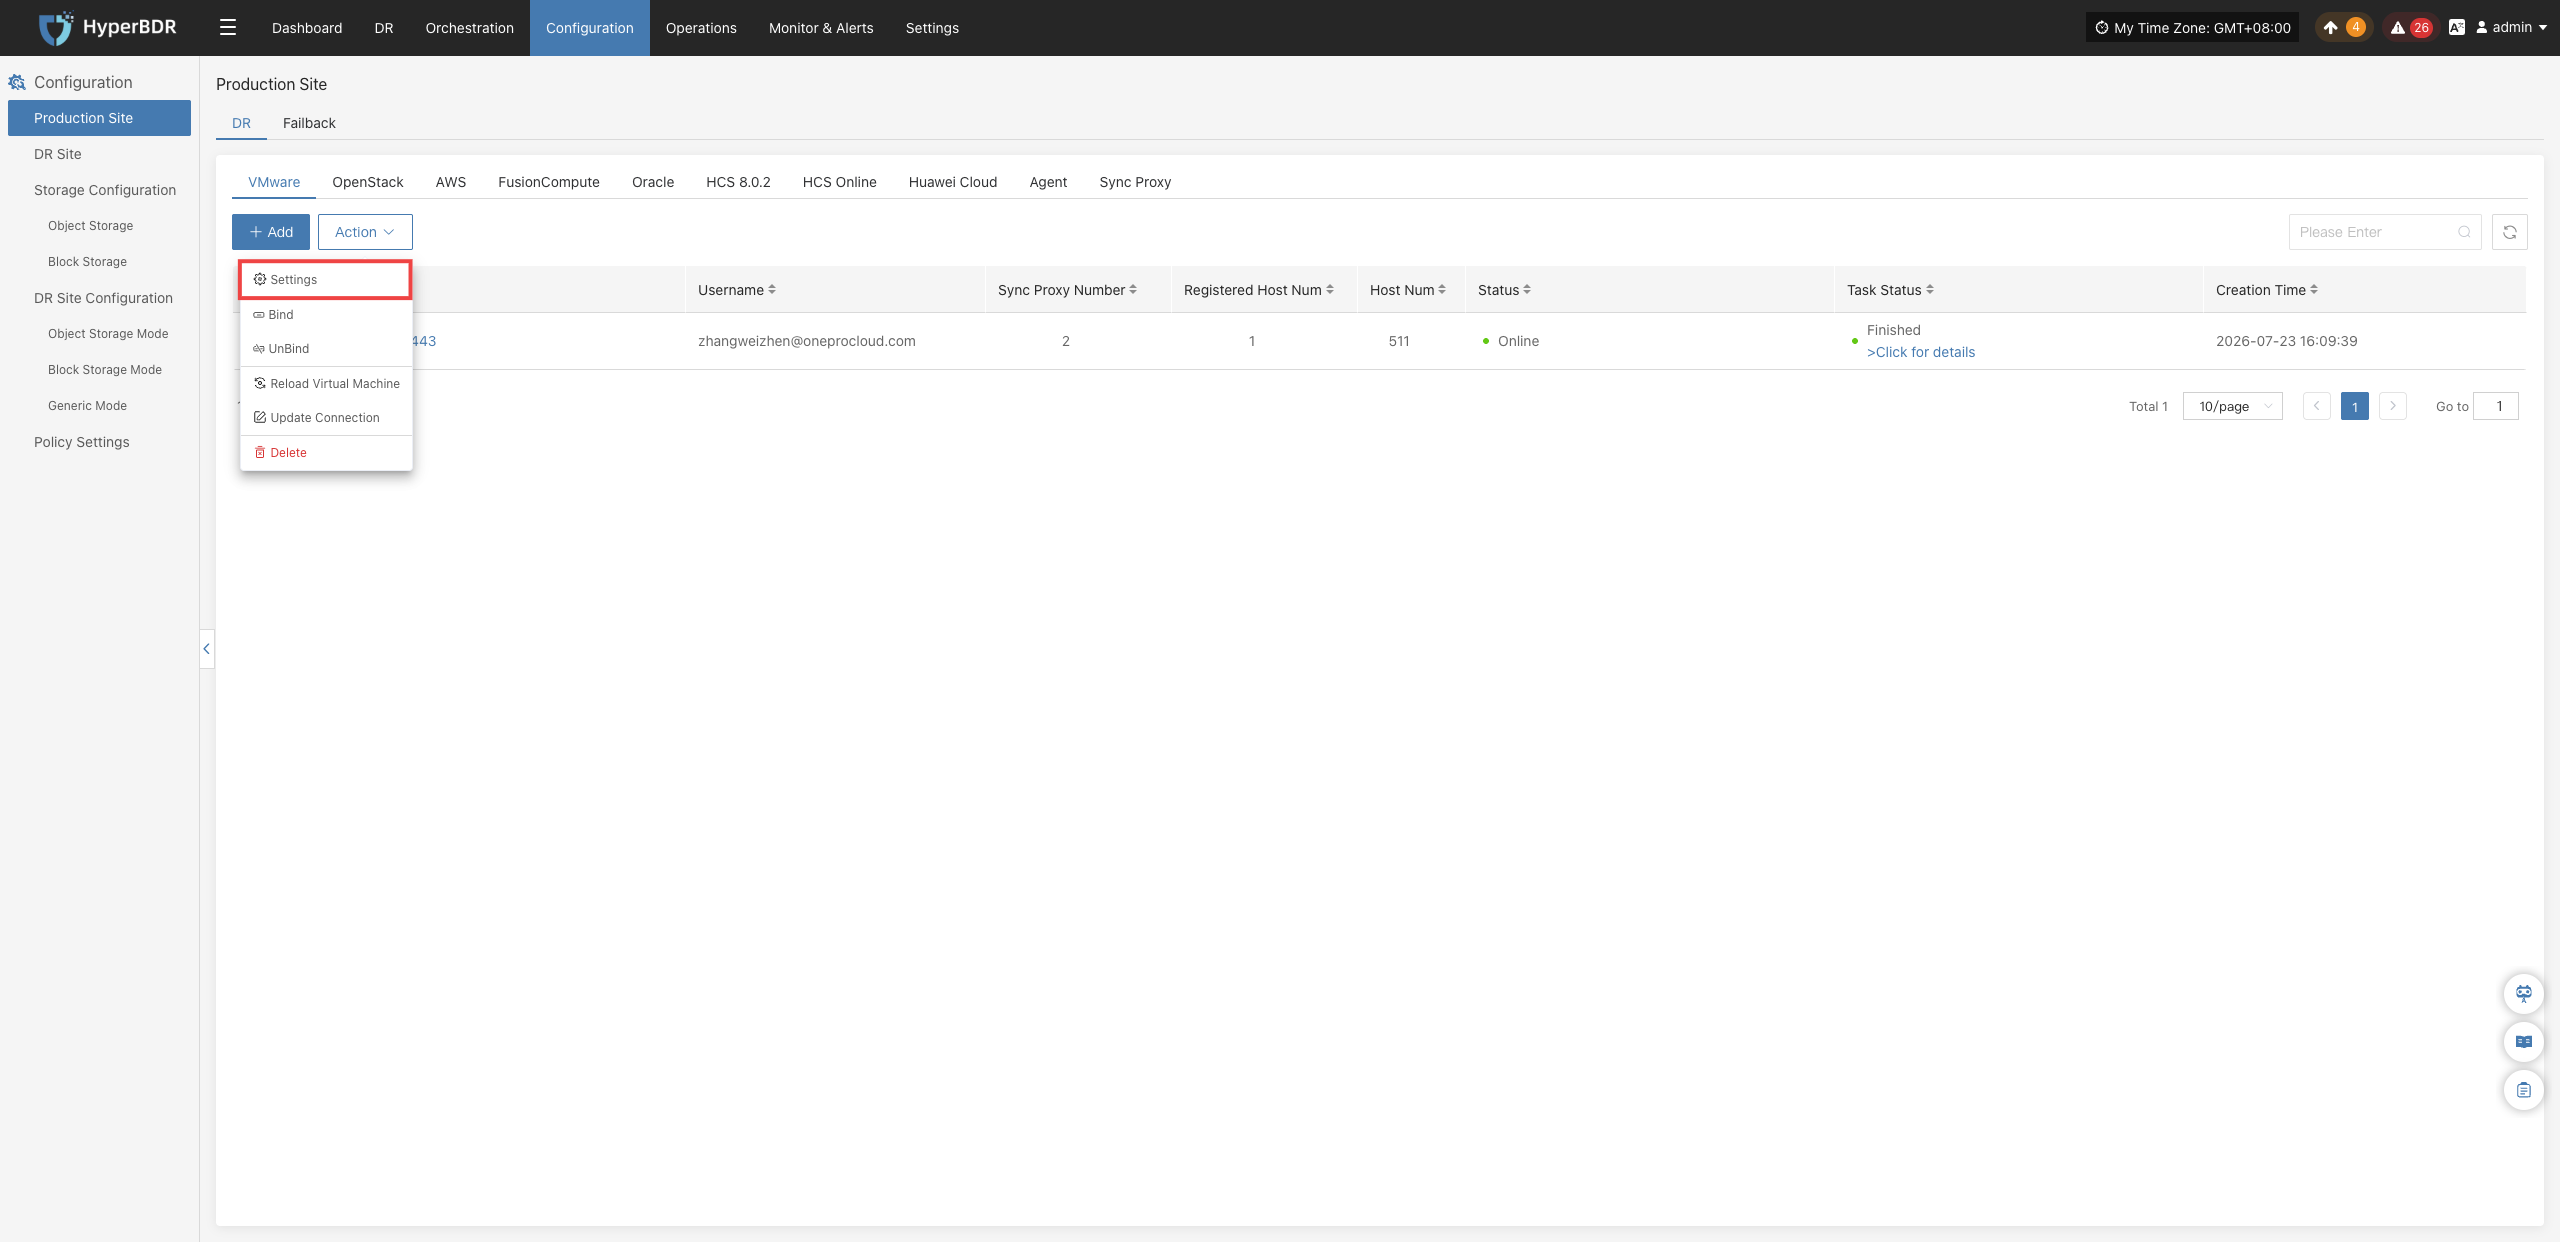
Configuration changes will not take effect immediately. The specific effective rules are as follows:
- Ongoing synchronization tasks: You must stop synchronization and restart it for modified configurations to take effect.
- Tasks not yet started: Modified configurations will take effect during the next synchronization run.
- Adjust relevant parameters based on actual requirements and on-screen prompts to achieve a more suitable synchronization configuration.
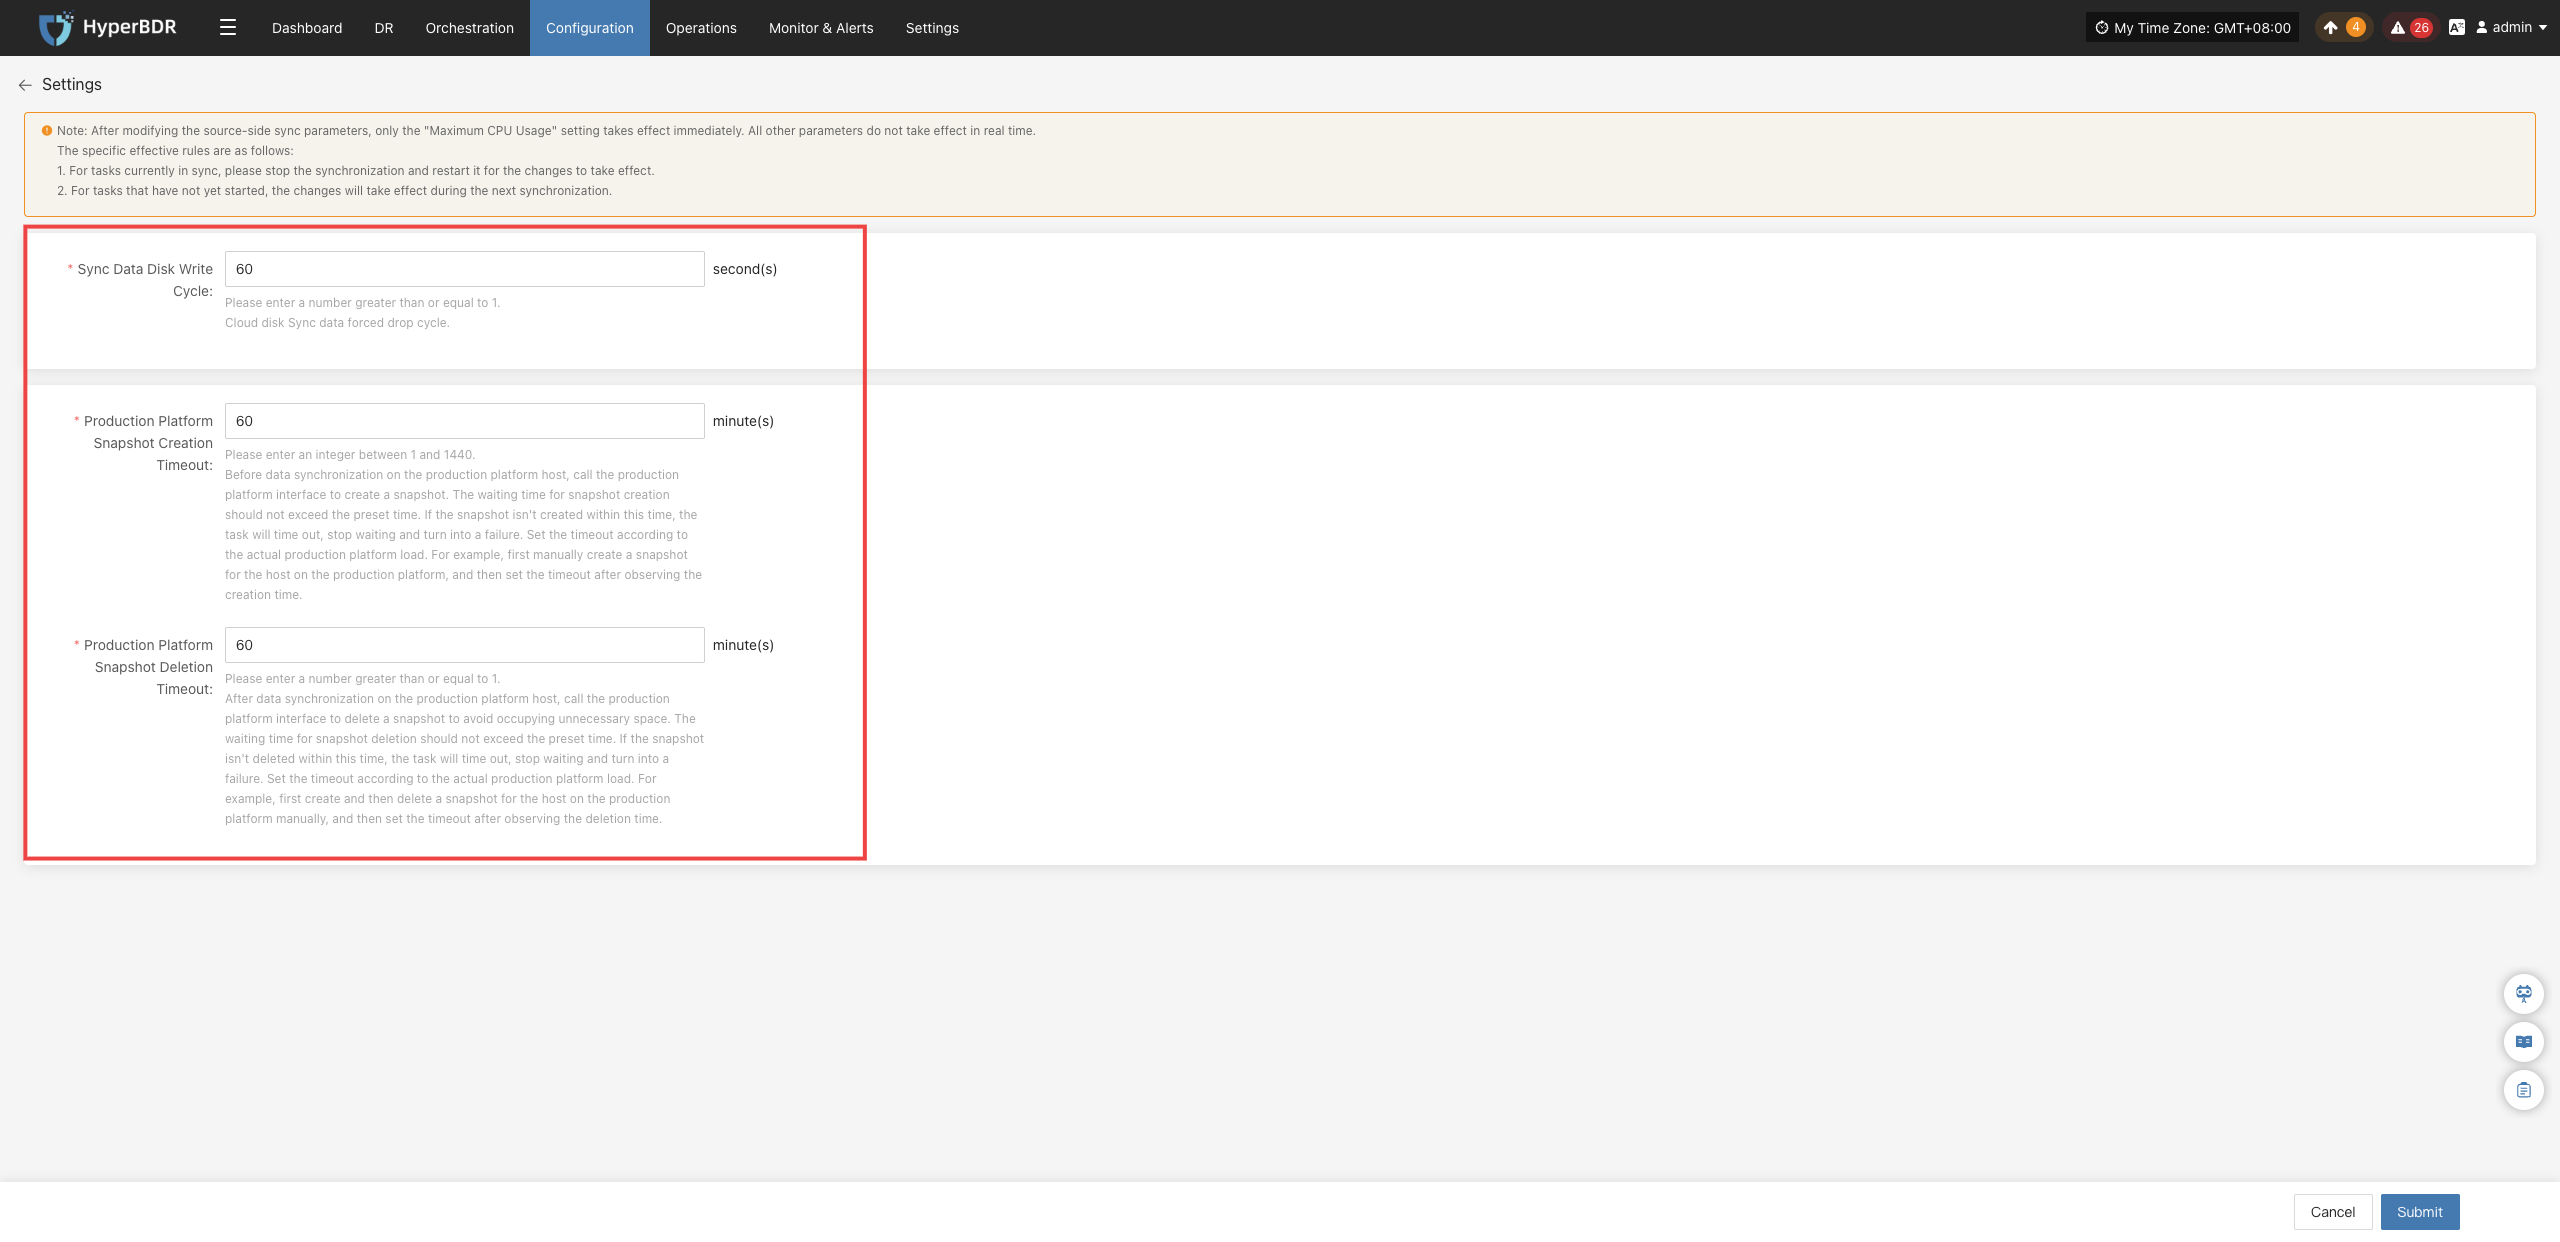
| Setting | Default Value | Description |
|---|---|---|
| Sync Data Disk Flush Interval | 60 seconds | Sets the time interval for force-flushing sync data to cloud disks. For example, setting it to 60 seconds means force-flushing once every 60 seconds. |
| Production Platform Create Snapshot Timeout | 60 minutes | Sets the maximum wait time for creating snapshots. If creation is not completed within the set time, the task fails. It is recommended to adjust this based on the production platform's actual workload, such as creating a manual snapshot first to observe the required time. |
| Production Platform Delete Snapshot Timeout | 60 minutes | Sets the maximum wait time for deleting snapshots. If deletion is not completed within the set time, the task fails. It is recommended to adjust this based on the production platform's actual workload, such as deleting a manual snapshot first to observe the required time. |
Bind
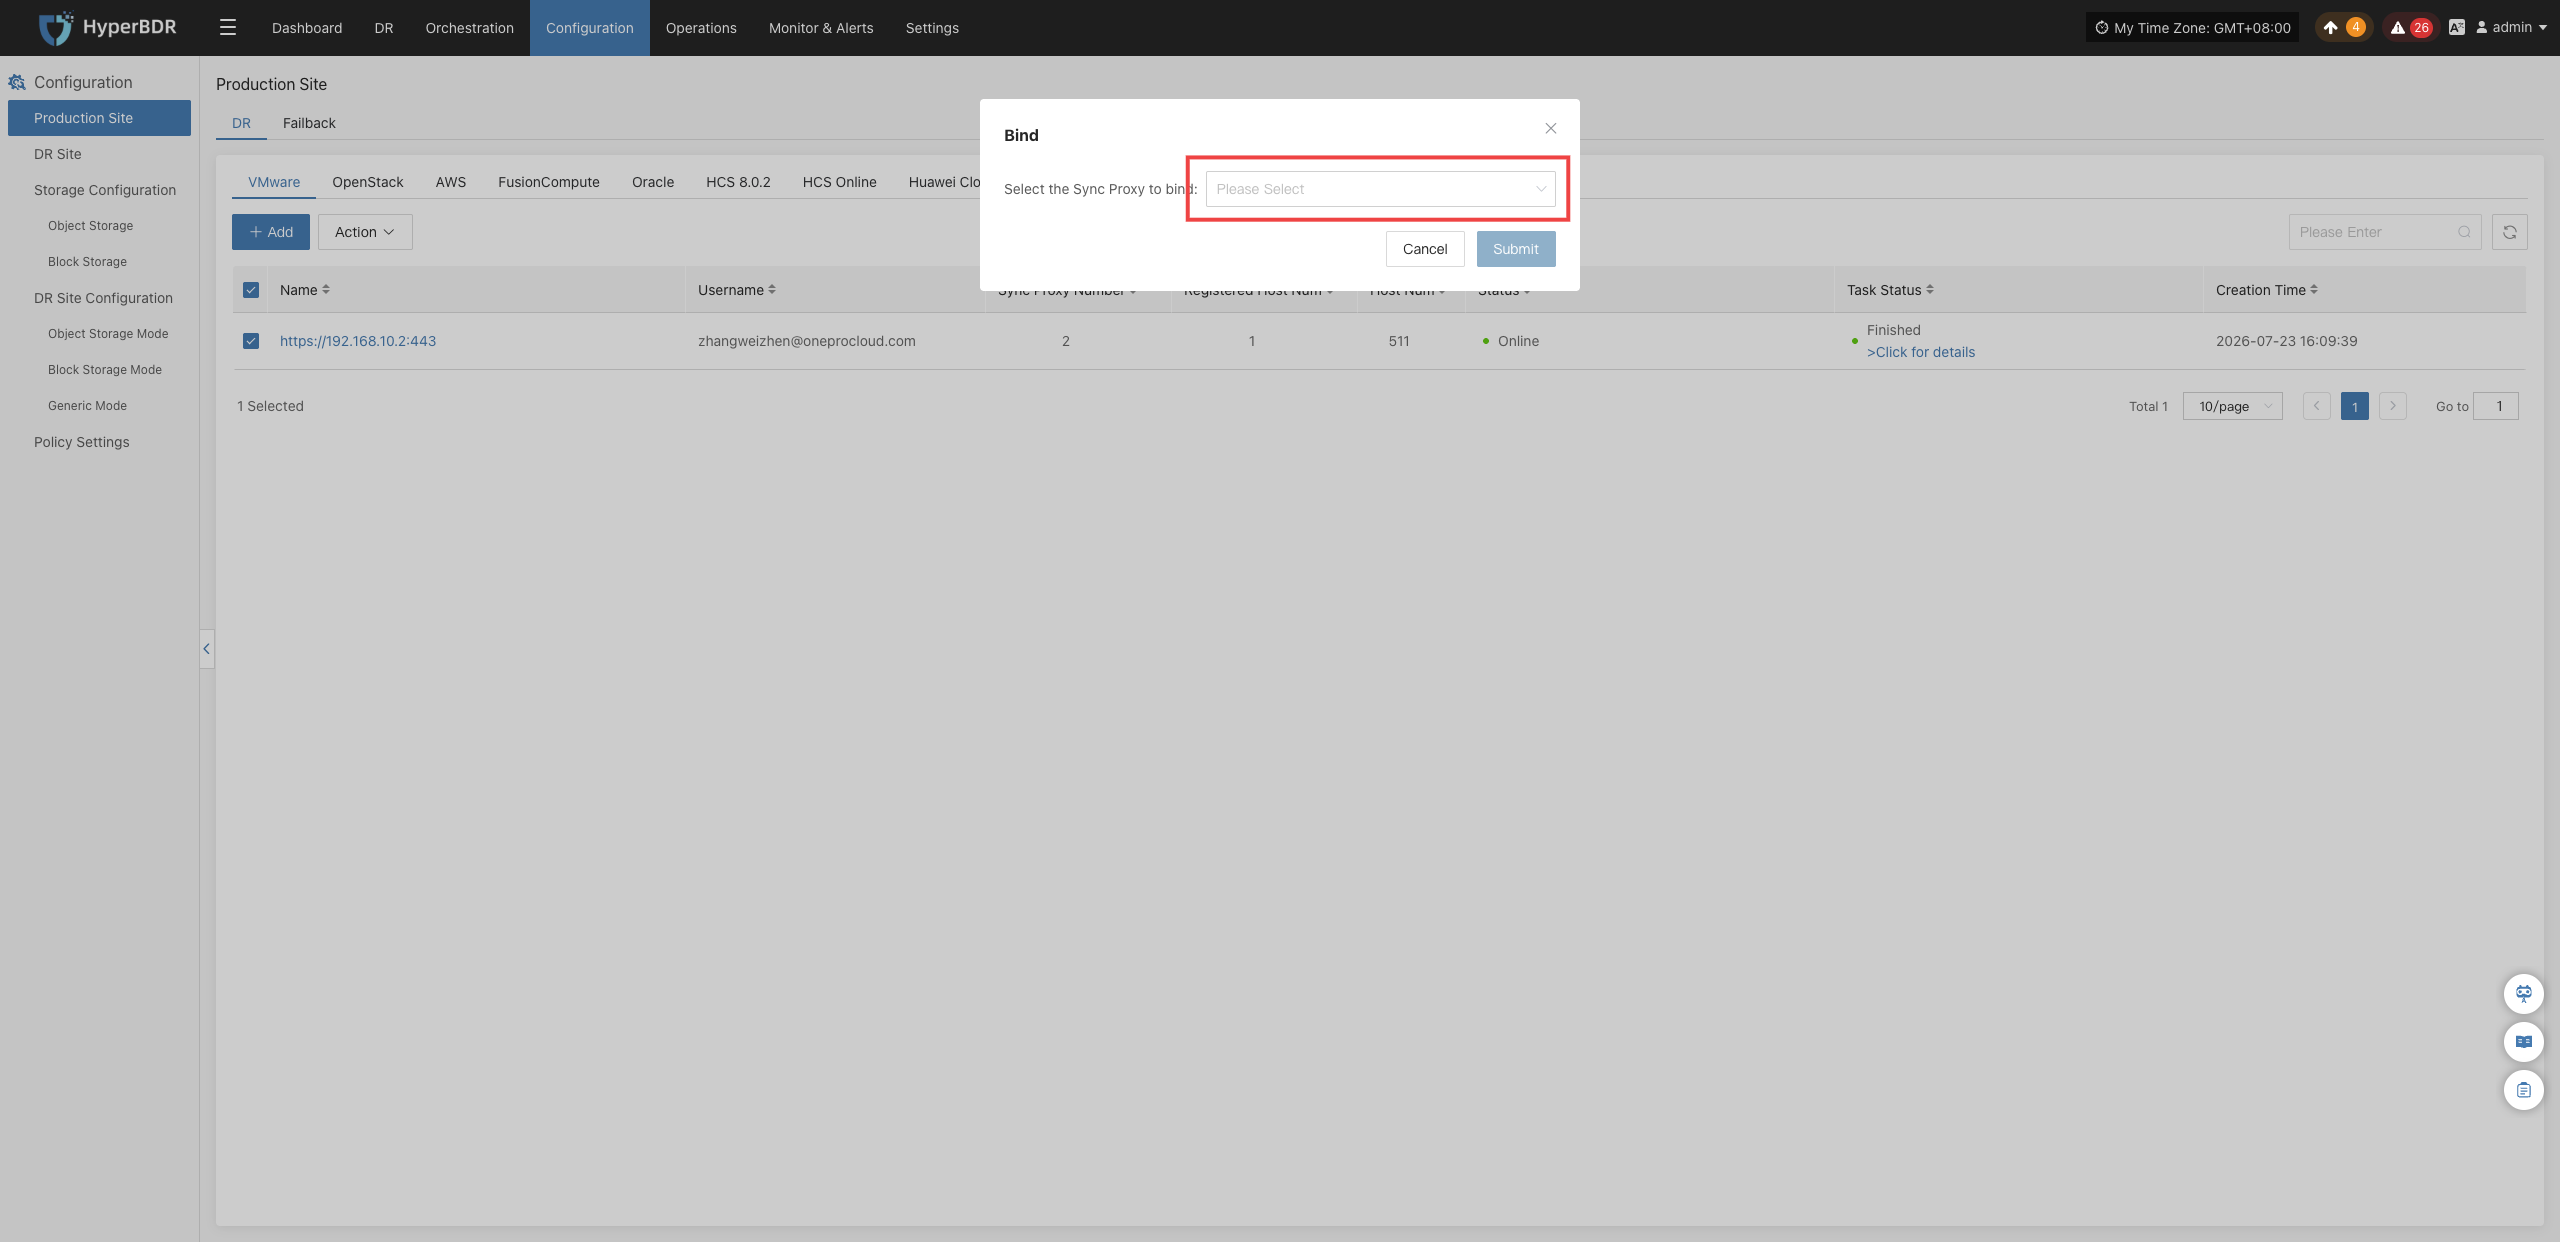
Click "Action" > "Bind" to associate ready Source Sync Proxy nodes with this production platform:
A single production platform supports binding multiple Sync Proxy nodes concurrently to expand the maximum number of attached disks supported by the platform. By default, a single host supports attaching up to 50 disks.
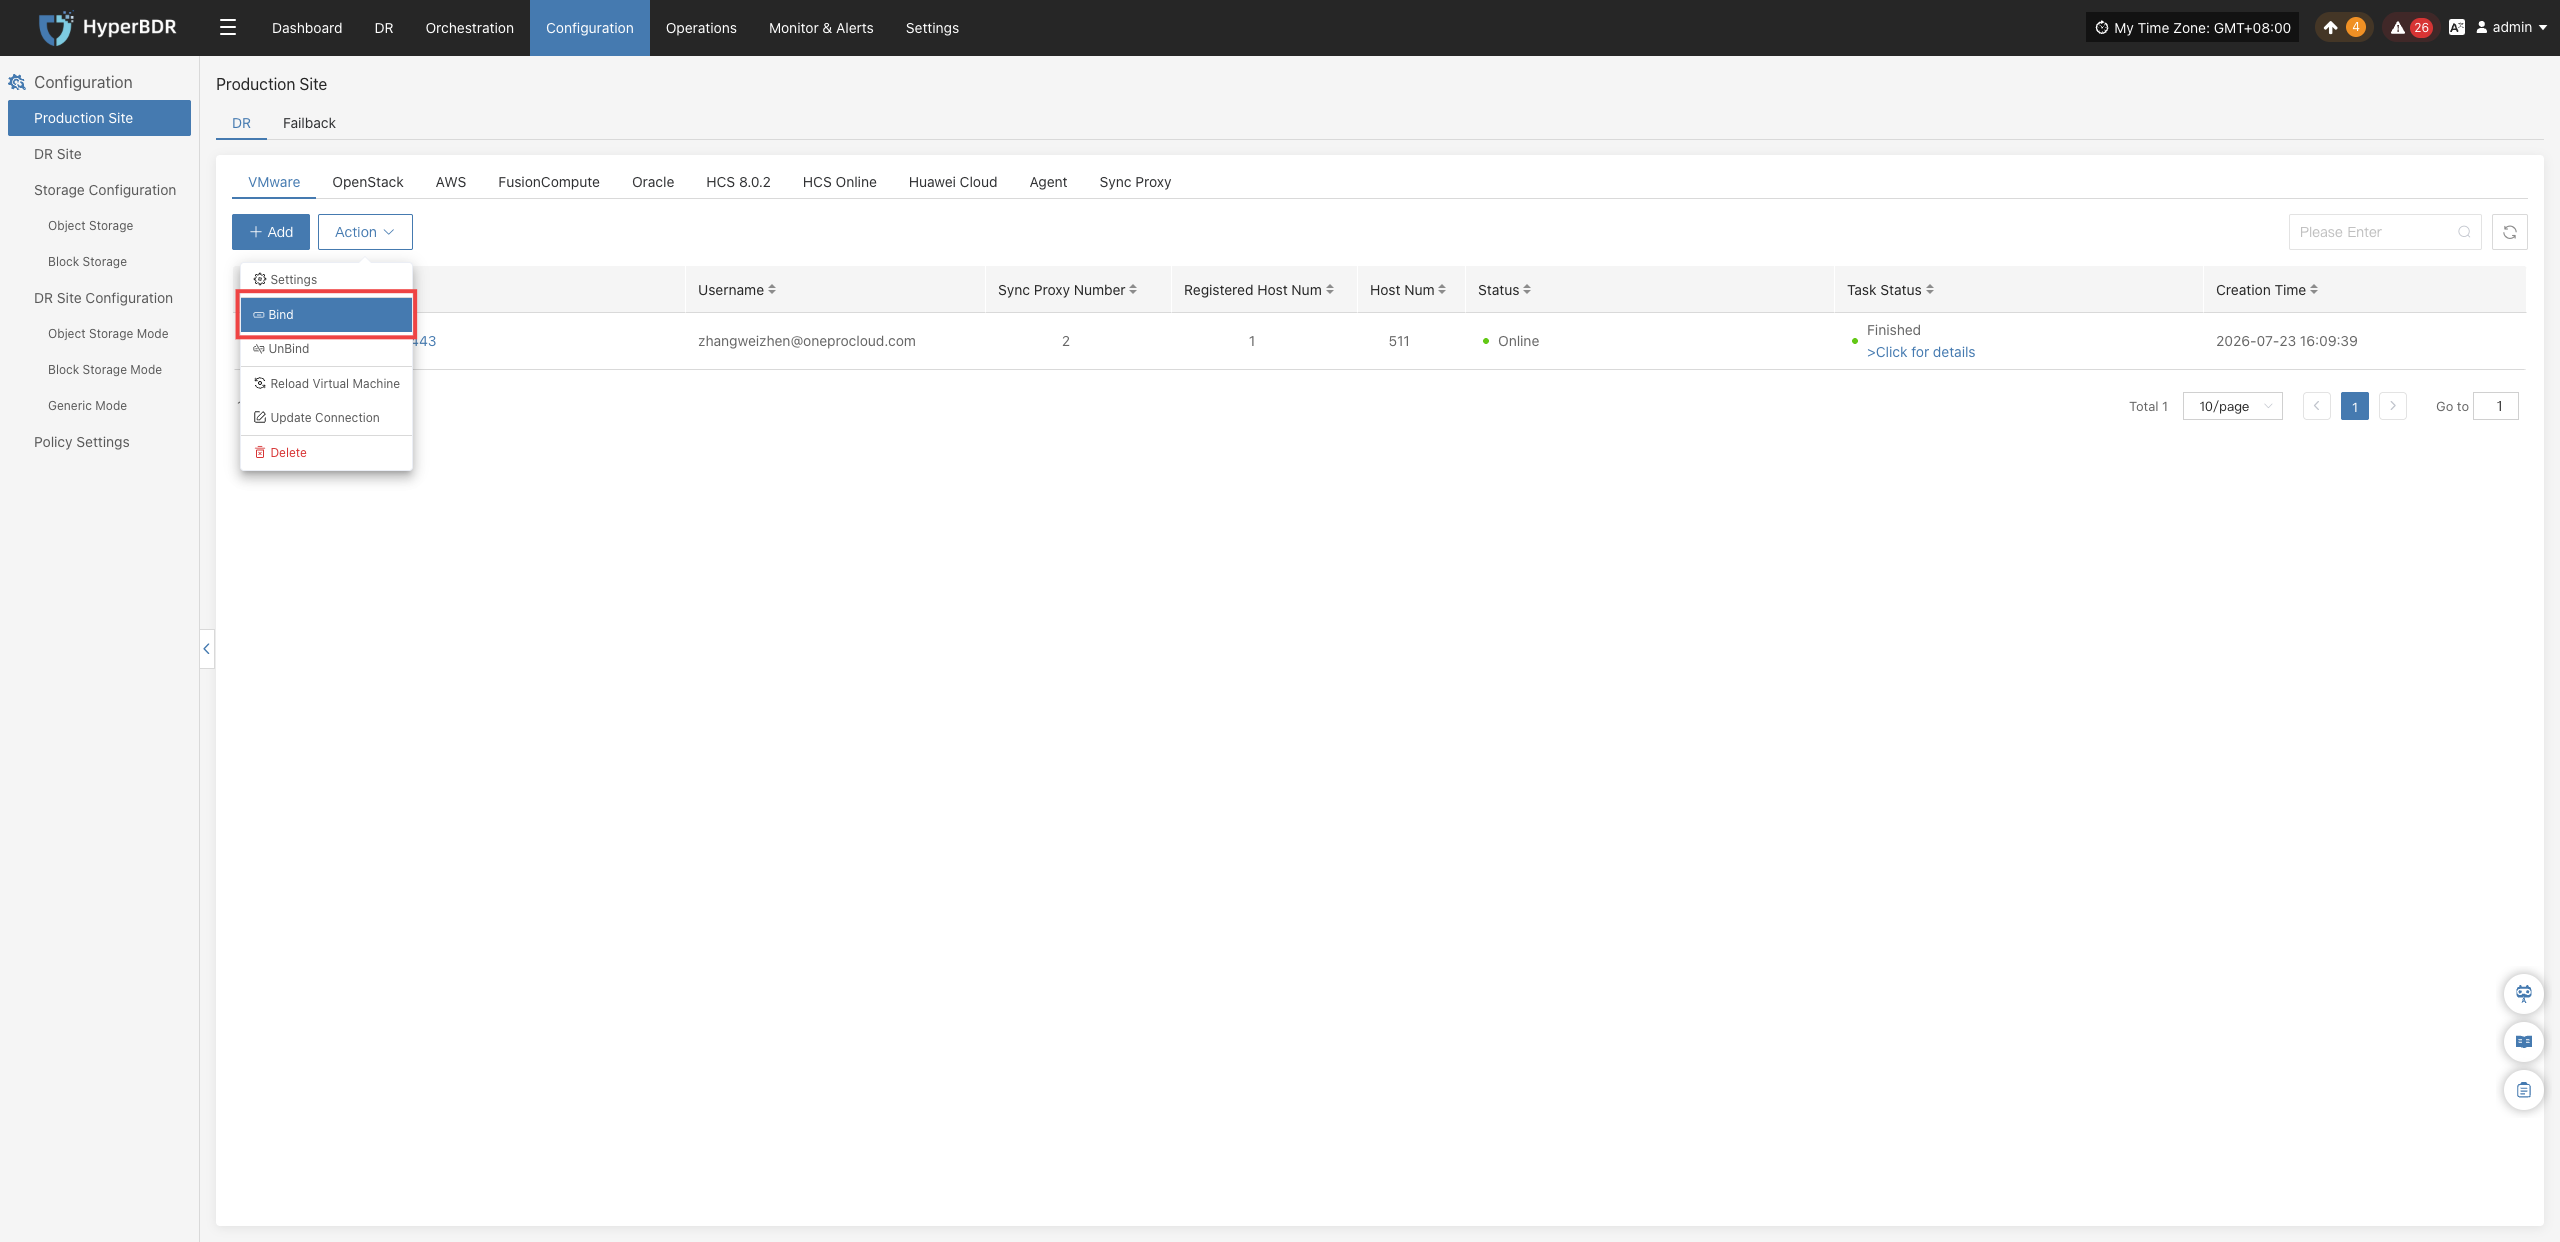
- In the pop-up dialog, select the target Sync Proxy node from the dropdown list, and click "OK" to complete the binding.
Unbind
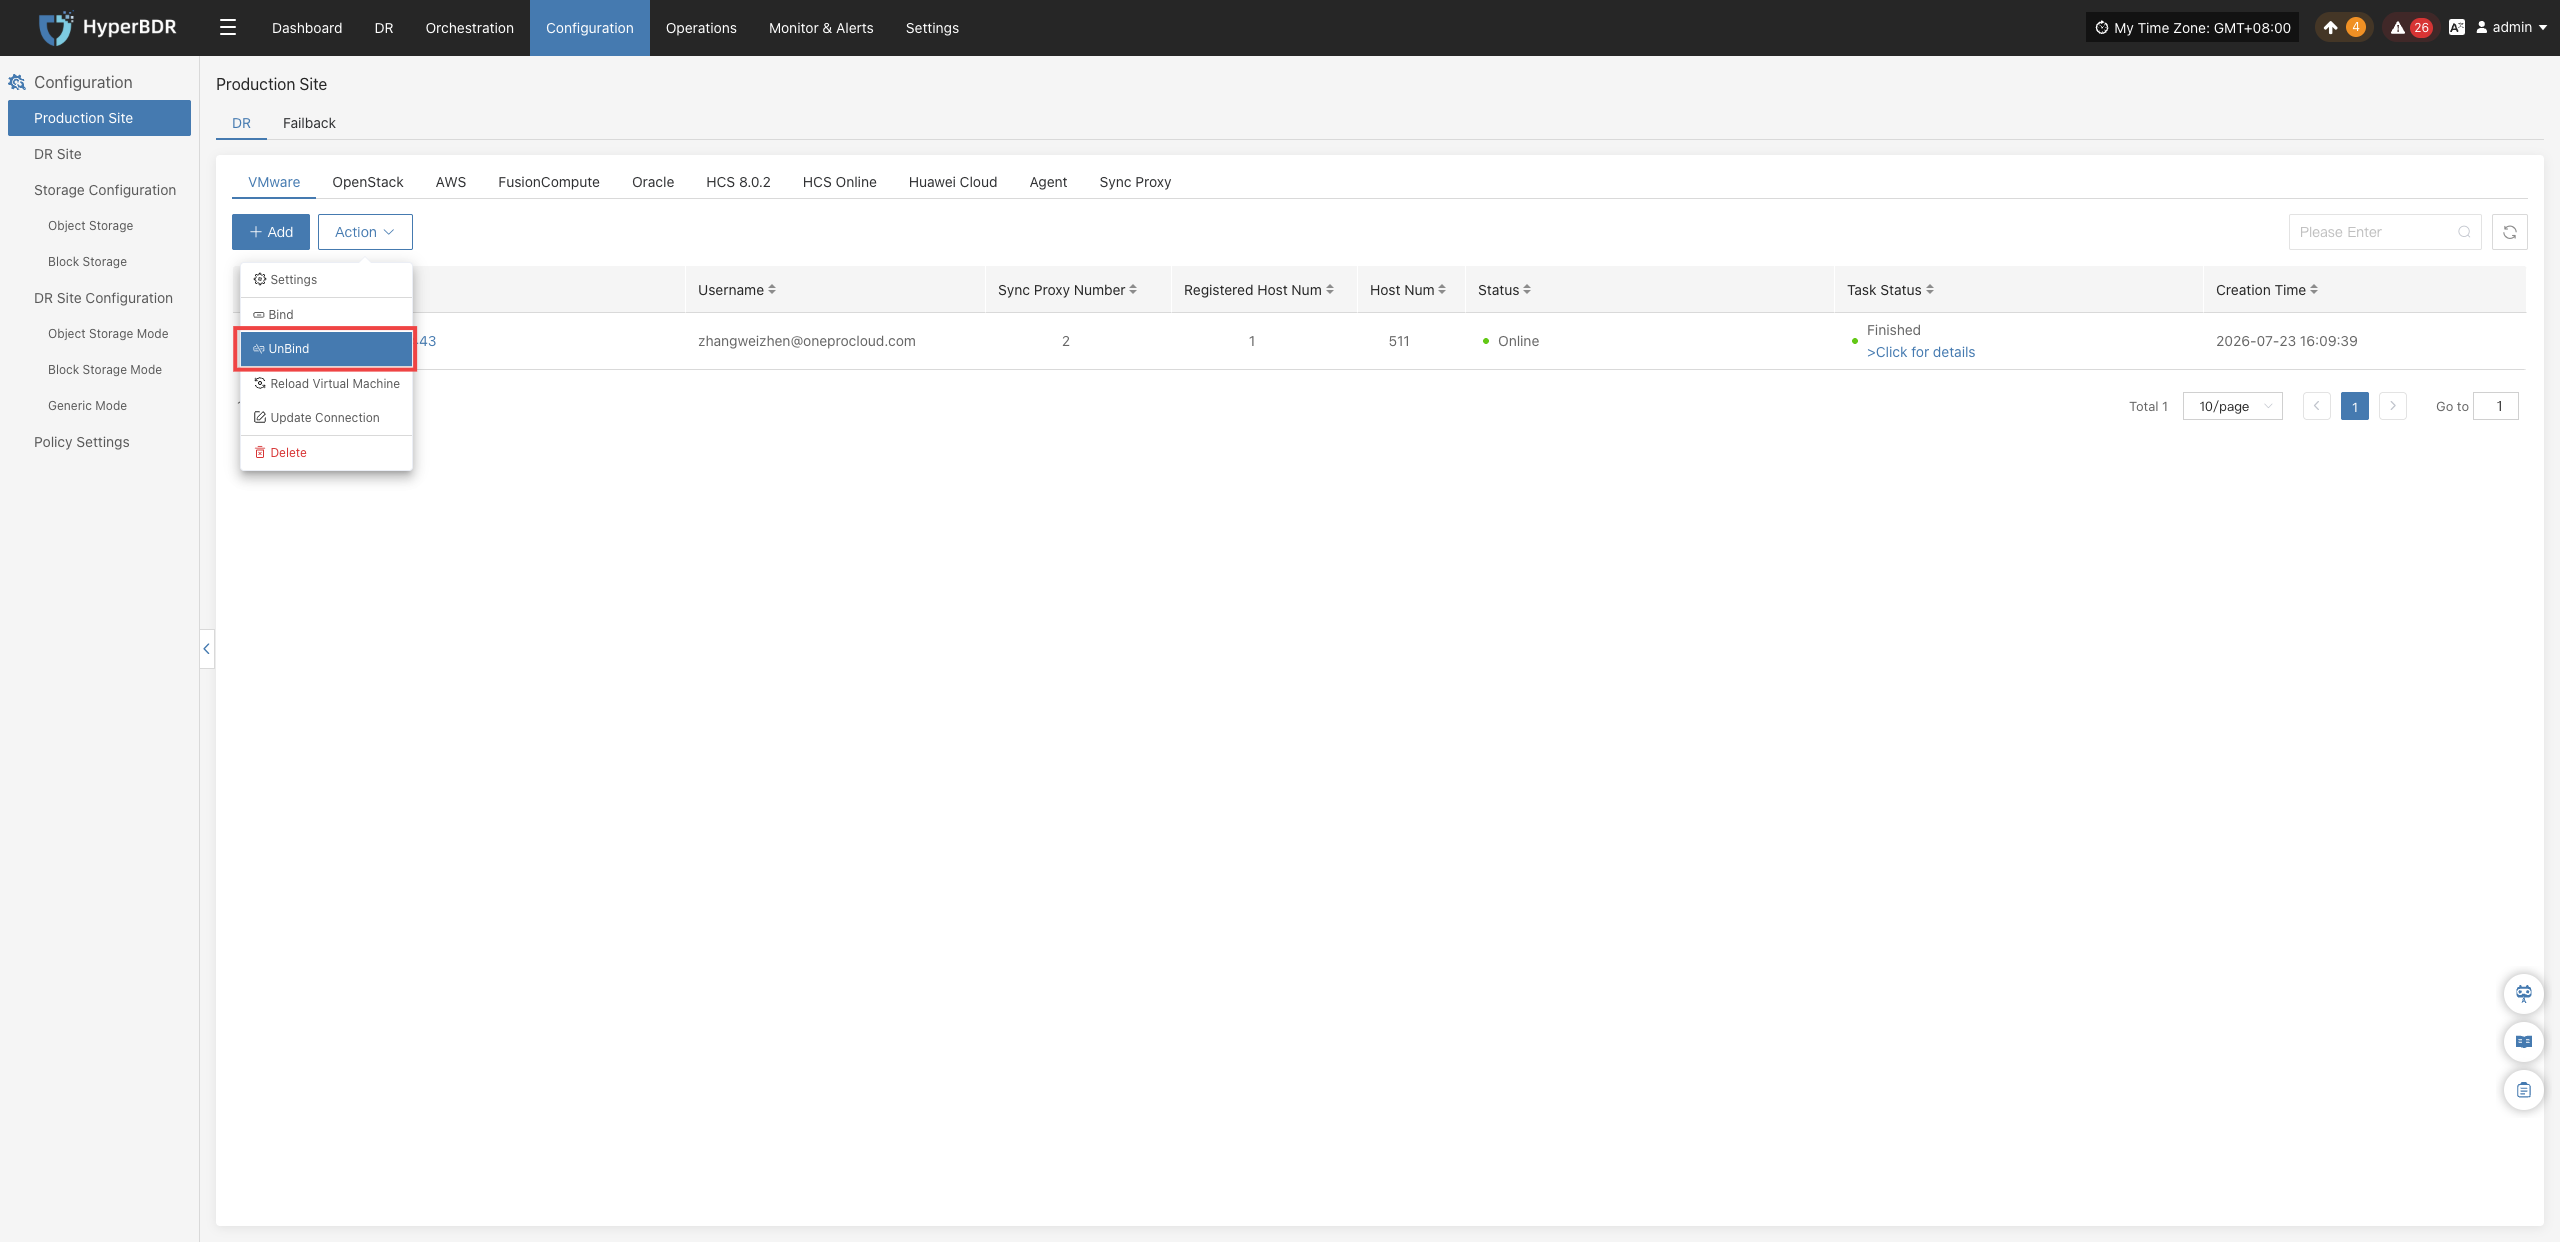
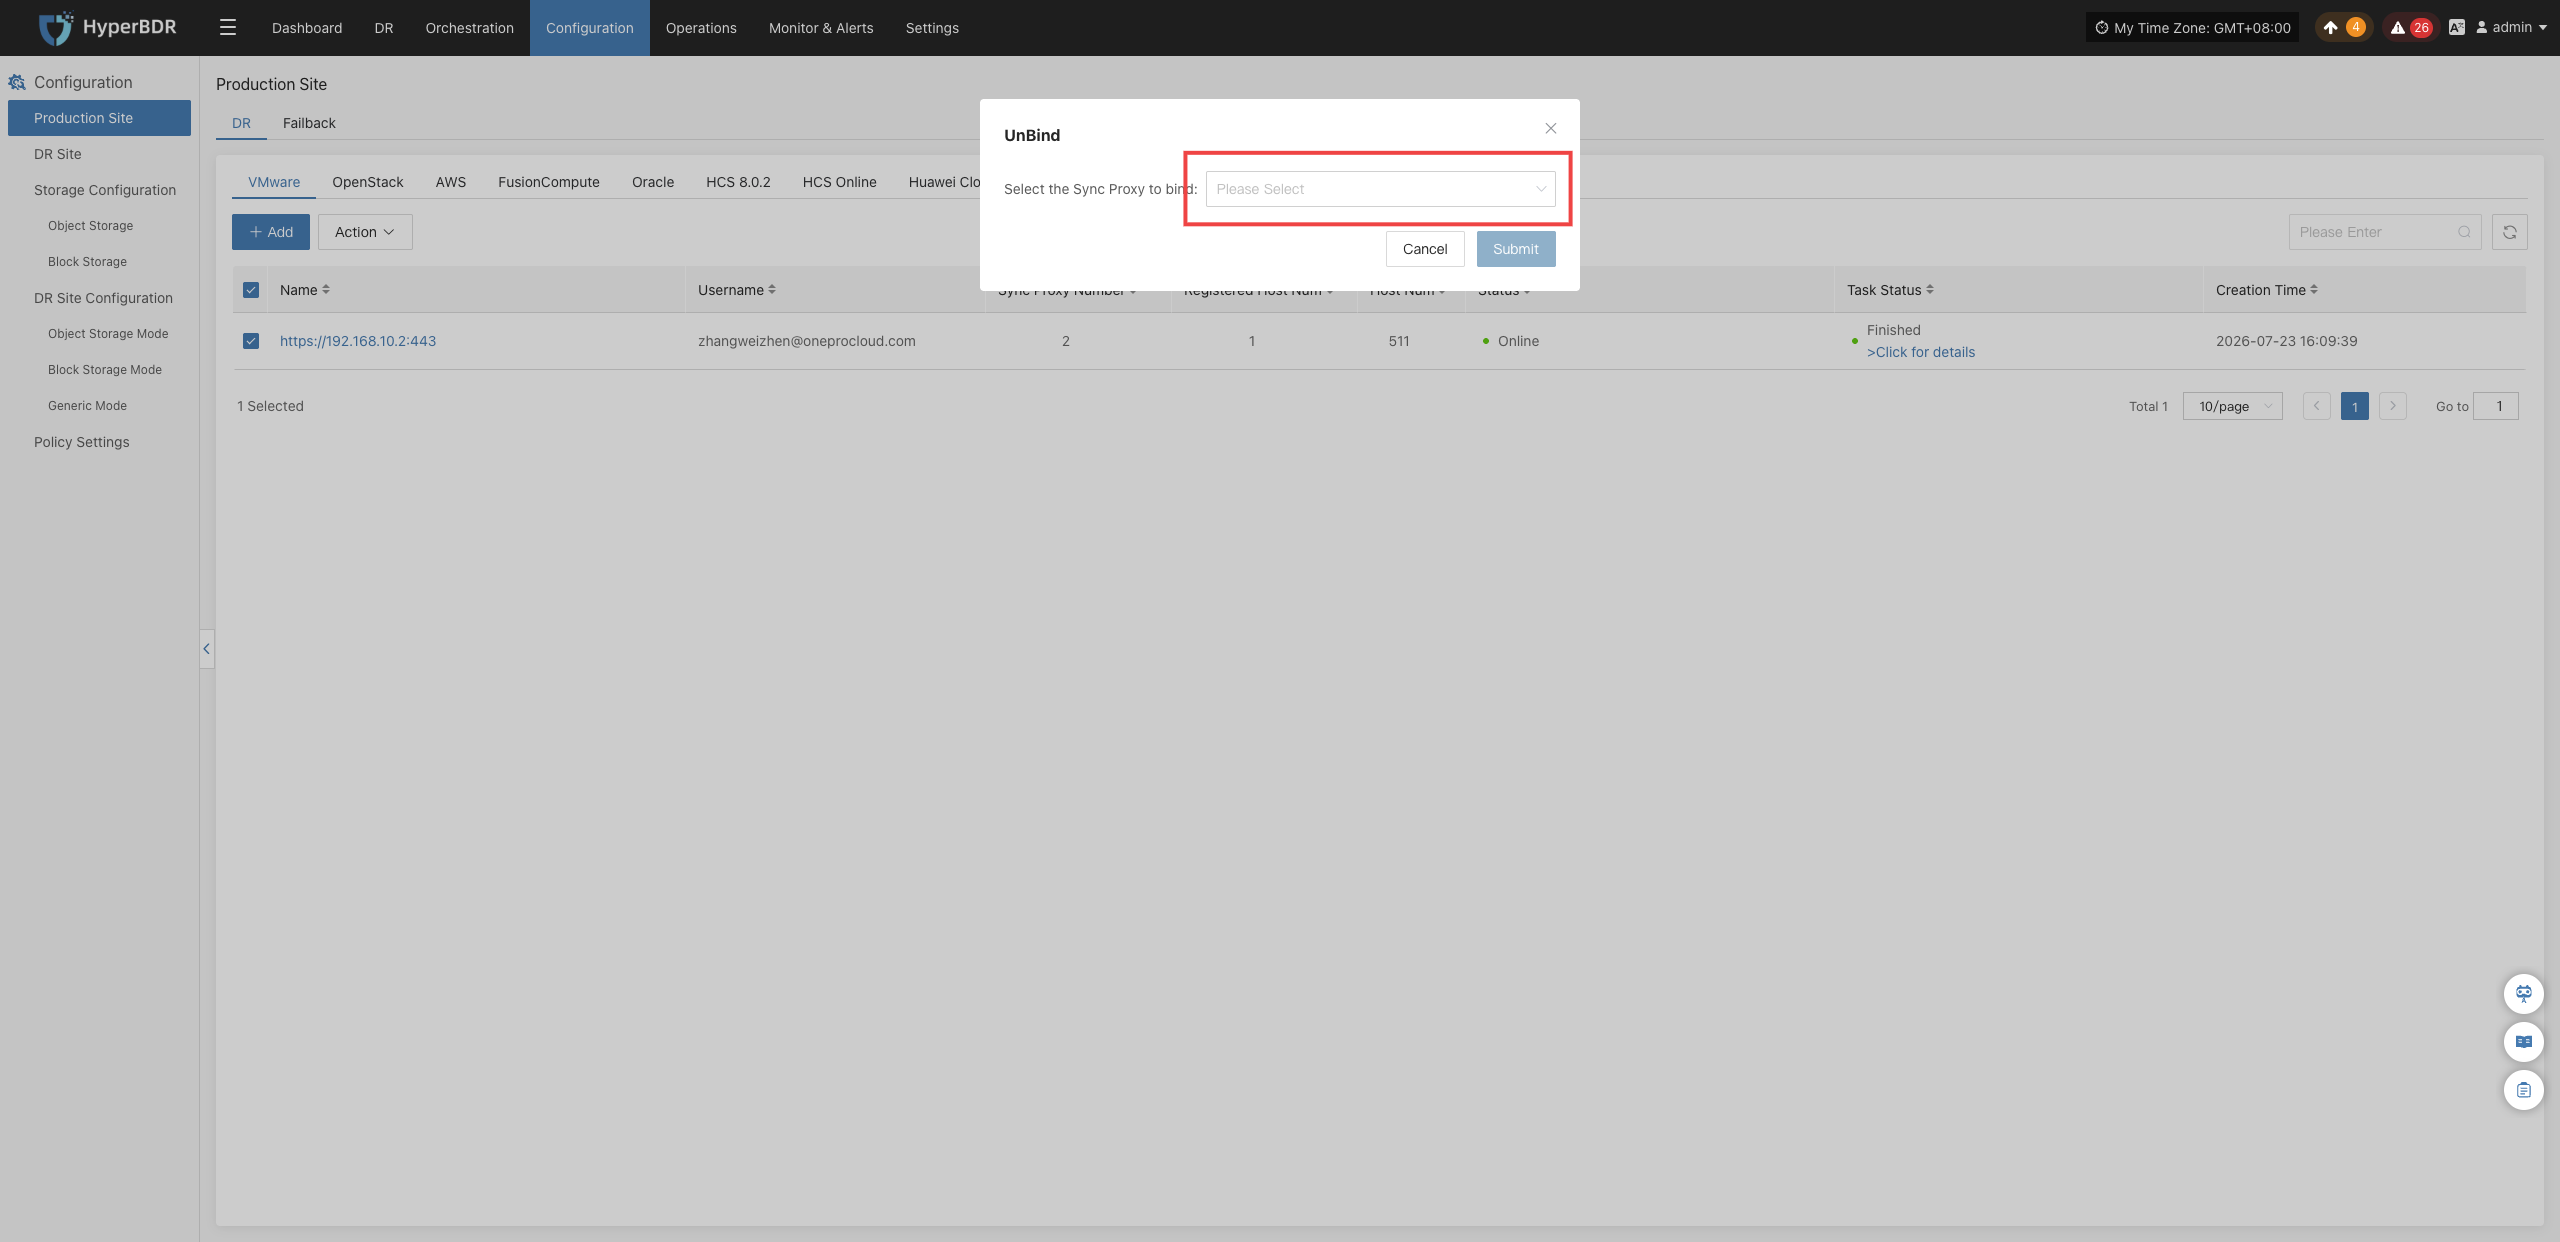
Click "Action" > "Unbind" to disassociate a bound Source Sync Proxy node from the current production platform:
Before unbinding, ensure that the proxy node has no ongoing data synchronization or disaster recovery backup tasks. Once unbound, the proxy stops processing replication jobs for this platform and can be rebound to other platforms or retired as needed.
- In the pop-up dialog, select the target Sync Proxy node from the dropdown list, and click "OK" to complete the unbinding.
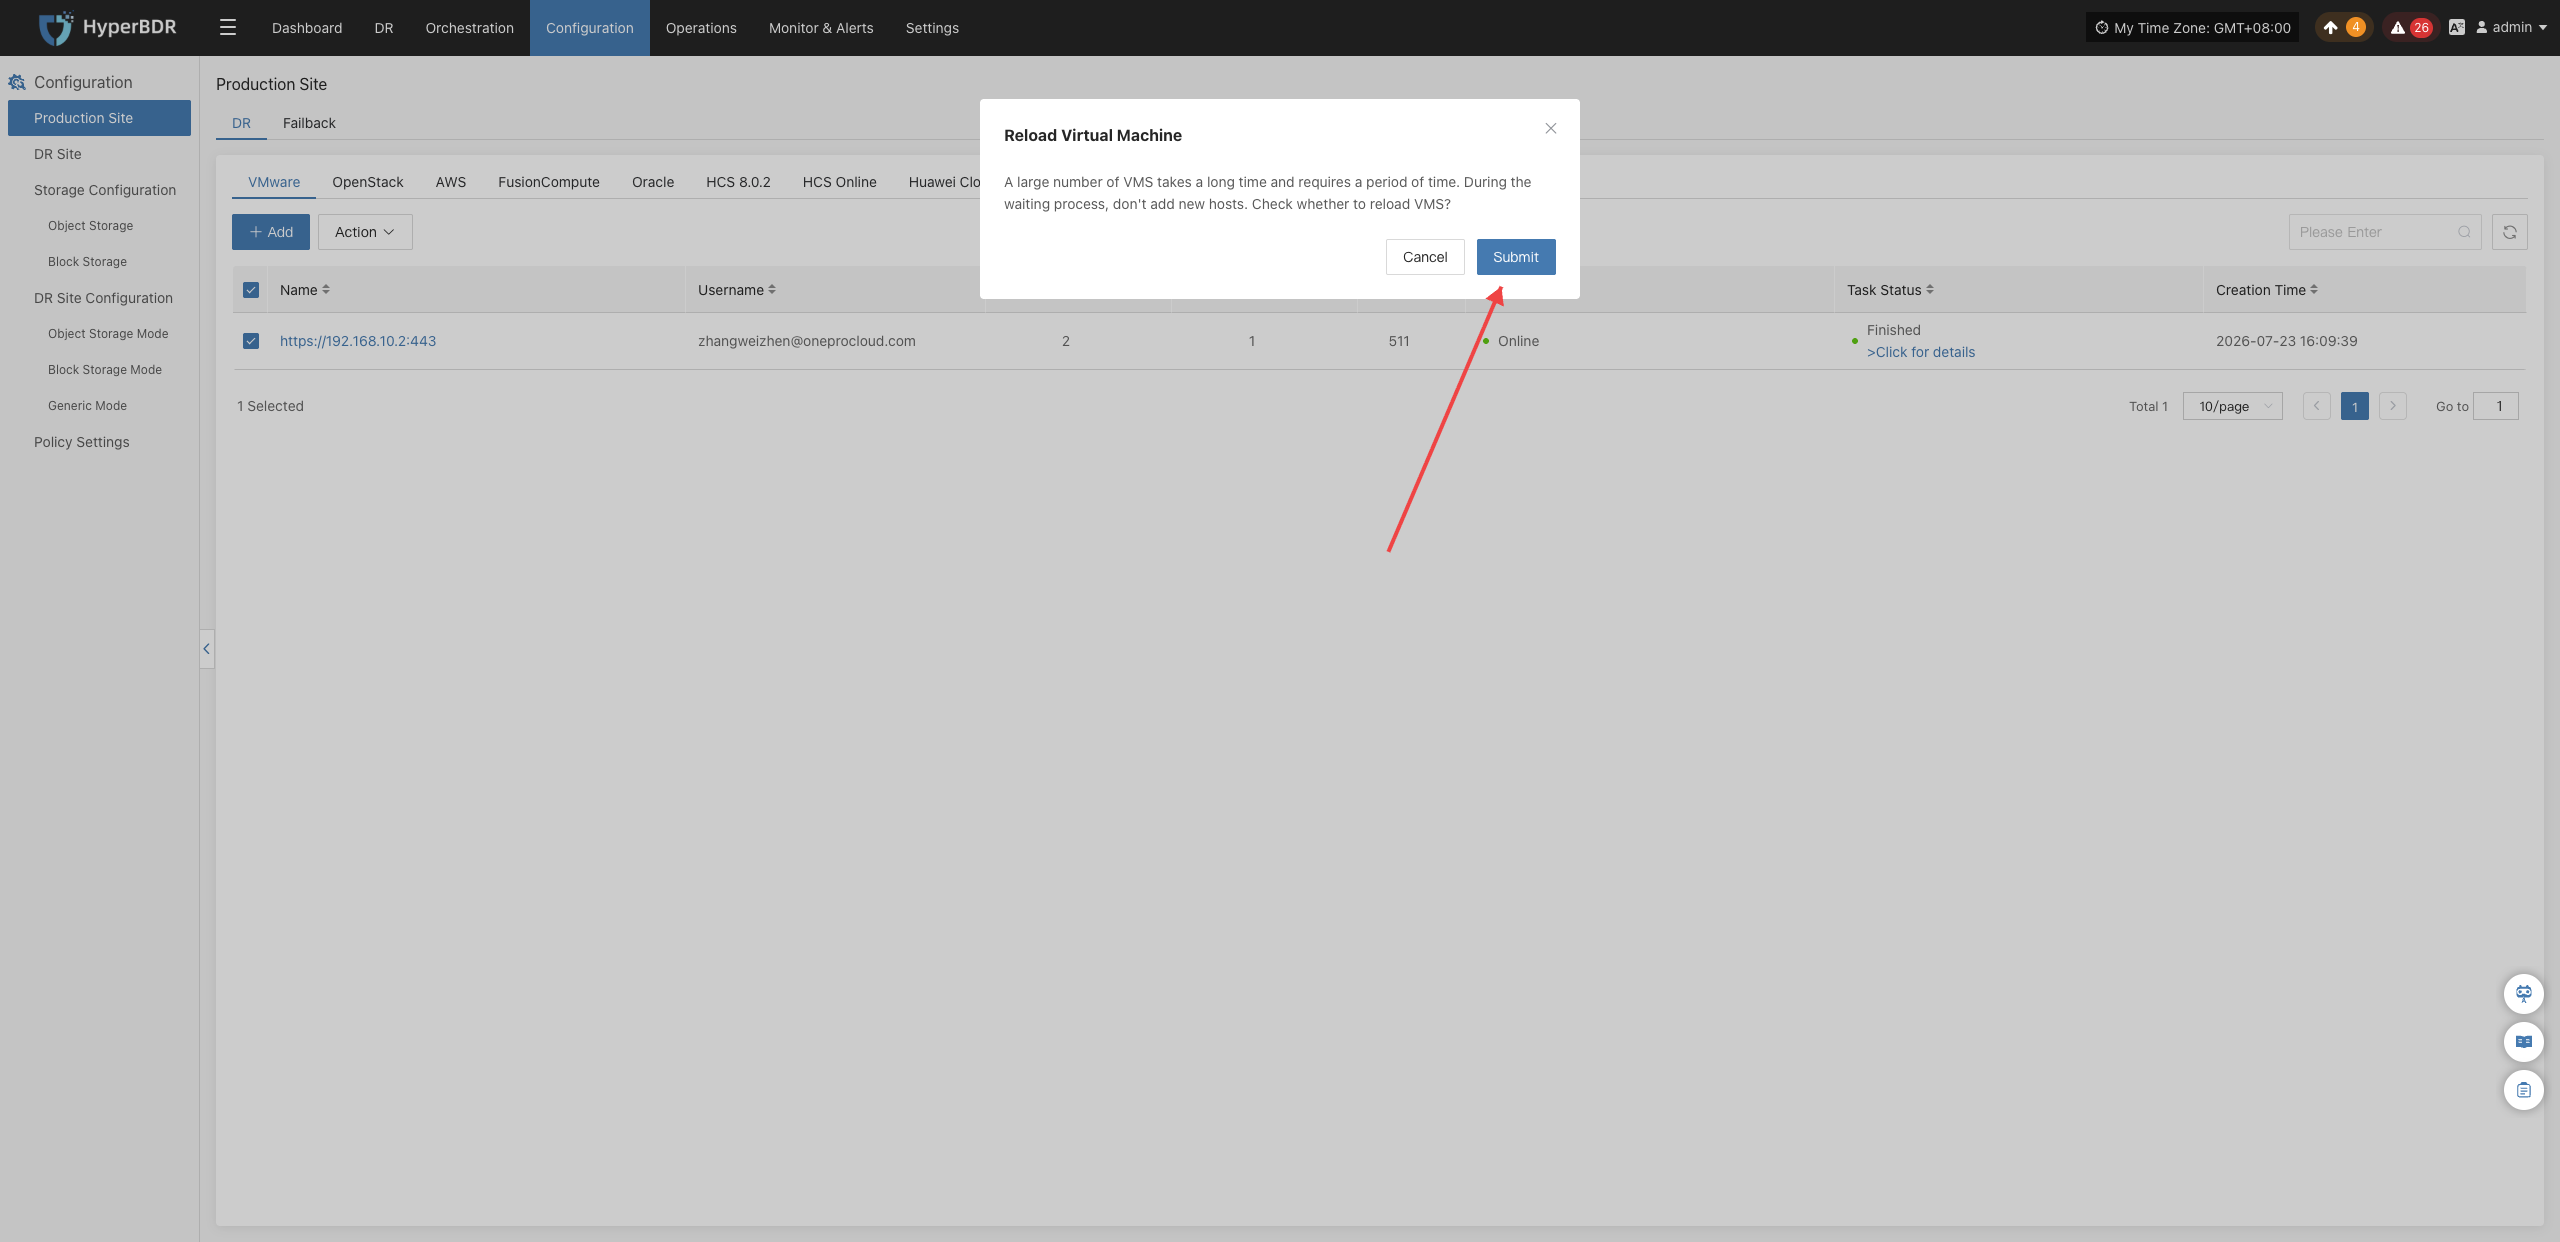
Reload Virtual Machine
Click "Action" > "Reload Virtual Machine" to force HyperBDR to immediately call source native APIs and synchronize the latest host and virtual machine inventory:
When new virtual machines/instances are added to the source environment and the console has not updated in real time, you can manually refresh the asset list using this function.
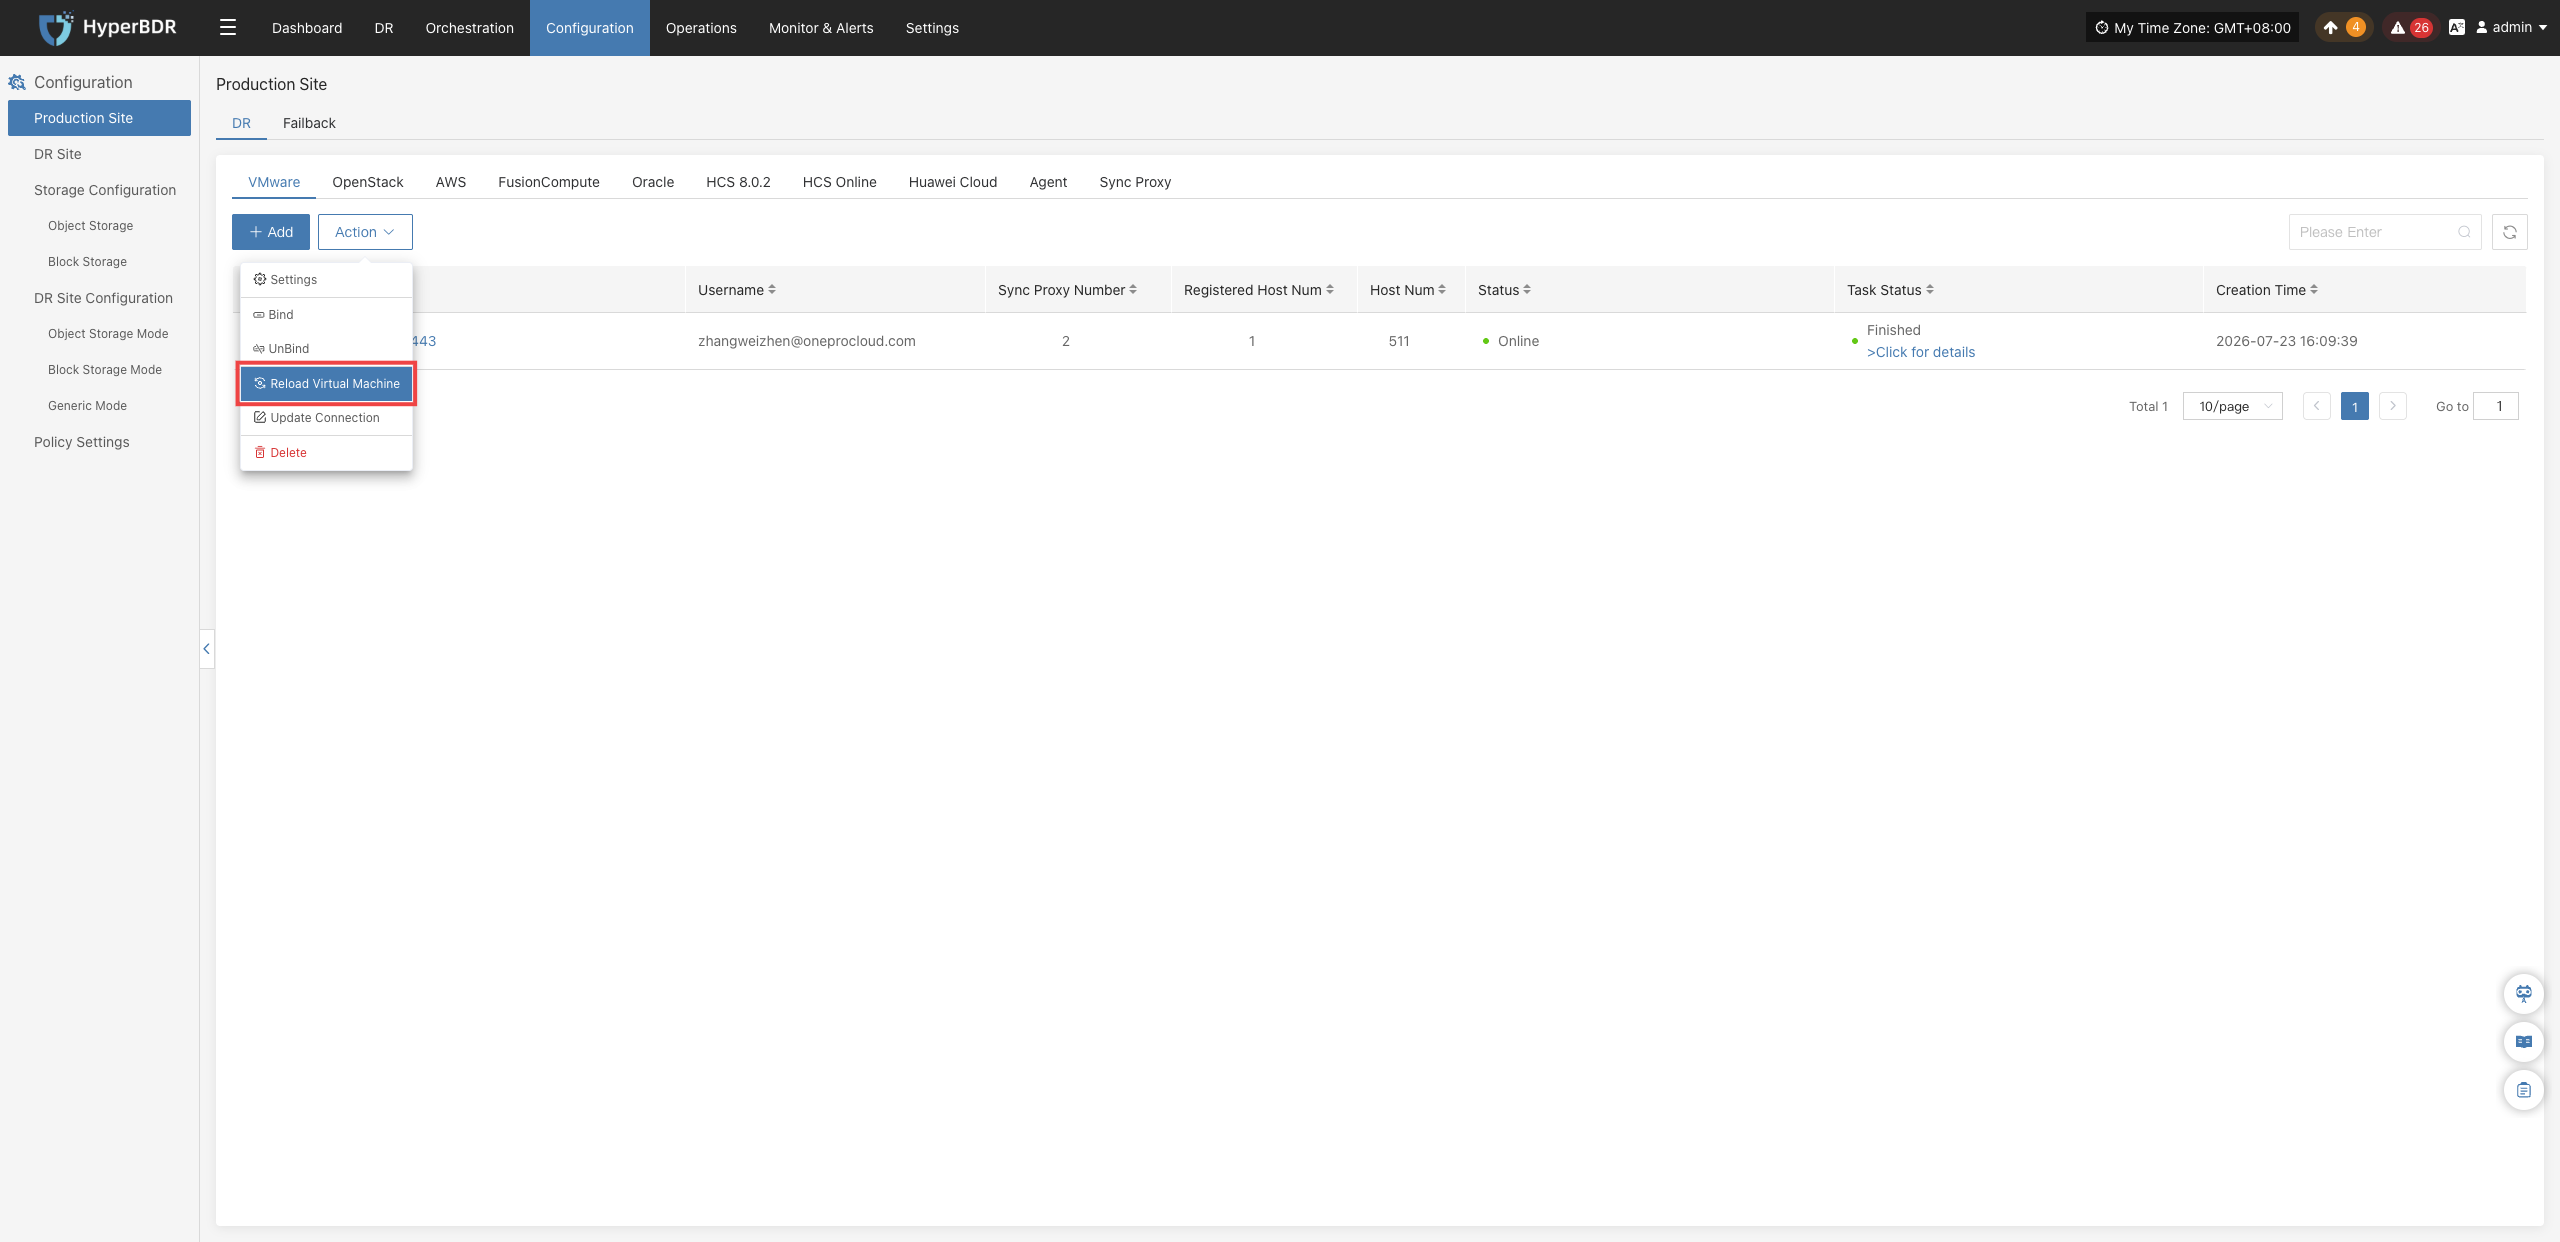
- In the pop-up dialog, review the precautions and click "OK" to start reloading virtual machines.
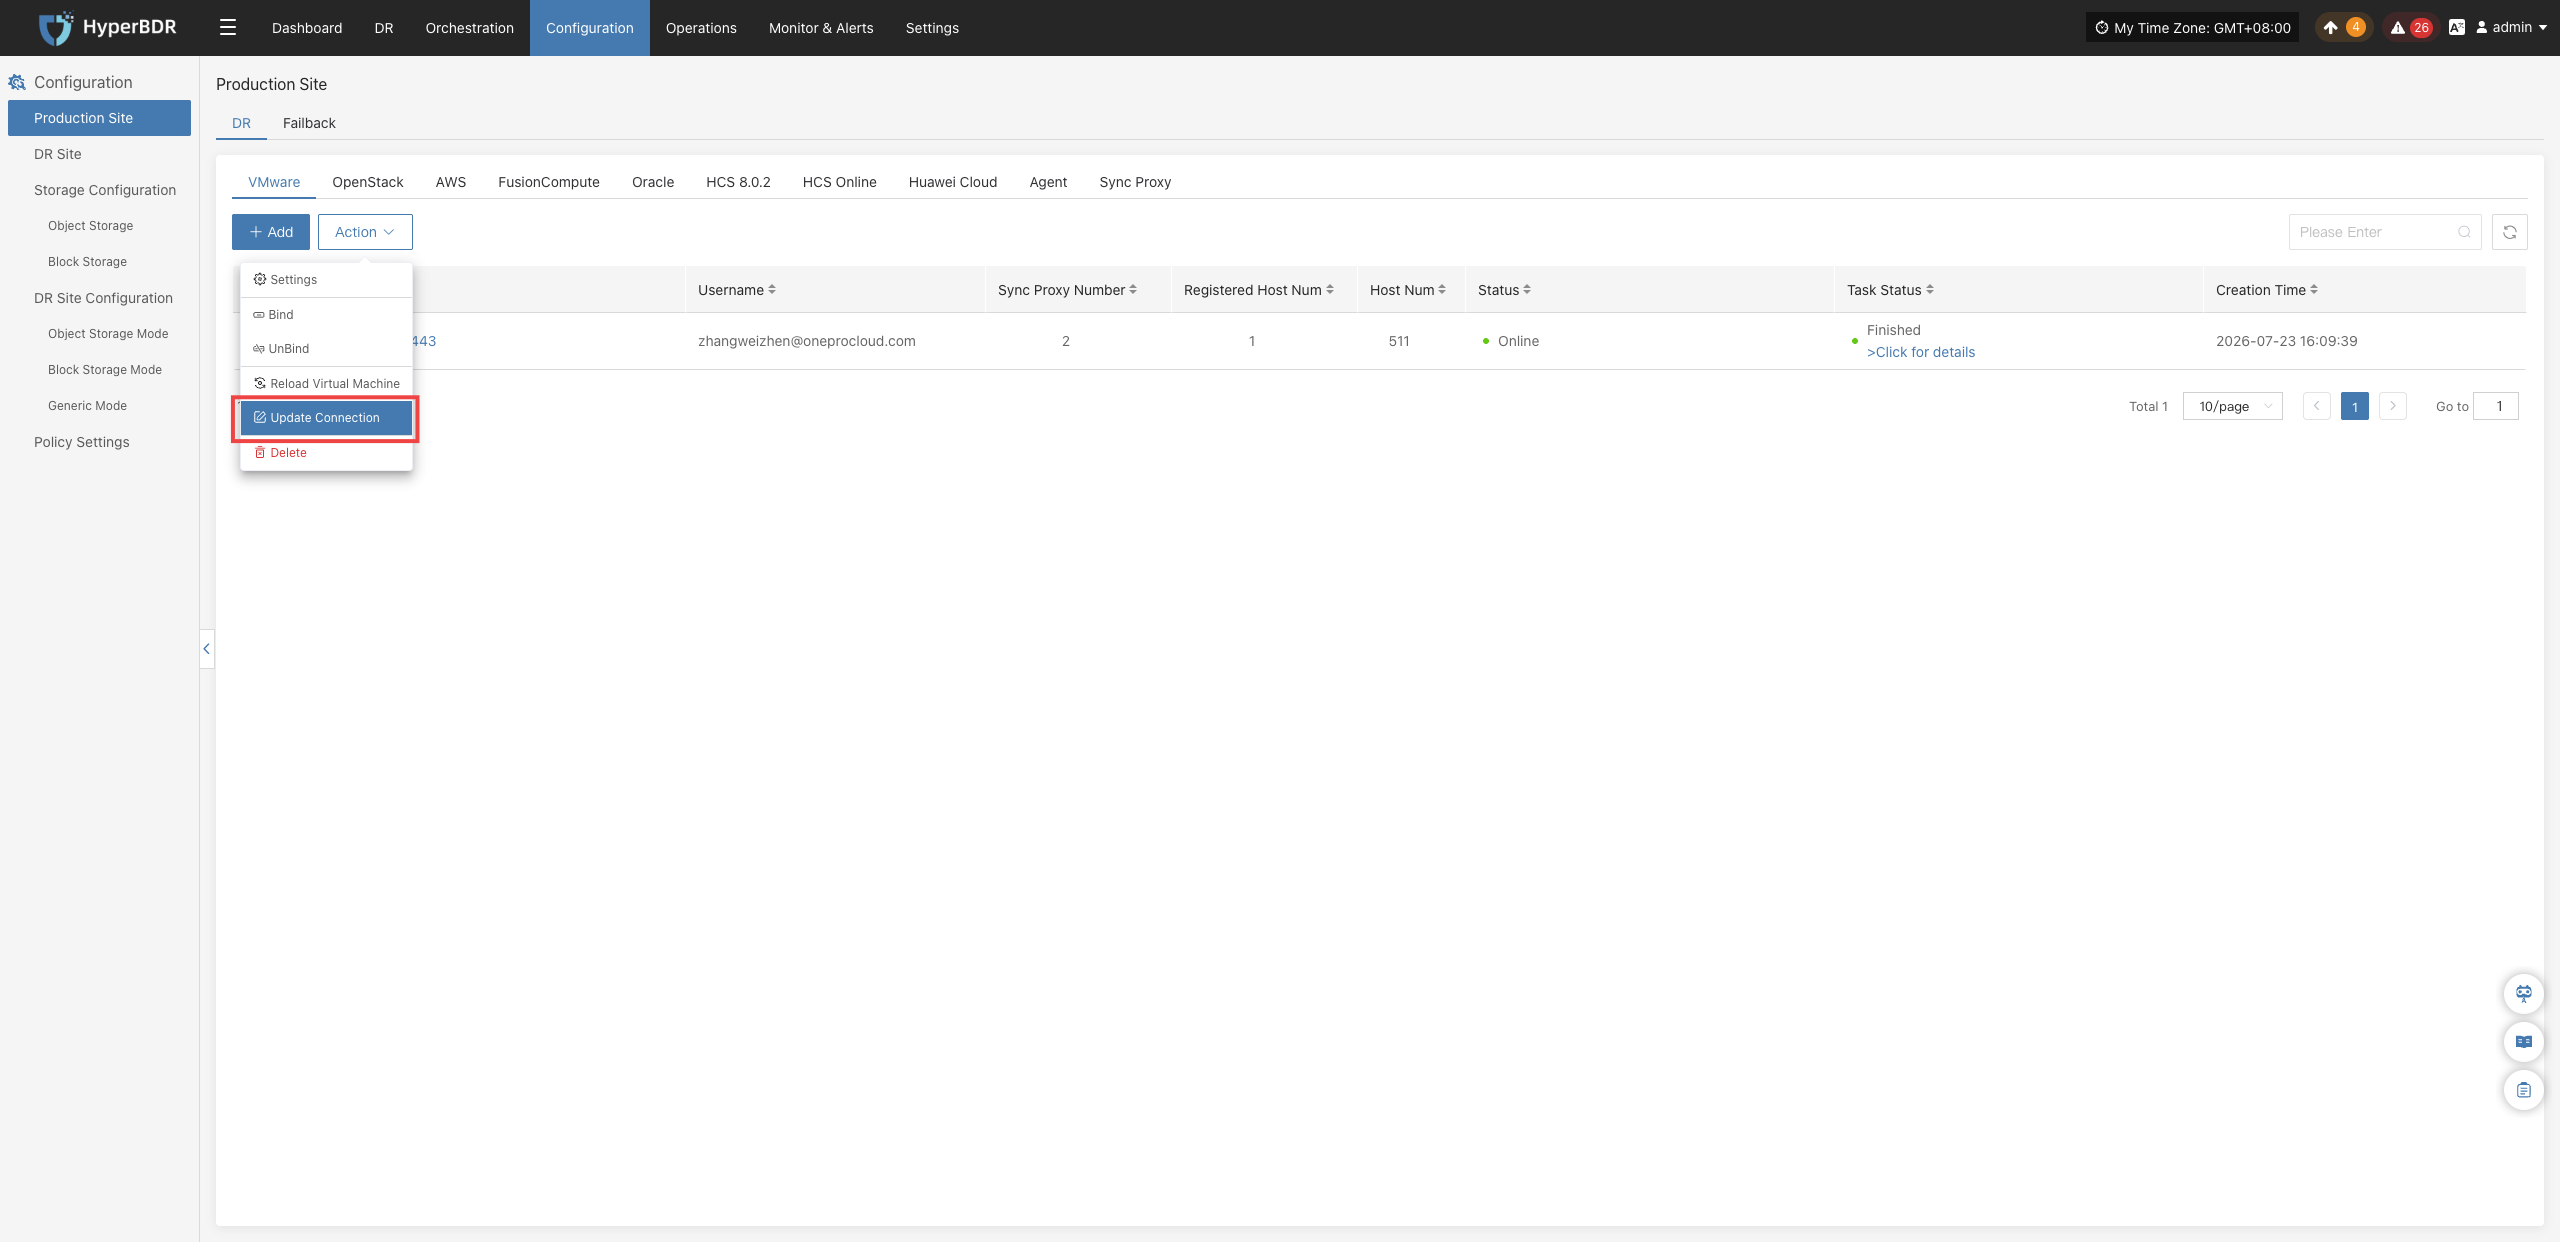
Modify Authentication Information
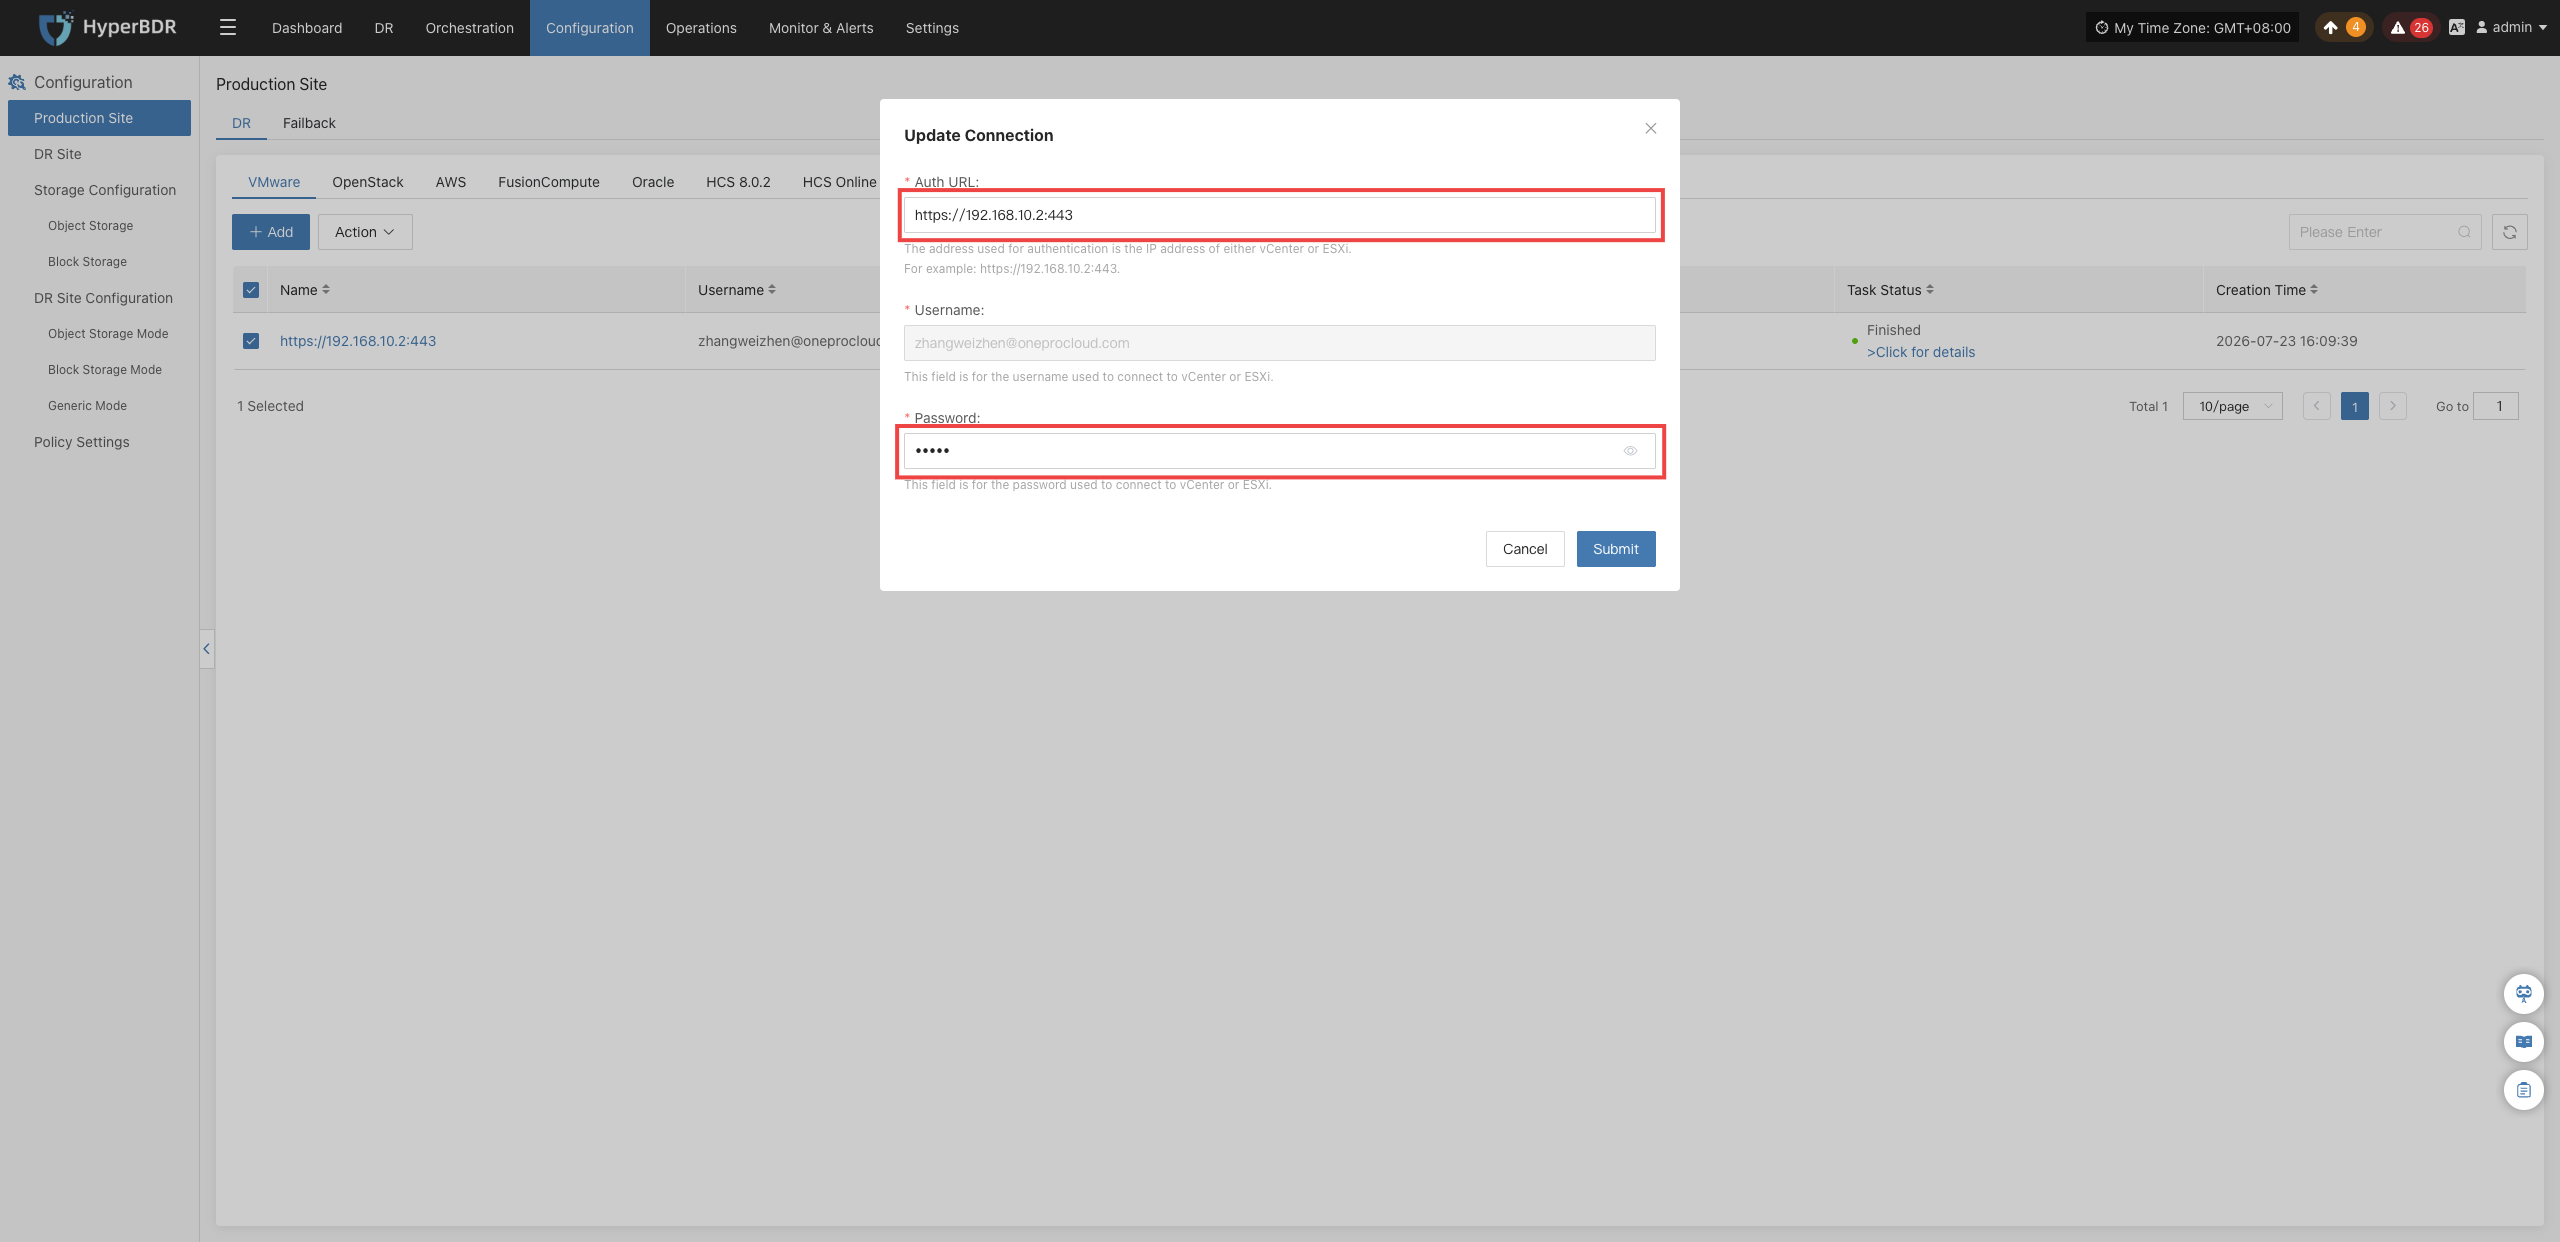
Click "Action" > "Modify Authentication Information" to directly modify credentials and connection parameters for the connected production platform.
When the source platform management IP, access endpoint, administrator credentials, API access keys, connection ports, or SSL certificates change causing abnormal connection status, update configurations via this function. After updating, the system will re-verify connectivity and update the platform status without needing to delete and recreate the platform, fully preserving existing disaster recovery protection policies and historical backup data.
- In the pop-up dialog, update the required authentication information or connection parameters. Click "OK" to submit changes and initiate connection re-verification.
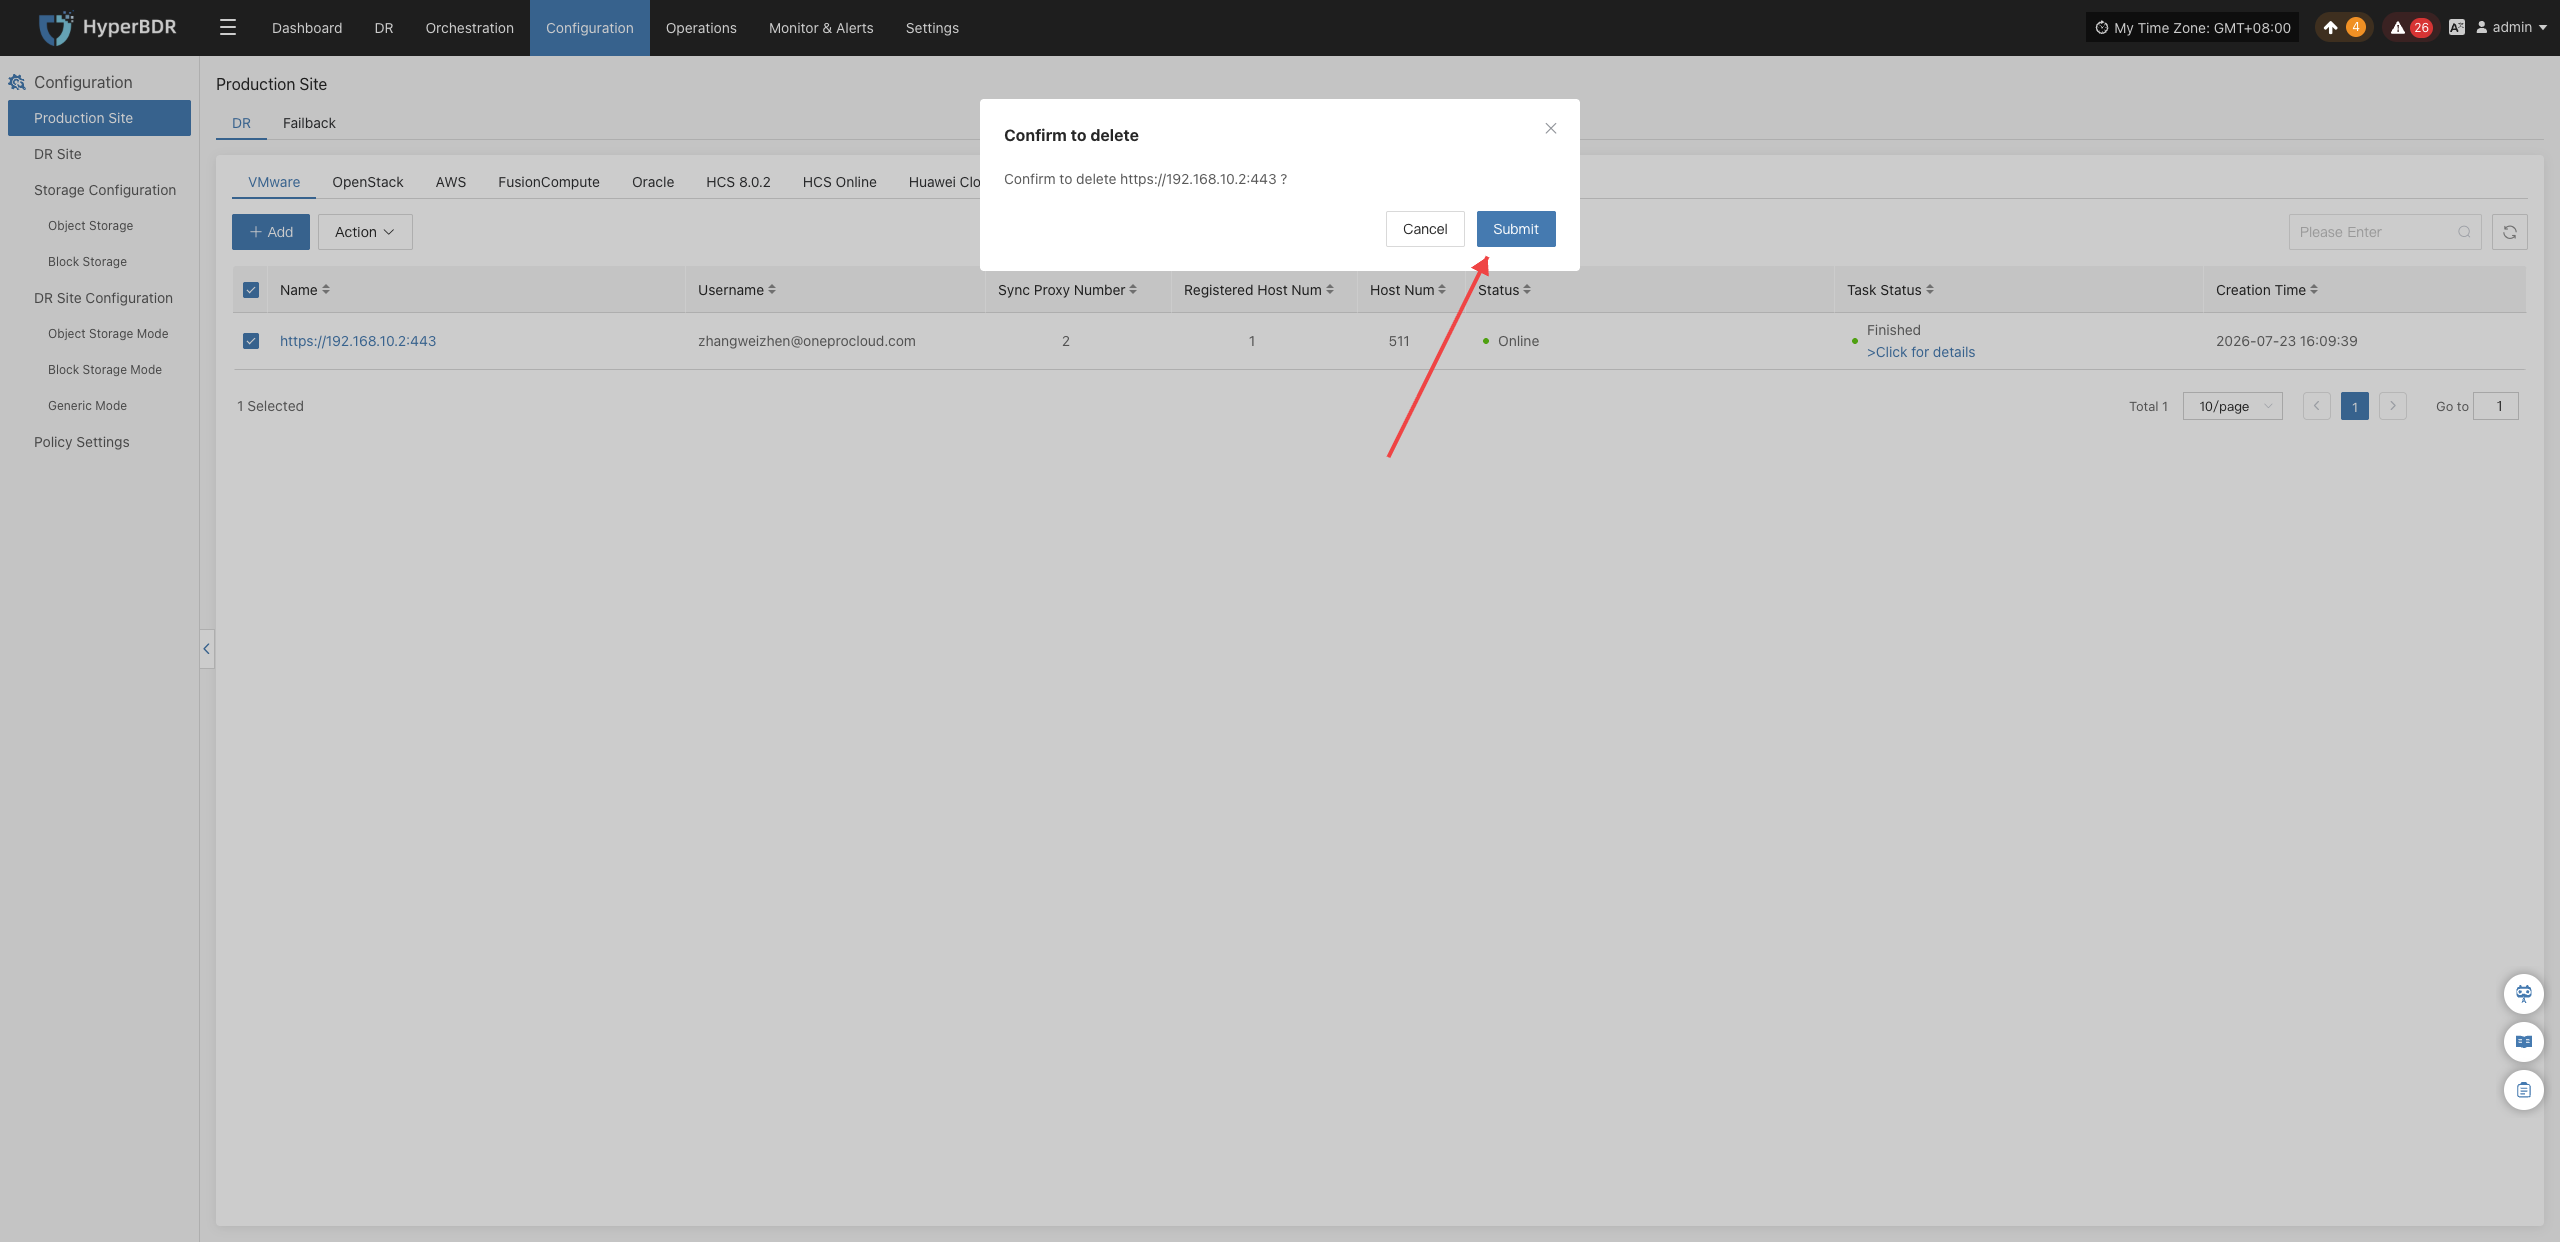
Delete
Click "Action" > "Delete" to permanently remove the production platform from HyperBDR:
Before deleting, ensure that the production site is not associated with any Sync Proxy.
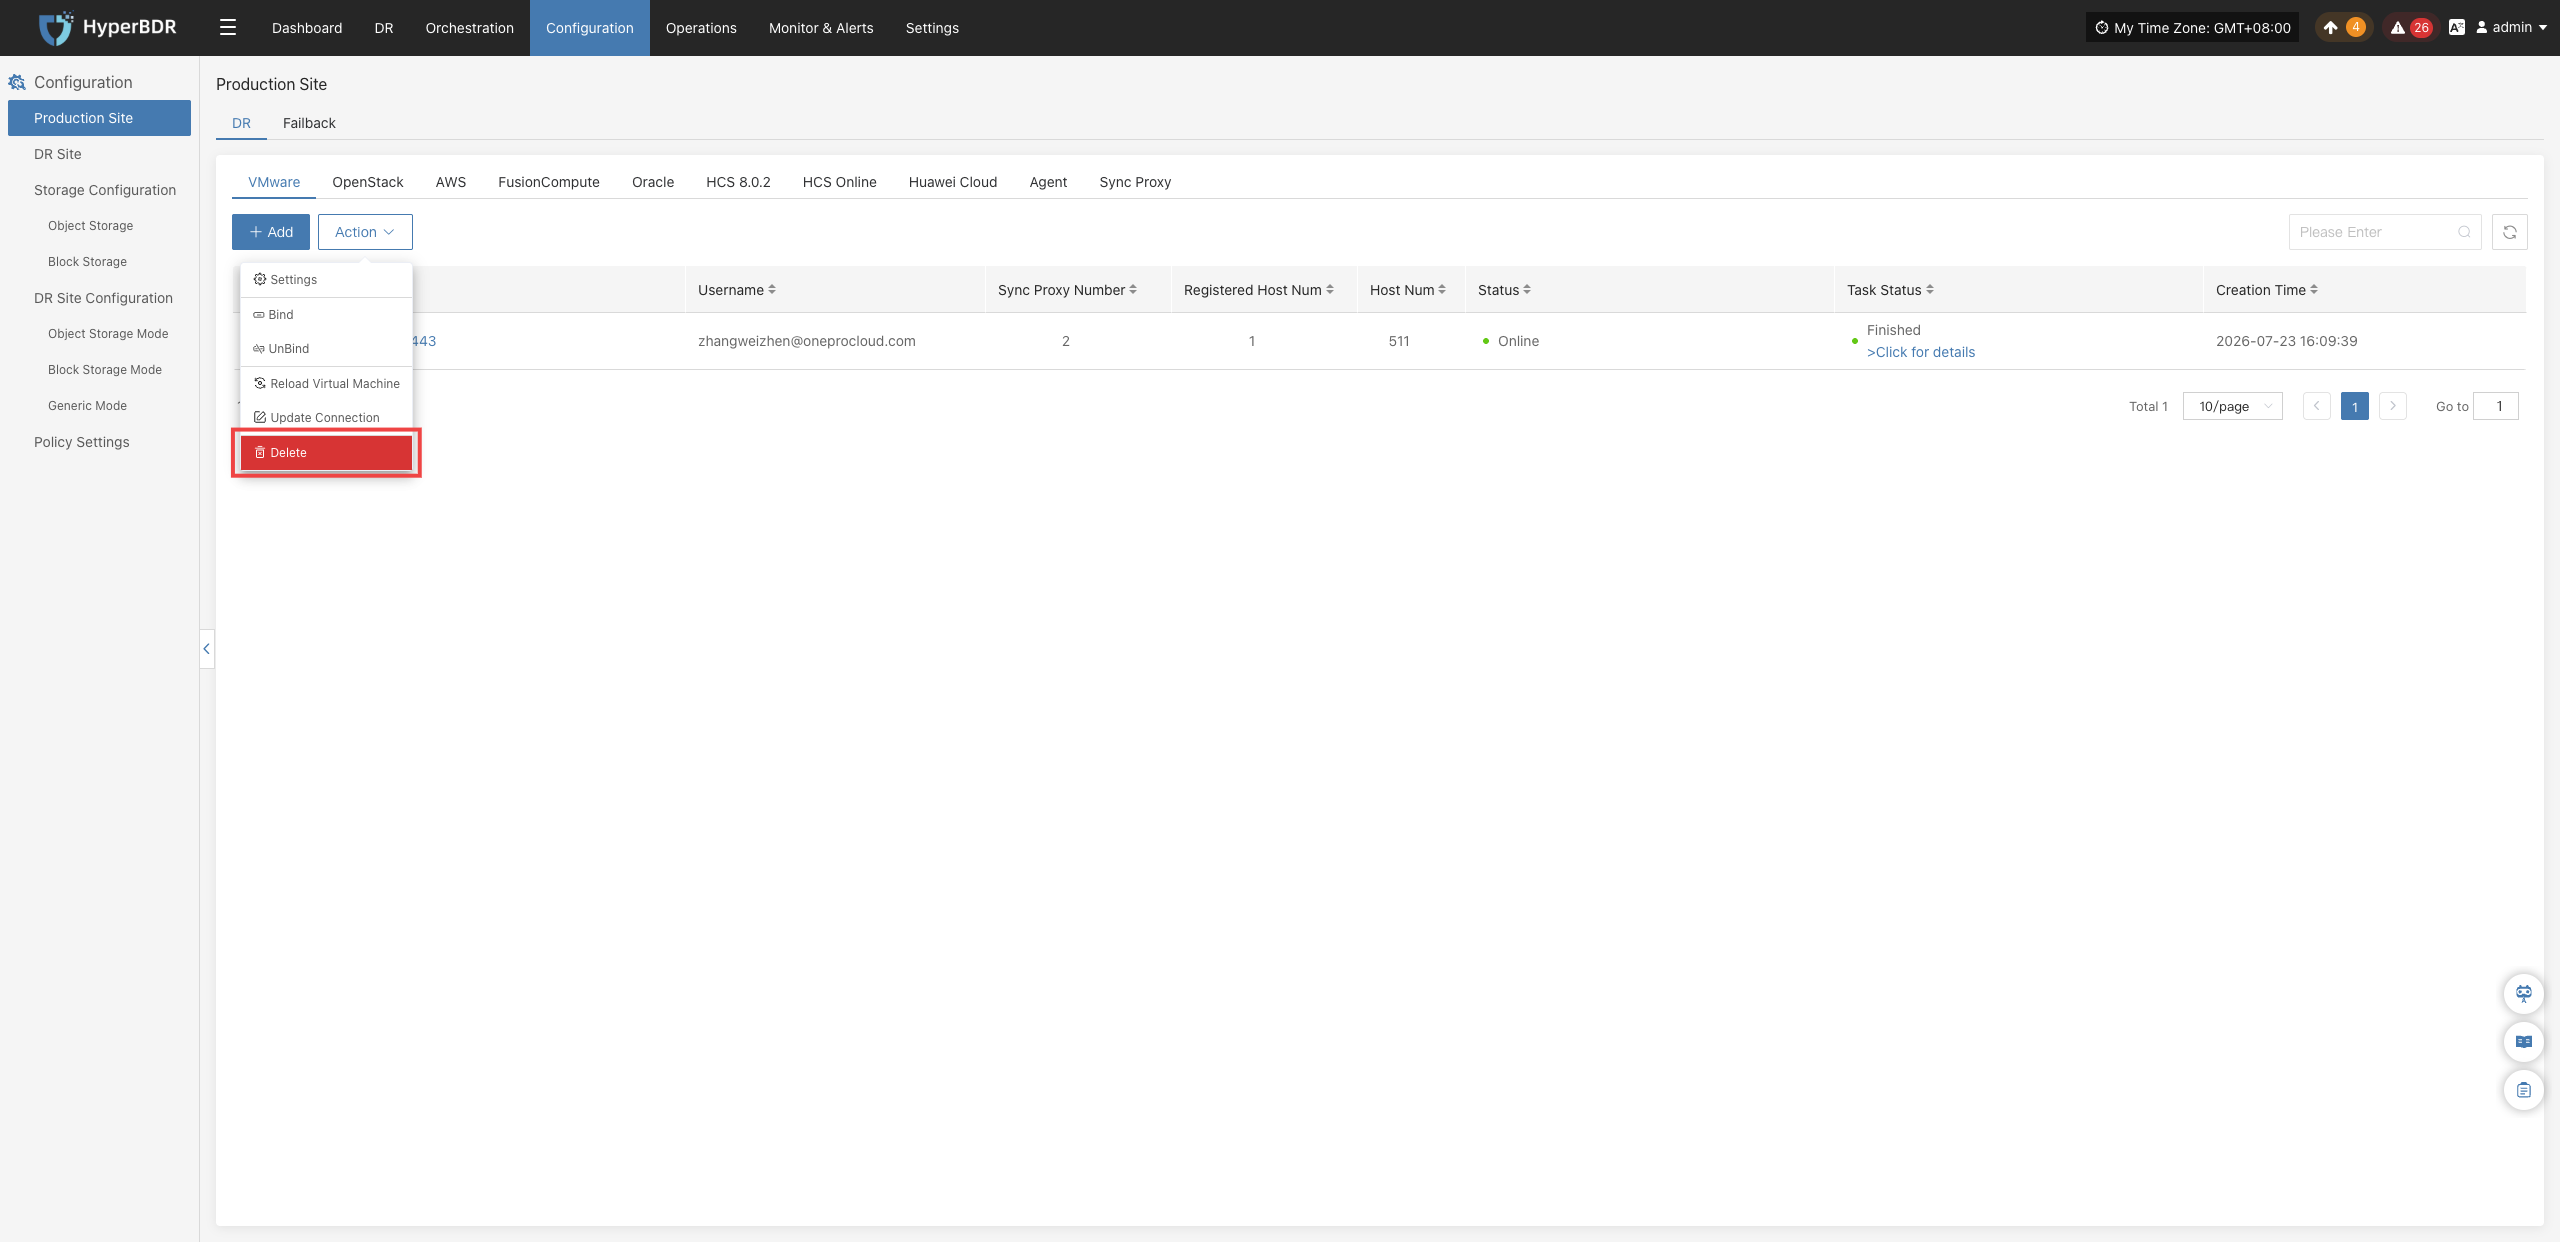
- Once prerequisites are met, click "OK" in the confirmation dialog to complete the permanent deletion of the platform.
Source Agent
When the source workload is a physical server, a standalone virtual machine (such as KVM, Xen, or Hyper-V), or a cloud host without native snapshot API access, install the Source Agent inside the guest operating system to capture disk data and drive replication.
- Use Cases: Universally applicable across diverse heterogeneous environments, including x86 physical servers, private cloud hypervisors, and public cloud instances;
- Support Matrix: View Source Agent OS Compatibility Matrix.
Prerequisites & Network Policies
Environment Preparation
- Administrator access credentials for the host to be protected (Linux
root, WindowsAdministrator); - HyperBDR platform and Cloud Sync Gateway basic deployment completed;
- For Windows hosts running antivirus or security software, add the Agent installation directory to the trusted whitelist in advance.
- Administrator access credentials for the host to be protected (Linux
Network Policy Requirements
| Source | Target | Port / Protocol | Description |
|---|---|---|---|
| Protected Host (Agent) | HyperBDR Console | 10443 / TCP | Authentication communication and task heartbeat |
| Protected Host (Agent) | HyperBDR Console | 30080 / TCP | Agent installation package download and auto-upgrade |
| Protected Host (Agent) | Cloud Sync Gateway | 13260 / TCP | Data transmission channel for block storage mode |
| Protected Host (Agent) | Cloud Sync Gateway | 443 / TCP (HTTPS) | Encrypted data transmission port for block storage mode |
| Protected Host (Agent) | Object Storage Services (OBS/S3/OSS) | 443 / TCP (HTTPS) | Direct transmission port for object storage mode (ensure valid certificates and DNS resolution) |
Linux Agent
Install Linux Agent
- Log in to the HyperBDR console, and click "Production Site" > "Source Agent".
- Under the Linux tab, click "Copy Command" to obtain the one-line installation command.

- Log in to the source Linux server, and execute the copied command in the terminal as
root.

- Wait for the script to download dependencies, deploy services, and complete host registration automatically. Once the success message is output, you can view the registered host in the platform host list.

Uninstall Linux Agent
Note: Before uninstalling the Agent, ensure the host has been deregistered on the "Host DR" > "Select Host" page in the HyperBDR console.
- Log in to the source Linux operating system terminal.
- Execute the official one-click uninstallation script:
bash /var/lib/egisplus-agent/uninstall_agent.sh - When the console displays the uninstallation success prompt, system services and temporary dependencies are completely removed.

Windows Agent
Install Windows Agent
- On the console "Production Site" > "Source Agent" page, click "Download Now" to obtain the Windows Agent installation package (
windows-agent.zip).
- Extract the package to a local directory on the source Windows server.

- Right-click
Install.exeand select "Run as administrator".

- In the installation wizard, click "Install >" to start the installation. If prompted about antivirus software, confirm that the Agent has been whitelisted and click "OK" to continue.


- Once installation is complete, a prompt will ask to start the service. Click "Yes" to enter the service initialization wizard.

Start Windows Agent & Precheck
- In the service management window, click "Precheck" in the lower-left corner to perform an environment health inspection.

- Precheck Item Descriptions:
| Check Item | Item Name | Description & Recommended Action |
|---|---|---|
| 1/9 | Service Start Permission | Check whether the account has administrative permissions to start and query Windows services. |
| 2/9 | Language Environment Support | Check whether the system user display language supports English. |
| 3/9 | VSS Snapshot Command Permission | Verify whether the vssadmin command can successfully create and delete VSS volume shadow copies. |
| 4/9 | Antivirus Software Interception | Check whether any security software blocks Windows Agent service registration and startup. |
| 5/9 | Filesystem & Free Space | Check whether volume filesystems and free space meet synchronization cache requirements. |
| 6/9 | Volume Type Support | Ensure no unsupported dynamic volume types exist (RAID-5, Mirror, Stripe, and Spanned volumes are not supported). |
| 7/9 | Critical Patch Check | For Windows Server 2008 / 2008 R2, verify that patch KB4474419 is installed. |
| 8/9 | Third-Party VSS Conflicts | Check whether third-party backup software has left locked VSS shadow copies. |
| 9/9 | Windows Backup Schedule | Temporarily disable built-in Windows backup schedules to prevent volume locking conflicts. |
- Once all prechecks pass (showing green PASS), click "OK".

- Click "Start Services" to launch core synchronization services.

- Confirm that the service status shows Running, then click "OK" to complete configuration.


- Return to the HyperBDR console; the Windows host will appear in the host list as automatically registered and online.
Uninstall Windows Agent
- On the source Windows server, open "Control Panel" > "Programs and Features" (Uninstall a program).


- Locate Windows_Agent (Publisher: OneProCloud) in the list, right-click and select "Uninstall".

- In the confirmation dialog, click "Yes". Wait for the uninstaller to remove services and drivers, then click "OK" to finish.


Source Sync Proxy
Technical Architecture & Principles
The Source Sync Proxy (Sync Proxy) is HyperBDR's core data synchronization engine for agentless (Agentless) disaster recovery, designed for VMware, OpenStack + Ceph, AWS EC2, FusionCompute, Oracle Cloud, HCS, and Huawei Cloud source production environments.
By deploying a lightweight Sync Proxy within the source local network, HyperBDR captures virtualized or cloud disk snapshot data locally via native hypervisor/cloud APIs and transfers backup data securely and efficiently to the target DR site. This architecture eliminates the security risks and performance overhead of invoking production APIs across wide-area networks.
- Internal Communication: Sync Proxy only requires access to the source production platform's management network (API authentication and snapshot control) and storage network (disk data reading).
- External Transmission: Sync Proxy only communicates with the HyperBDR Console and the target DR site, isolating and protecting the source production platform's internal network topology.

Node Specifications & Network Requirements
Recommended Specifications
Sync Proxy runs on an Ubuntu 24.04 operating environment. By default, a single Sync Proxy node supports concurrent mounting and synchronization of up to 50 disks. When protecting large numbers of hosts or high disk counts, you can scale out by deploying multiple Sync Proxy nodes at any time.
| Parameter | Recommended Specification | Description |
|---|---|---|
| Operating System | Ubuntu 24.04 LTS | Official standard image or provided OVA / QCOW2 template |
| CPU | 4 Cores (4 vCPU) | Can be increased for high concurrency scenarios as needed |
| Memory | 8 GB | Sufficient memory ensures adequate caching performance |
| System Disk | 50 GB | Used for system runtime and temporary log caching |
Network Policy & Port Requirements
The virtual machine or host deploying Sync Proxy must satisfy the following network connectivity requirements:
| Source | Target | Port / Protocol | Description |
|---|---|---|---|
| Sync Proxy | HyperBDR Console | 10443 / TCP | Control communication and bidirectional node authentication |
| Sync Proxy | HyperBDR Console | 30080 / TCP | Sync Proxy installation package download and component updates |
| Sync Proxy | Source Platform Management & Storage Planes | Platform native ports | Invoking source APIs (e.g., vCenter 443, Keystone 5000, etc.) and storage interfaces |
| Sync Proxy | DR Cloud Sync Gateway / Storage Services | 13260 / 443 / TCP | Transferring backup data to the disaster recovery target |
Node Management & Operations
After deploying and registering Sync Proxy via any production platform wizard, manage the node lifecycle on the "Source Sync Proxy" page.

Settings
In the Sync Proxy list, click "More Operations" (or "Action") > "Settings" on the right side of the target node row to fine-tune running parameters:


| Setting | Default Value | Description |
|---|---|---|
| HTTP Communication Timeout | 600 seconds | Timeout threshold for communications between the proxy node, the source production platform, and the console. Increase this value under poor network conditions or large-batch API calls to prevent retry failures. |
| Max Concurrent Disks | 50 | Maximum number of disks allowed to be mounted simultaneously for data reading on a single node. Increasing this requires higher CPU and memory allocations; the recommended upper limit is 150 per node. |
Bind
Click "More Operations" (or "Action") > "Bind" to associate the Sync Proxy with an added production platform. Once bound, the node can handle disk data synchronization tasks for that platform.


Multi-Node Concurrency Mechanism:
- One-to-Many: A single Sync Proxy node can be bound to multiple source production platforms simultaneously.
- Many-to-One: A single production platform can be bound to multiple Sync Proxy nodes. HyperBDR's load-balancing scheduler automatically distributes disk mounting and replication tasks across proxies, significantly boosting throughput for large-scale host migrations and backups.
Note: Multiple nodes provide concurrency scalability. If a proxy node experiences physical or network interruption, its active sync tasks will fail; resolve the proxy issue and retry. Active in-flight tasks do not automatically fail over to other nodes.
Unbind
Click "More Operations" (or "Action") > "Unbind" to disassociate the proxy node from the specified production platform.


Note: Before unbinding, ensure the Sync Proxy has no ongoing synchronization or backup tasks. After unbinding, the node can be rebound to another platform or deleted.
Delete
Click "More Operations" (or "Action") > "Delete" to permanently remove the Sync Proxy node from the system.

Note: A proxy node bound to any production platform cannot be deleted directly. You must first perform "Unbind" and ensure the node is completely unbound before deletion.
Failback
When configuring a Failback Production Site, the overall configuration logic is consistent with the DR Production Site workflow. The meaning and operation of each parameter can be directly referenced in the DR Production Site section. Once the configuration is complete, you can proceed with the Host Failback operation.
