Notification
Notification
When an alert occurs, the system will notify designated people or groups. Notification recipients can receive alerts by email, SMS, phone, or other methods to ensure timely awareness and response.
Note
If no email or SMS service is configured for notification recipients, you cannot create notification users. Please go to 【O&M Platform】>【Notification Settings】 to configure them.
DR
Create Notification
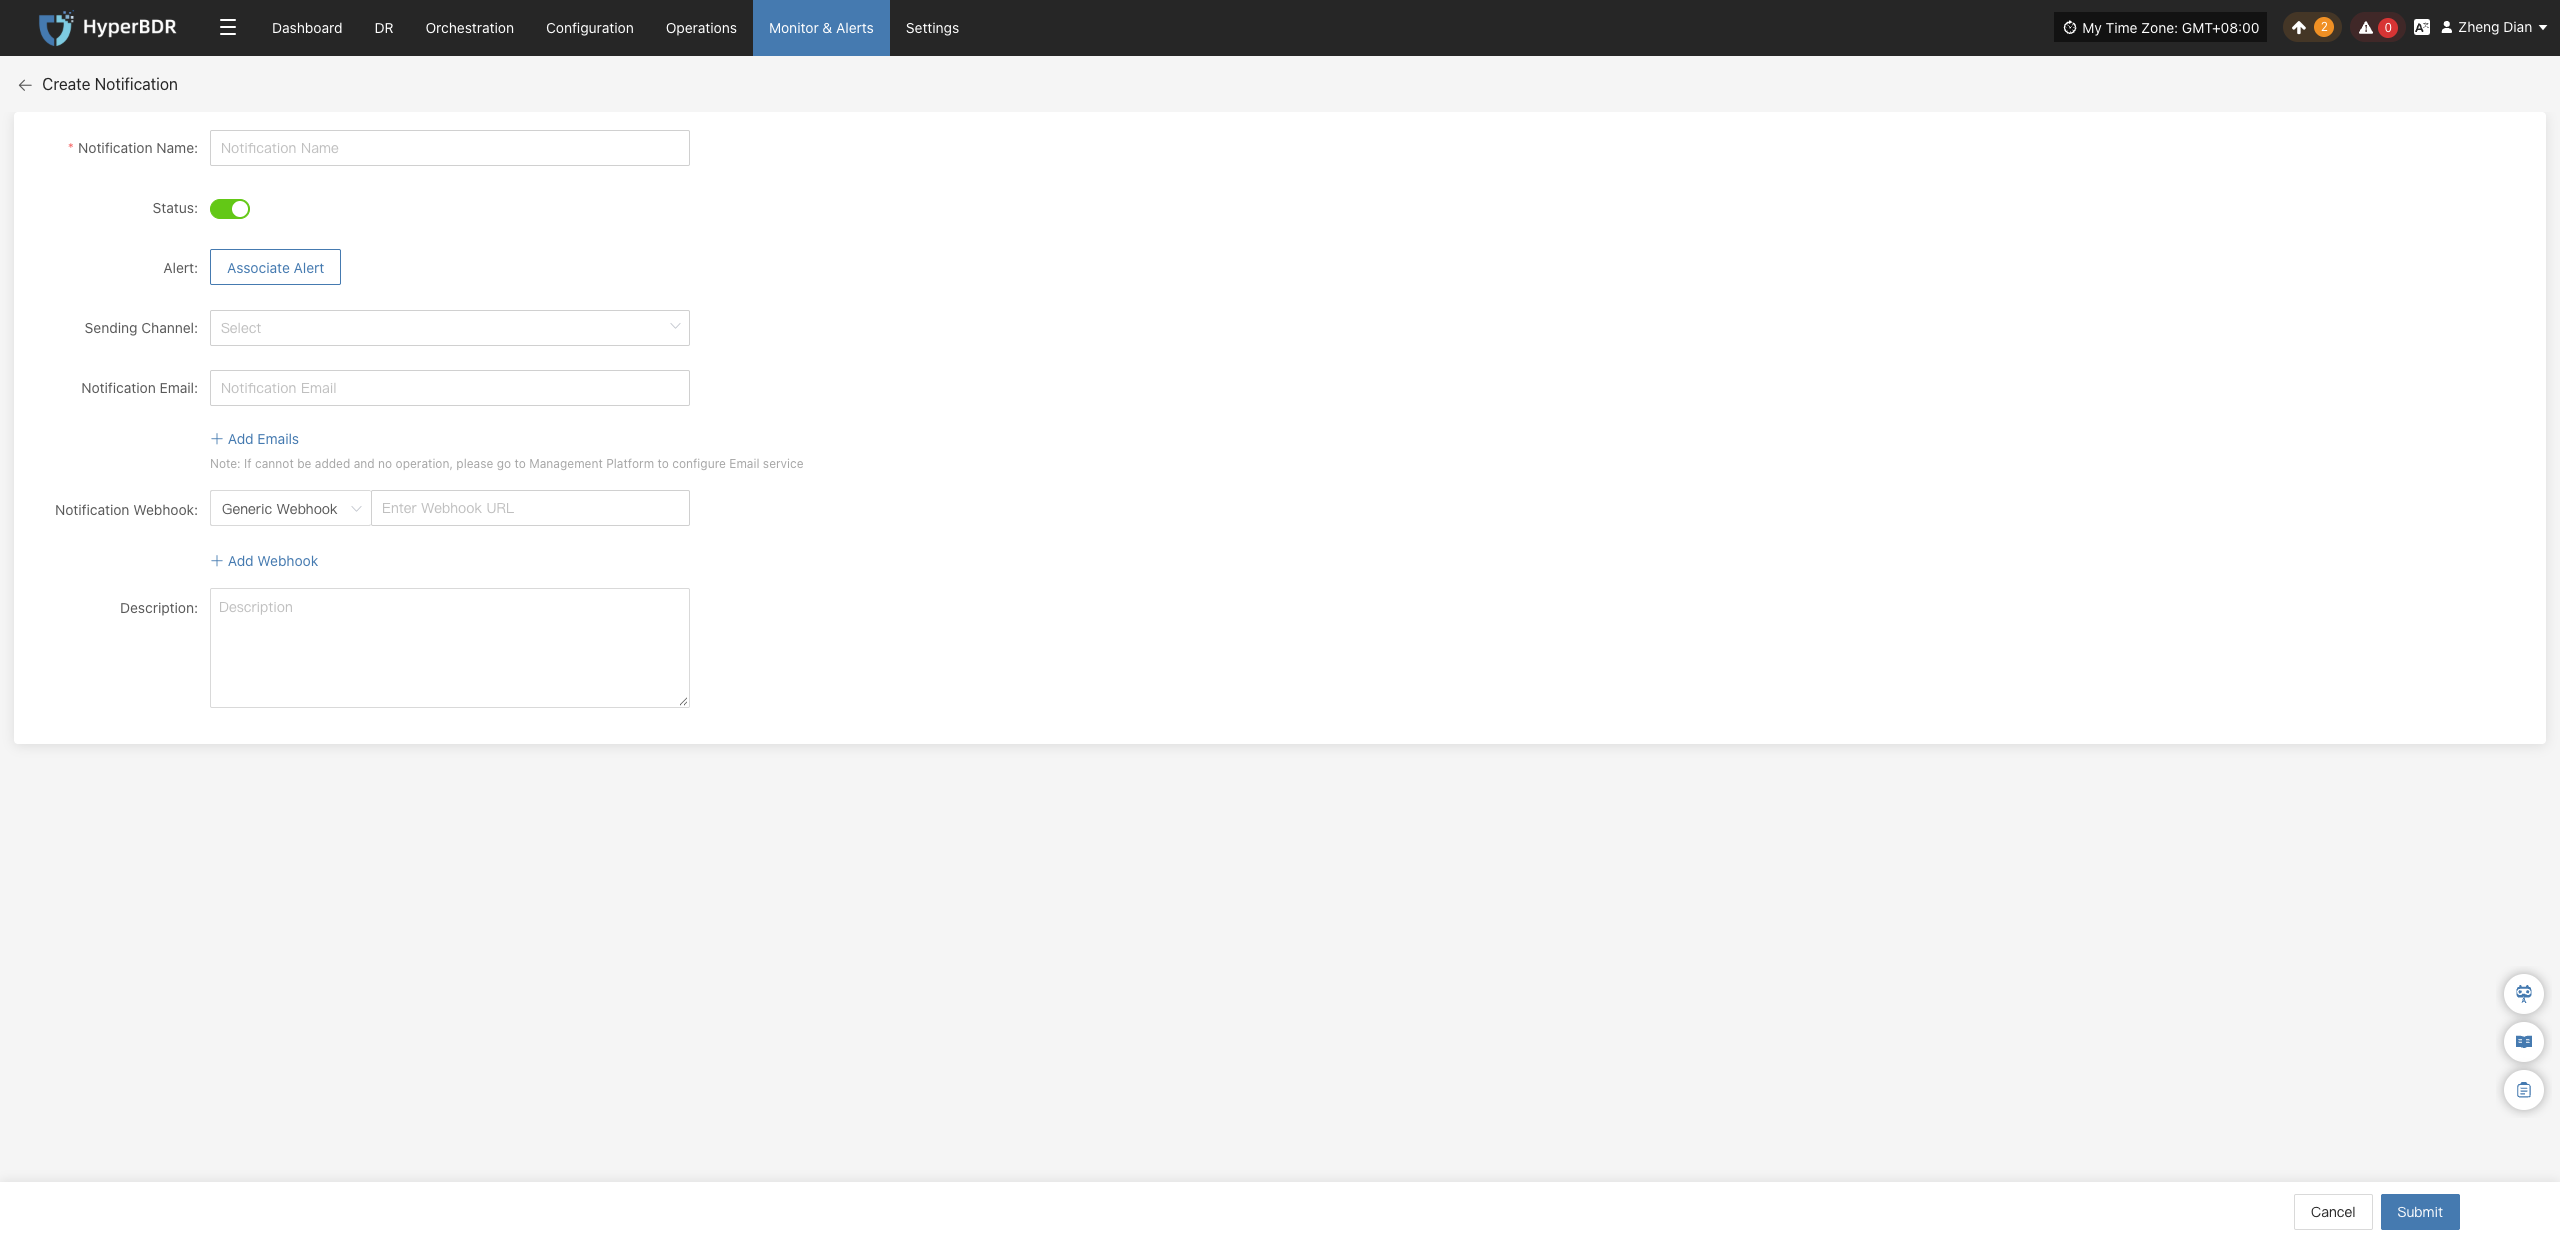
Go to 【Monitoring & Alerts】>【Notification Recipients】, which defaults to the 【DR】 tab, and click 【Create Notification Recipient】. Fill in the relevant parameters and save as prompted to ensure personnel receive alerts in a timely manner.
| Field Name | Example | Description |
|---|---|---|
| Notification Name | test | Custom name of the notification recipient, used to identify different notification configurations. |
| Status | Enabled | Sets whether the notification recipient is active. When enabled, the system sends alert notifications whenever the conditions of associated alert rules are met. |
| Alert Rules | Associated Alert Rules | Click 【Associate Alert Rules】 to select the alert rules to link in the popup selection dialog. The notification recipient will receive and send notifications based on the associated alert rules. |
| Sending Channel | xxx@qq.com | Select a configured notification sending channel from the dropdown list. If no email channel is available in the list, please configure the service based on your deployment model: for on-premises/private deployments, configure email services in the management platform; for SaaS users, please contact technical support to Get Support. |
| Notification Email | XXX@qq.com | Destination email address to receive alert notifications. Click 【+ Add Email】 on the page to add multiple email addresses. |
| Notification Webhook | https://example.com/webhook | Configure the Webhook URL to receive alert notifications. Click 【+ Add Webhook】 on the page to add multiple Webhook URLs. |
| Description | - | Additional remarks or notes for the notification recipient. |
Action
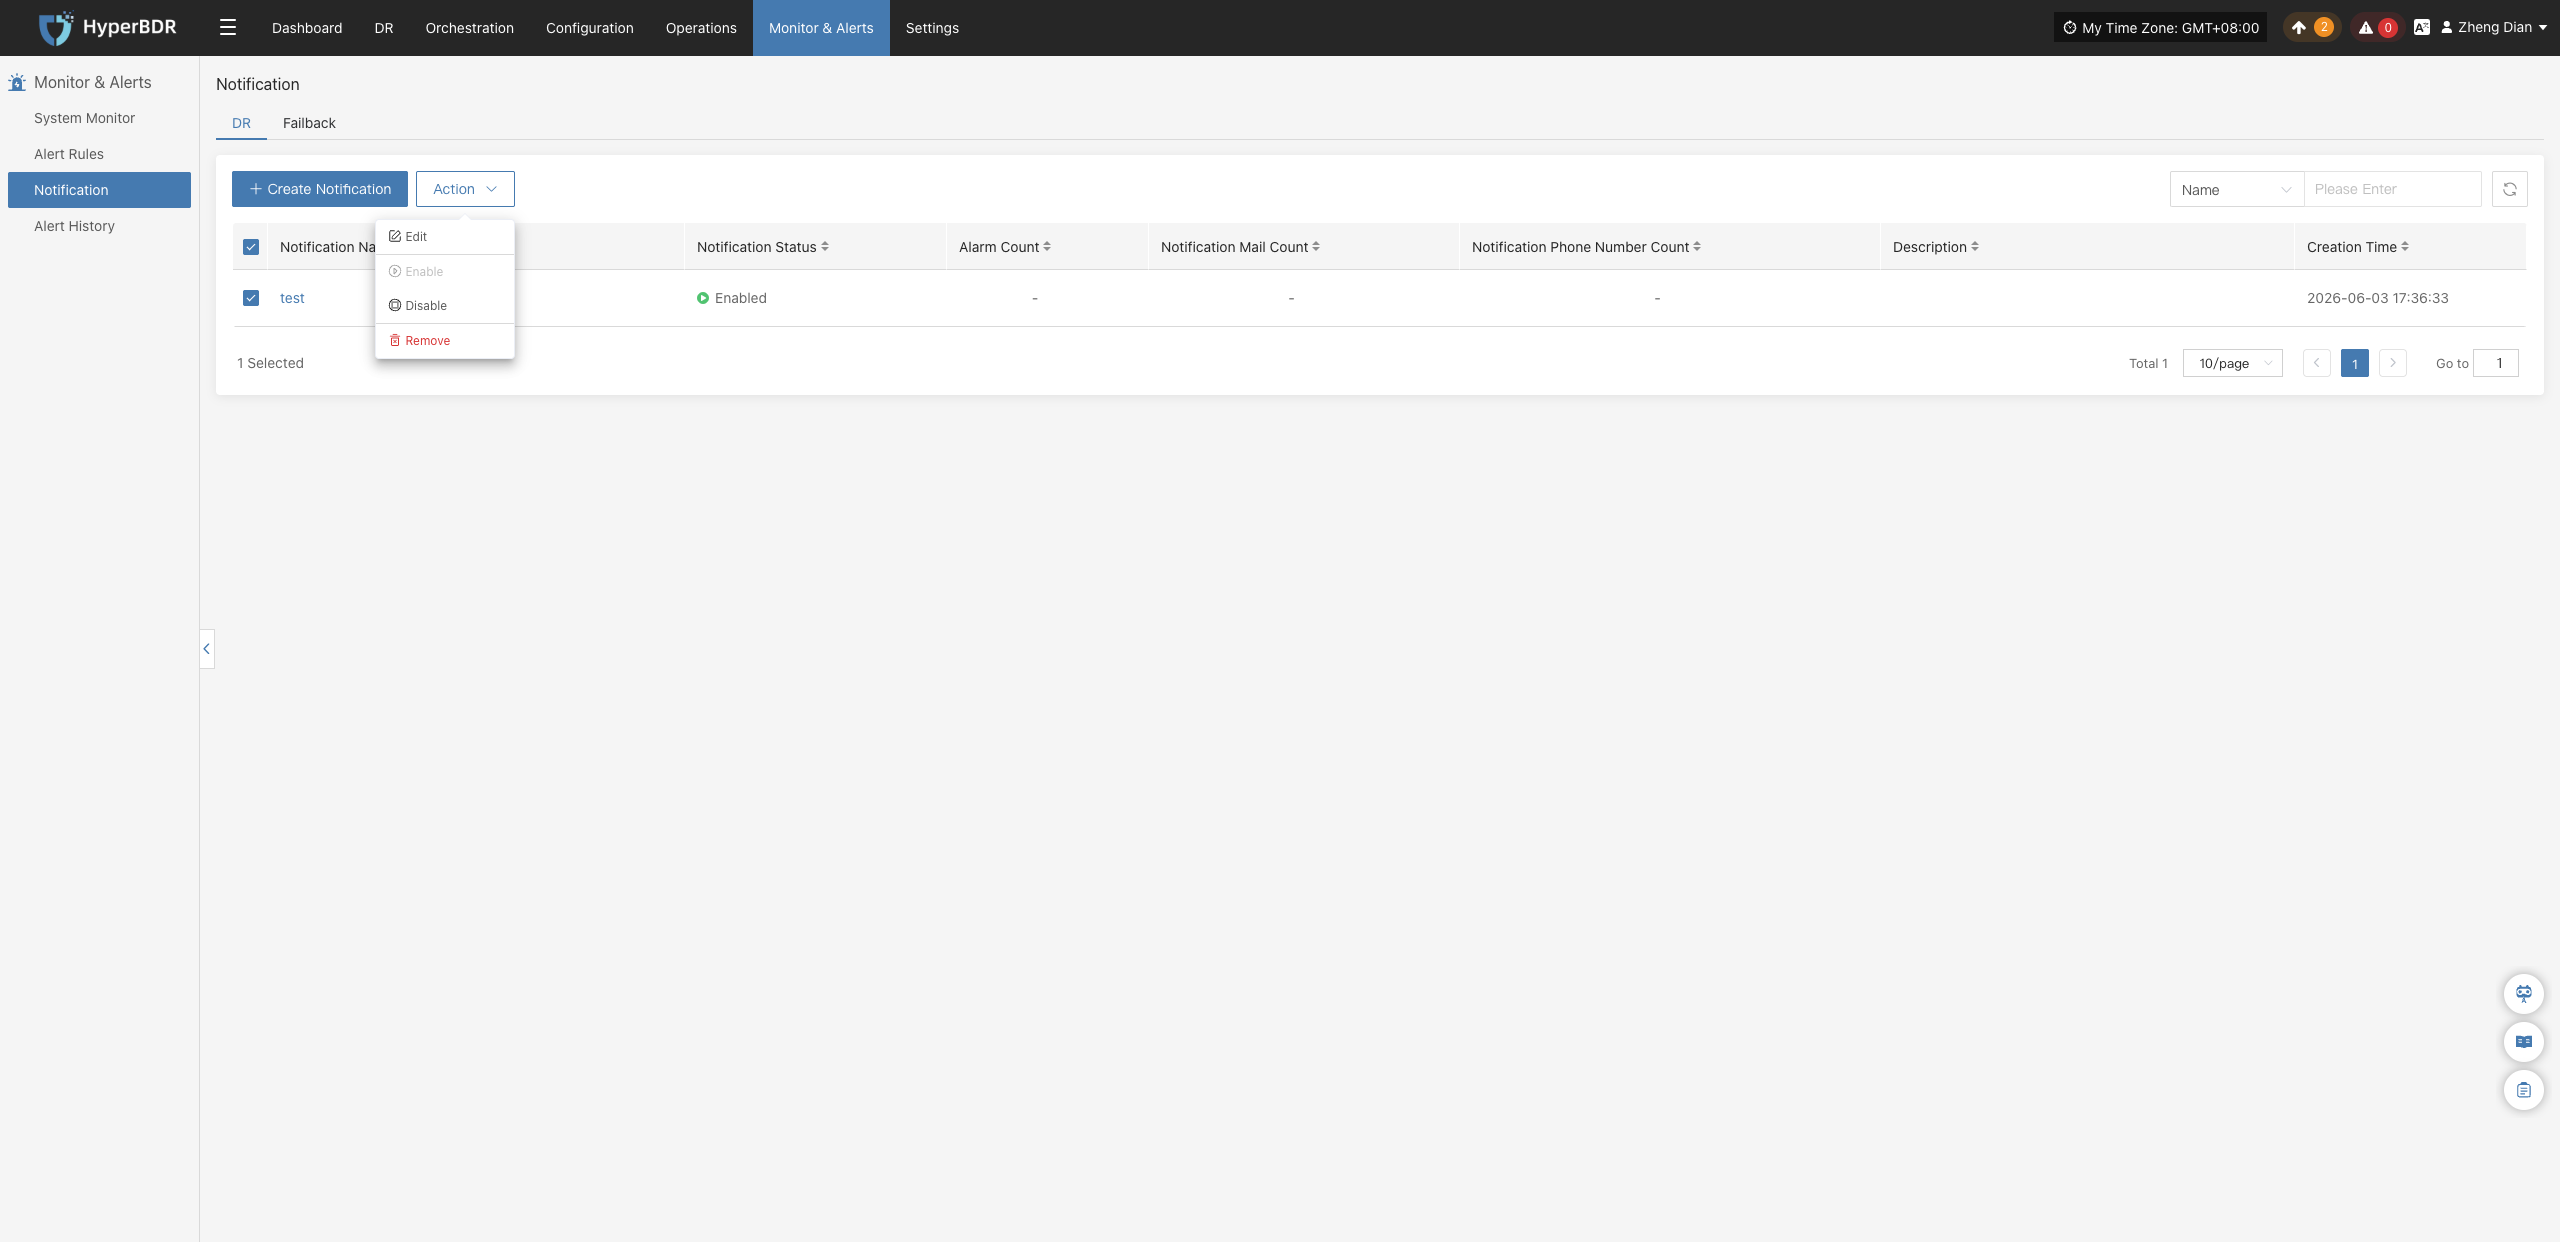
After selecting a notification recipient, click the 【Action】 button to expand the action menu, where you can perform operations including modify, enable, disable, and remove:
Modify
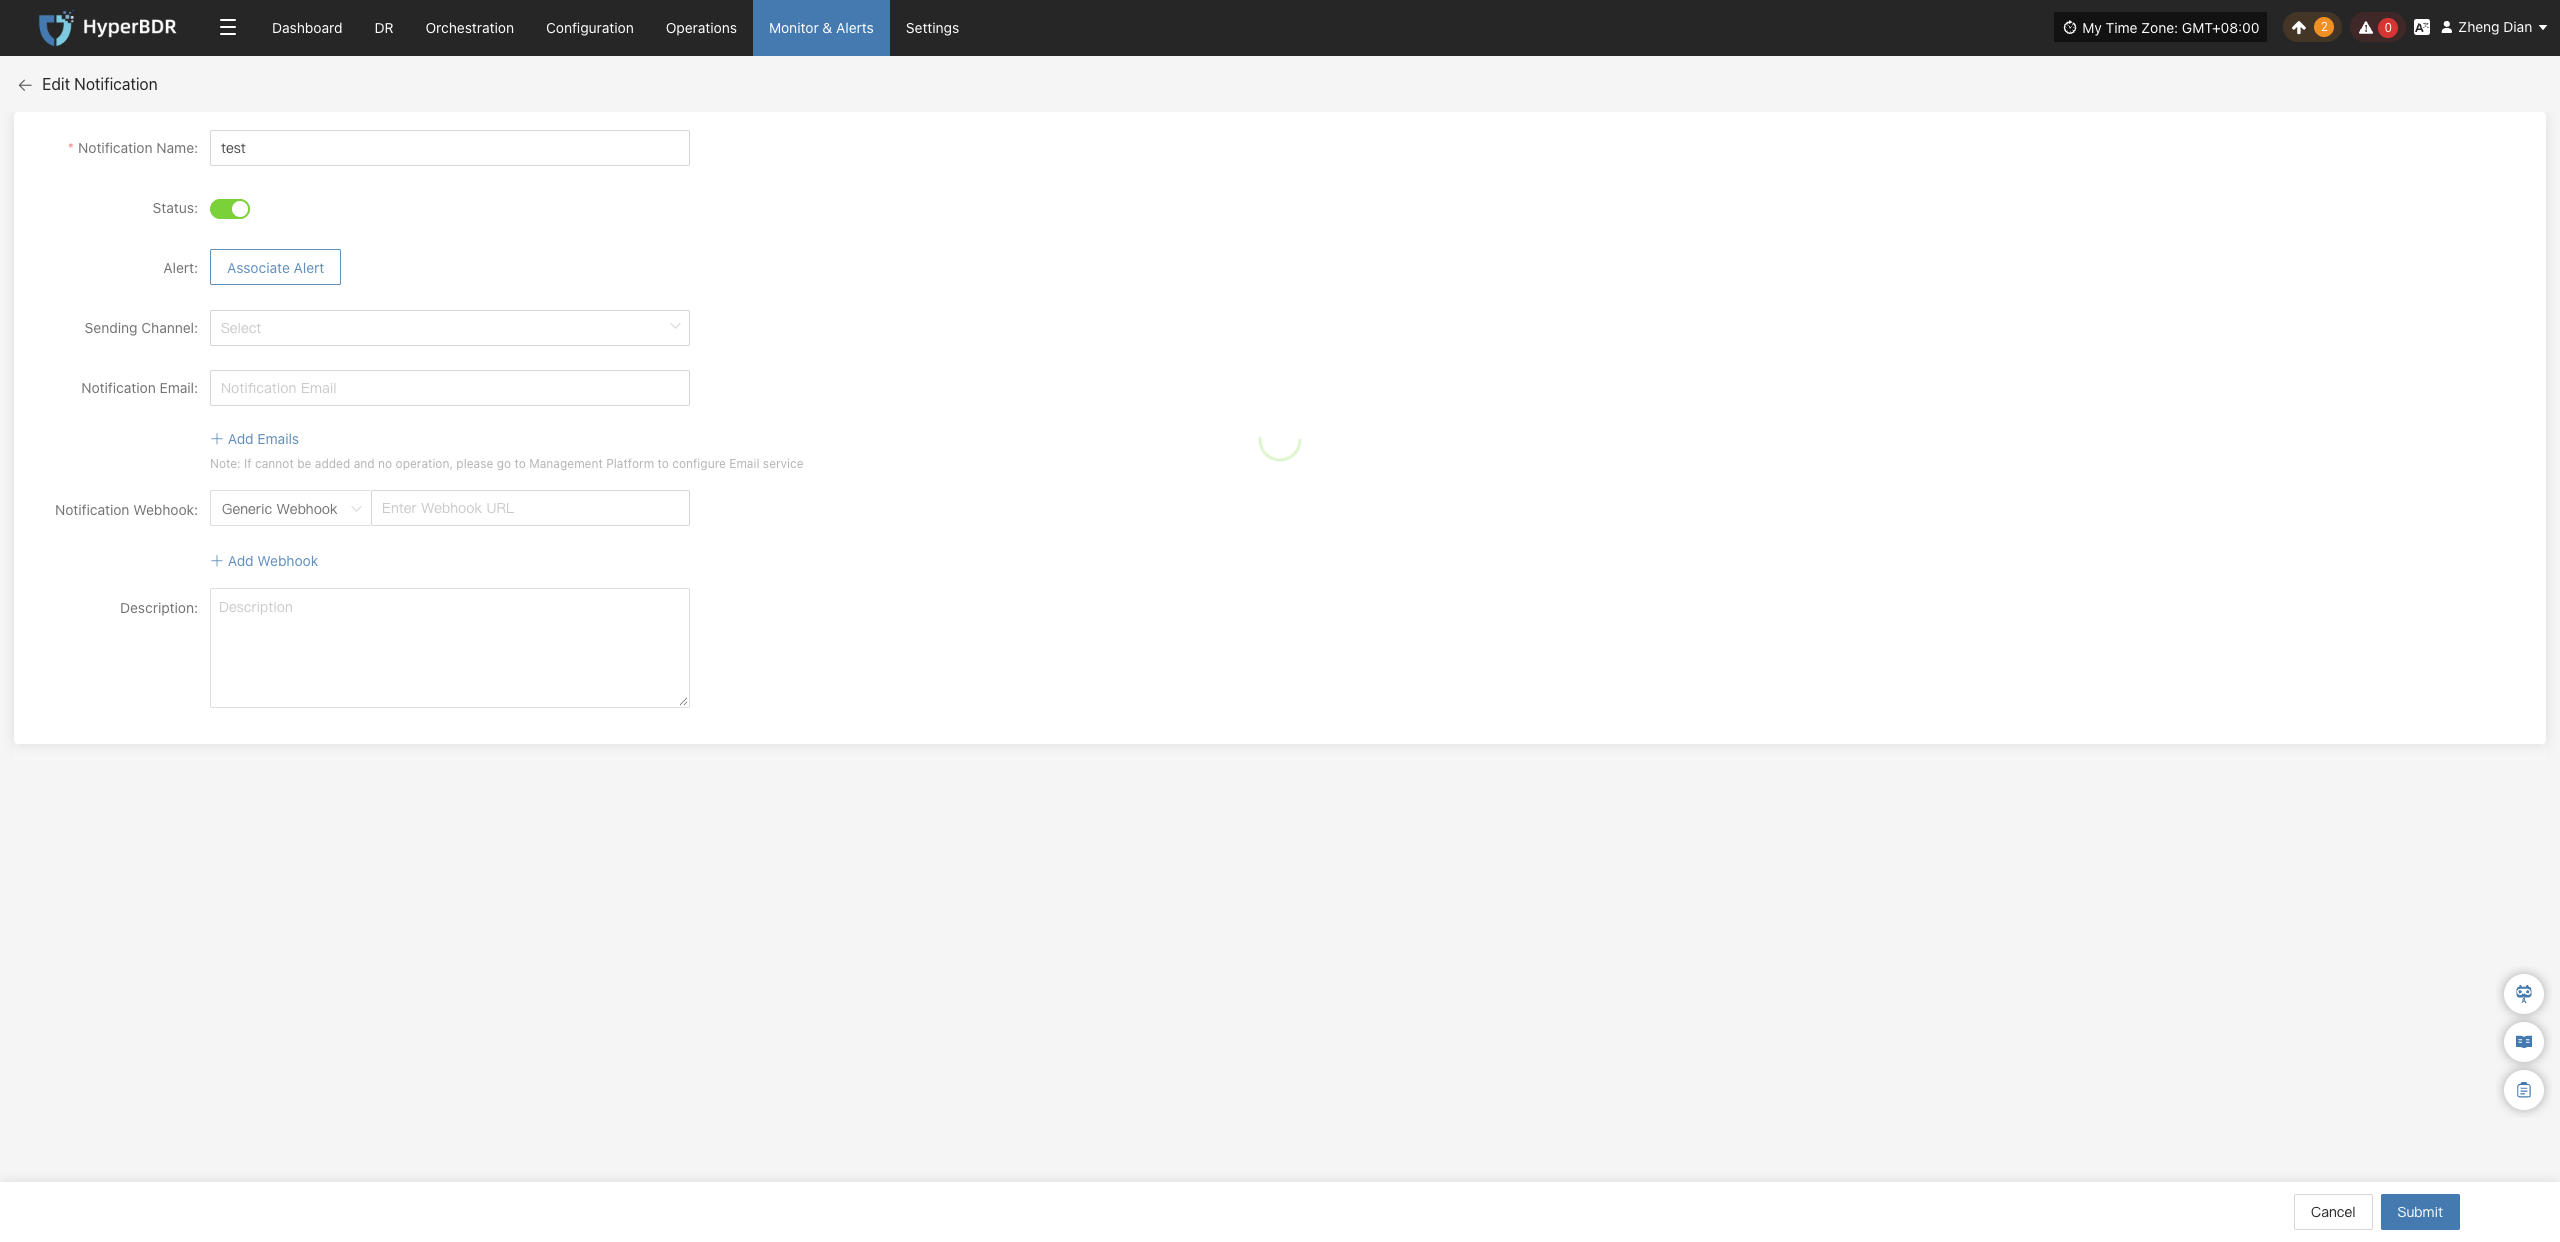
Click 【Modify】 to navigate to the editing page, where you can modify the configuration parameters of the created notification recipient.
Enable
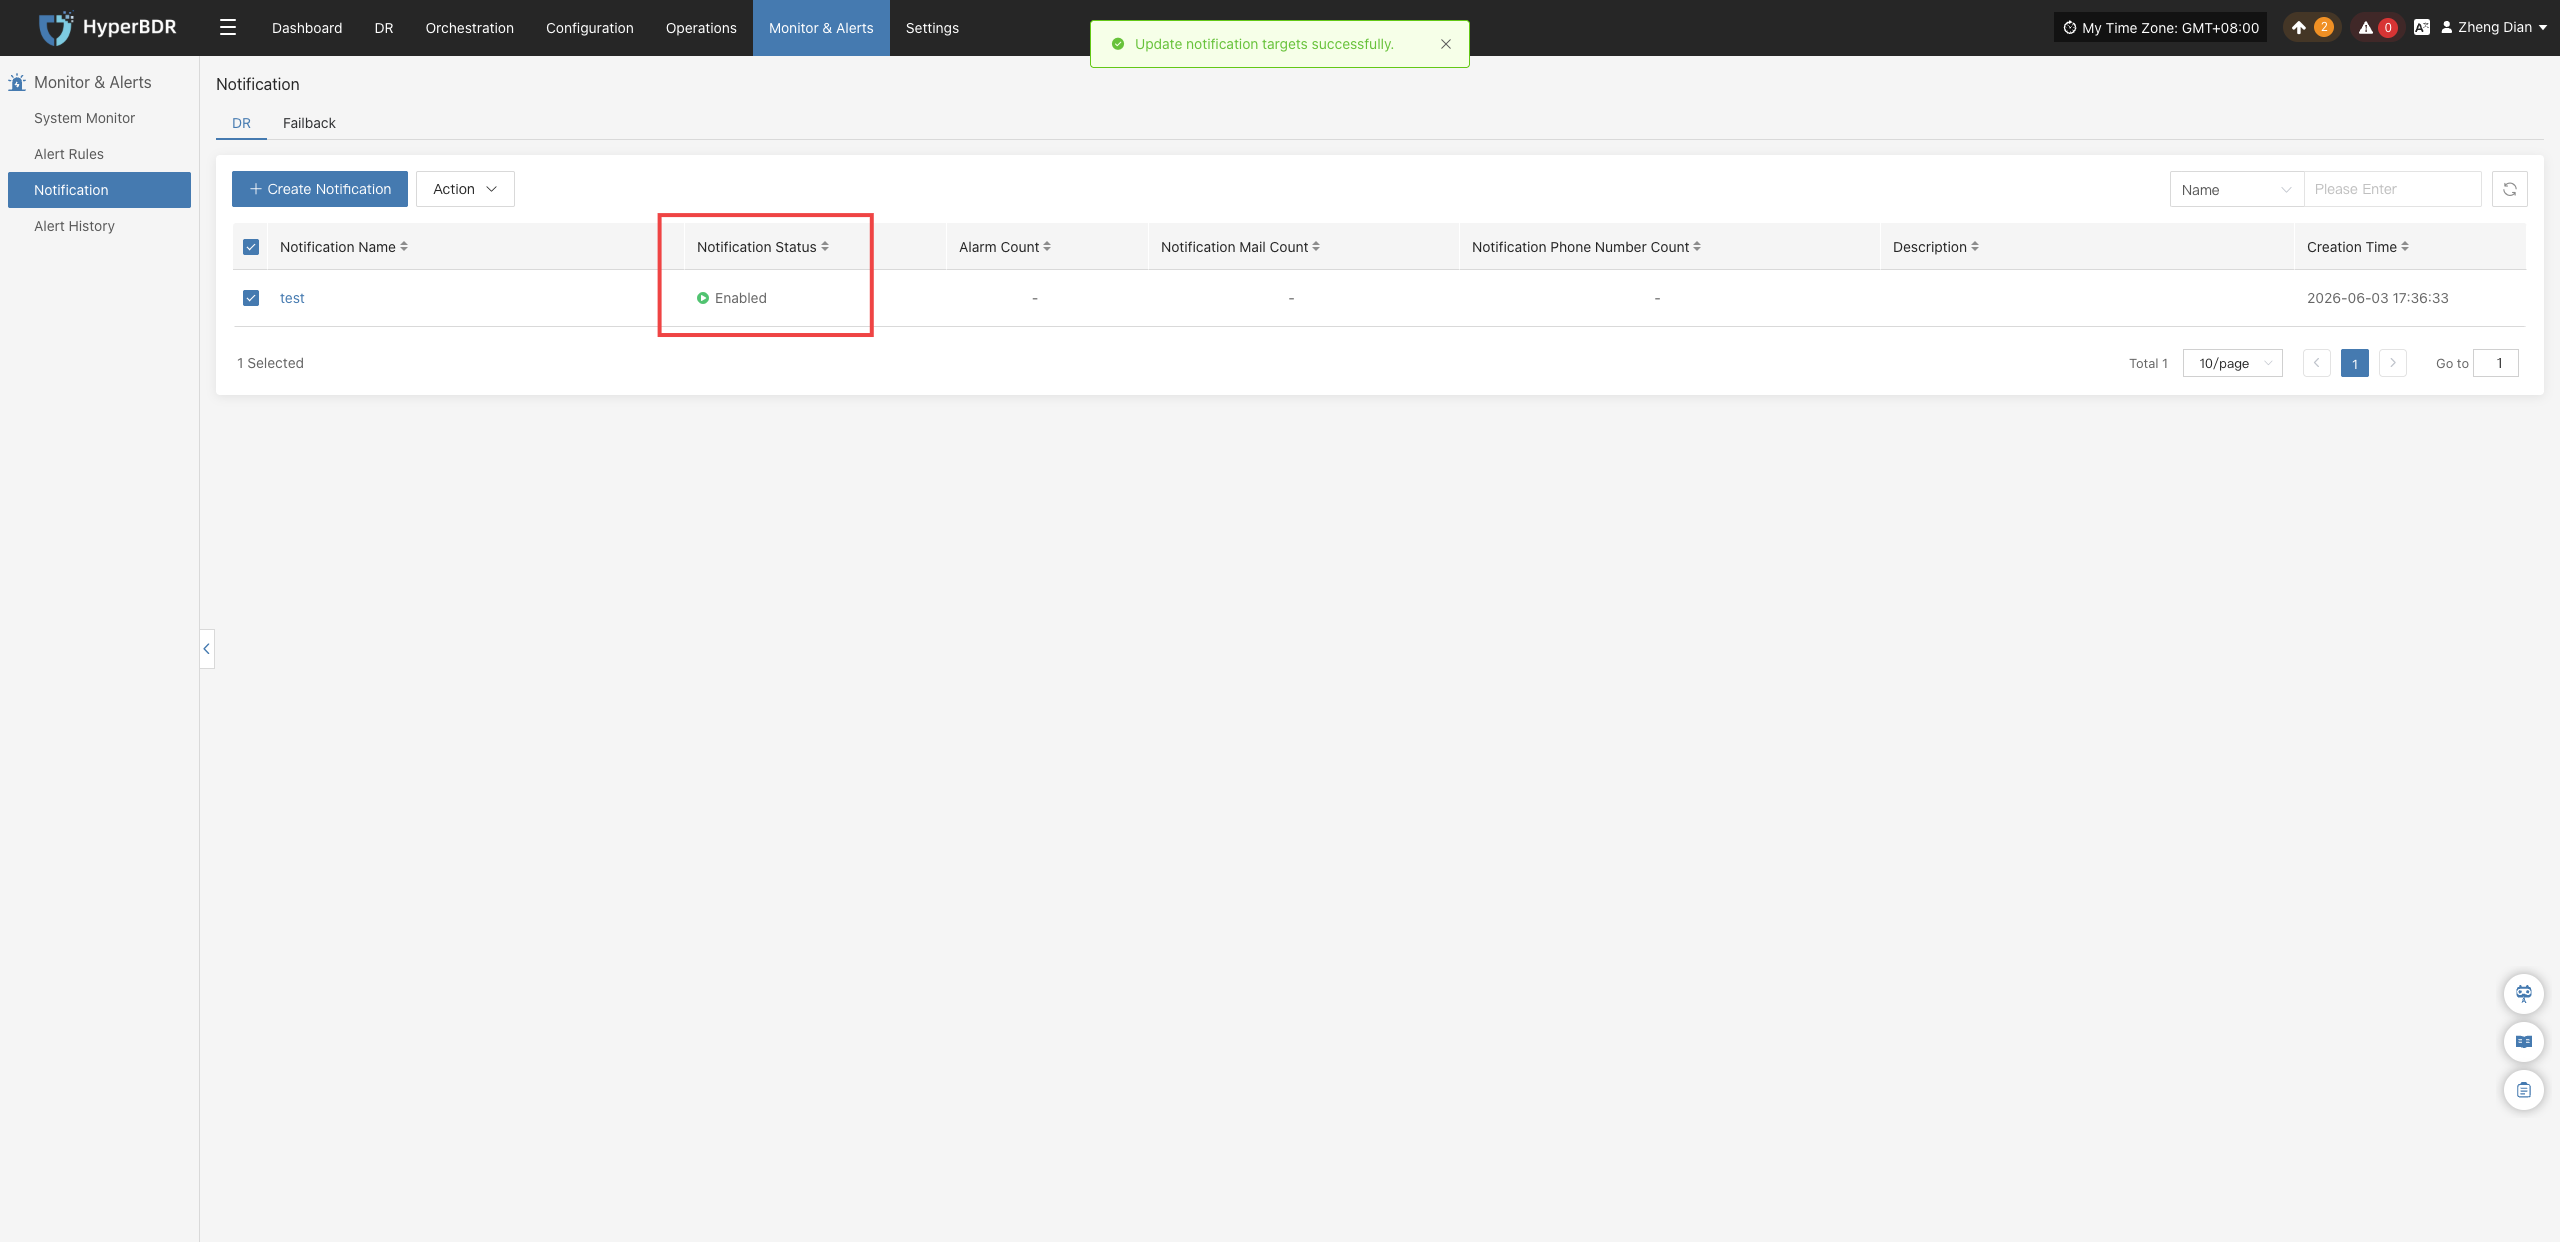
Click 【Enable】 to update the notification recipient status to "Enabled", resuming alert message notifications.
Disable
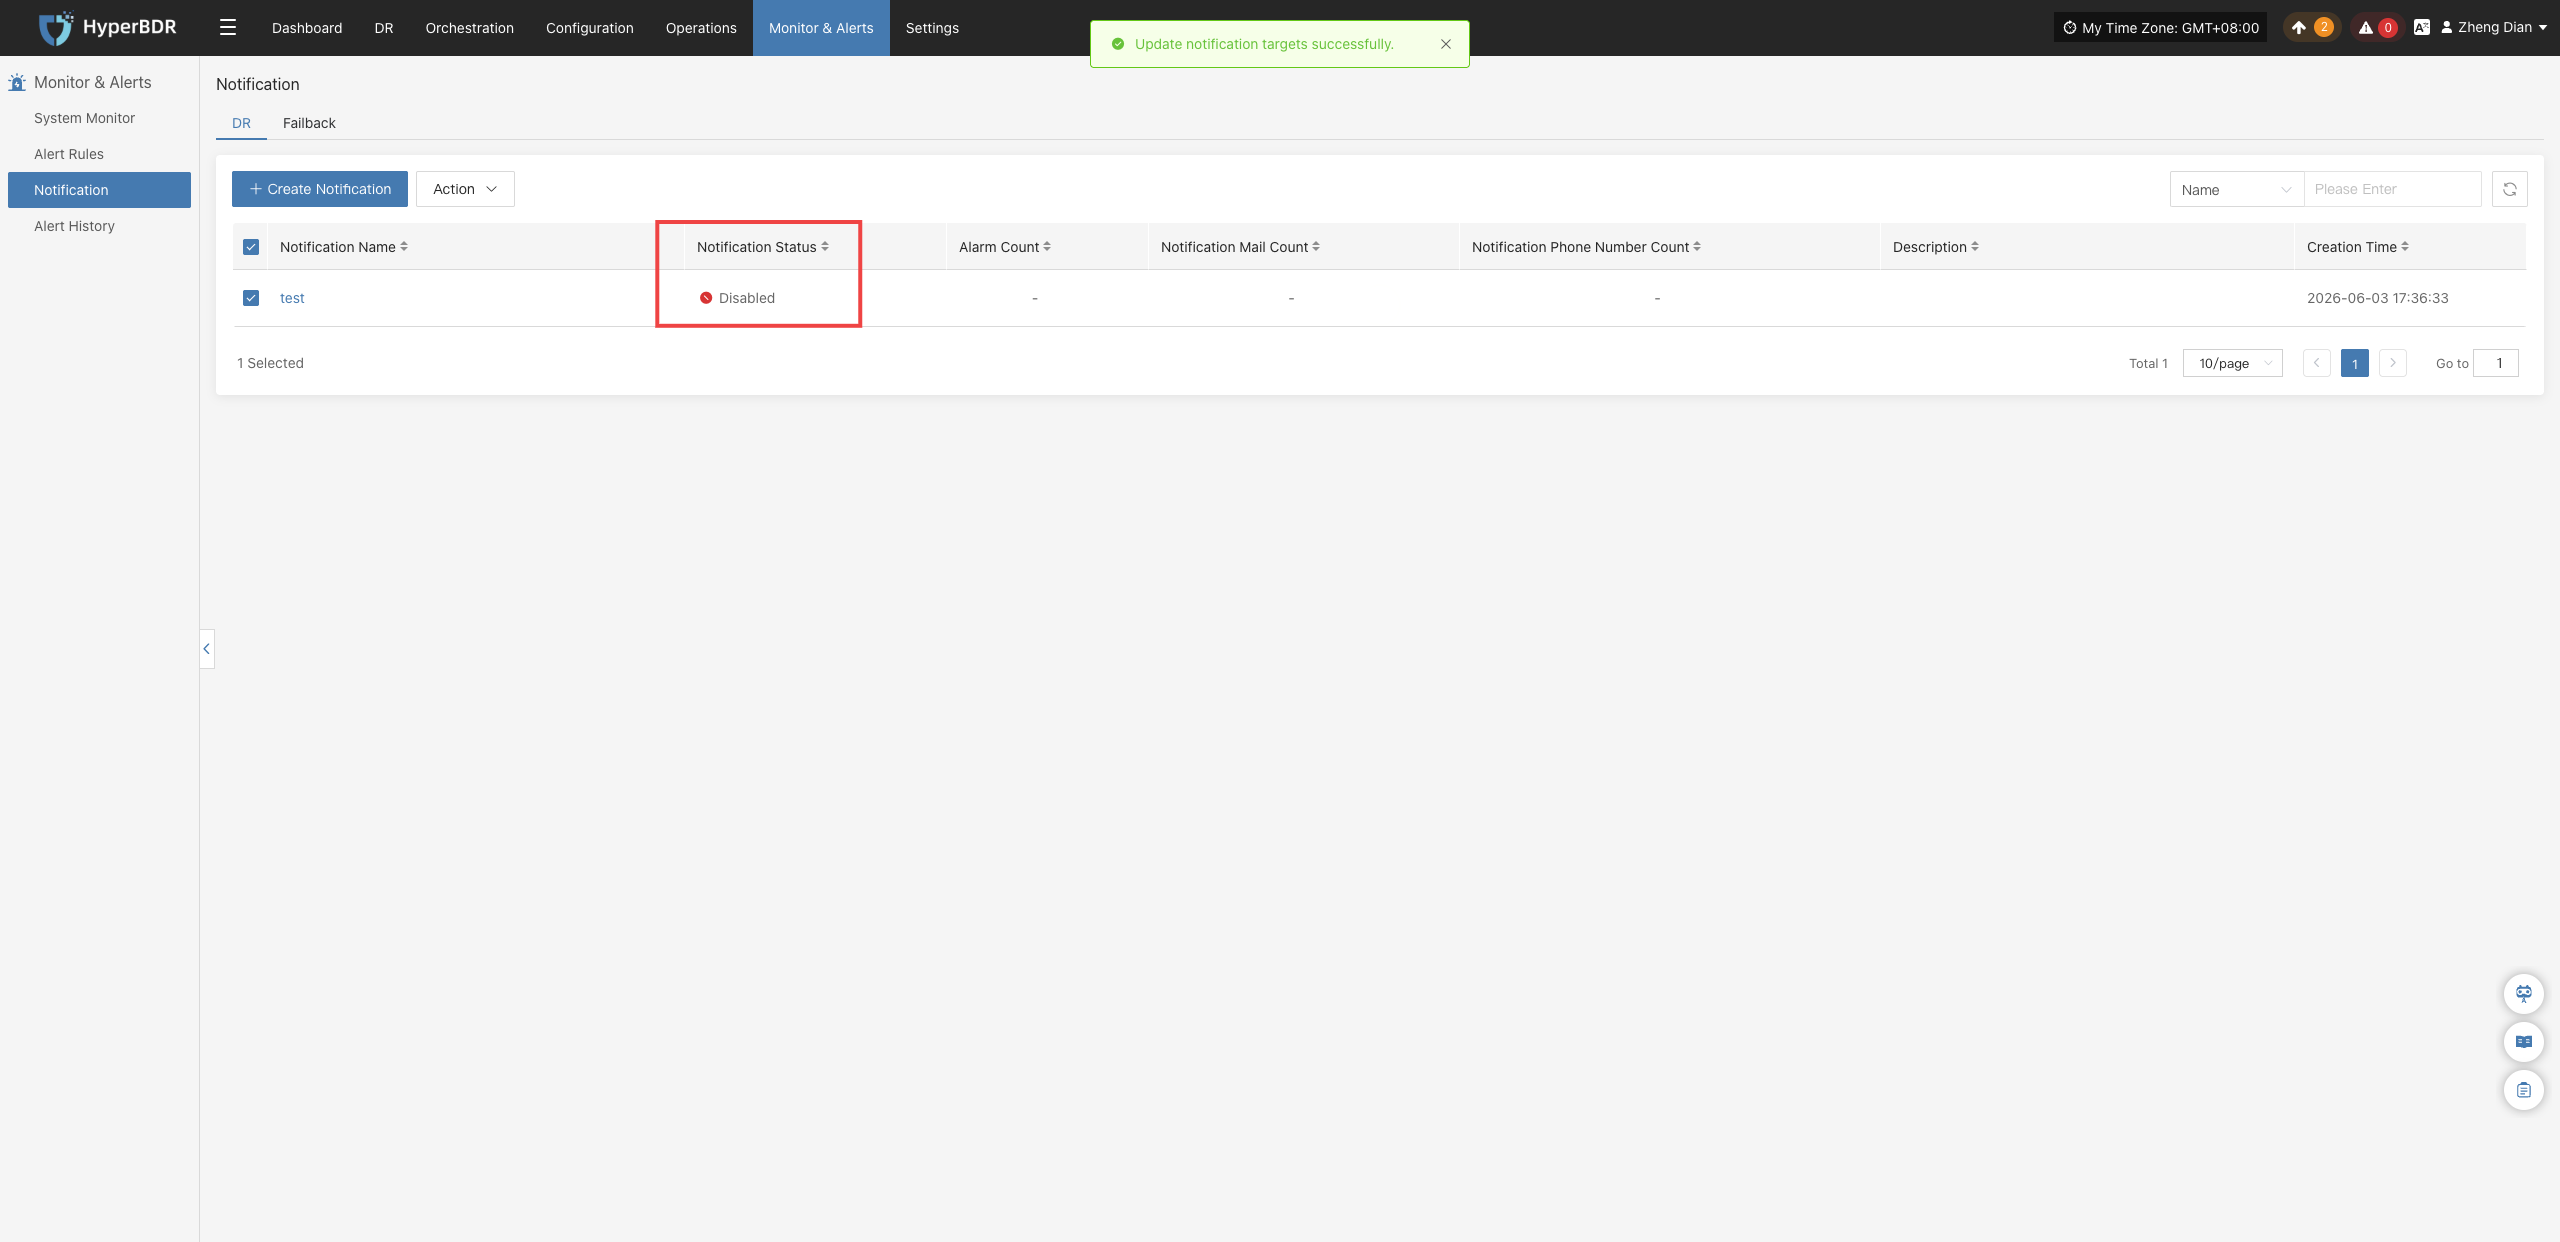
Click 【Disable】 to update the notification recipient status to "Disabled". No notifications will be sent while the recipient is in the disabled state.
Remove
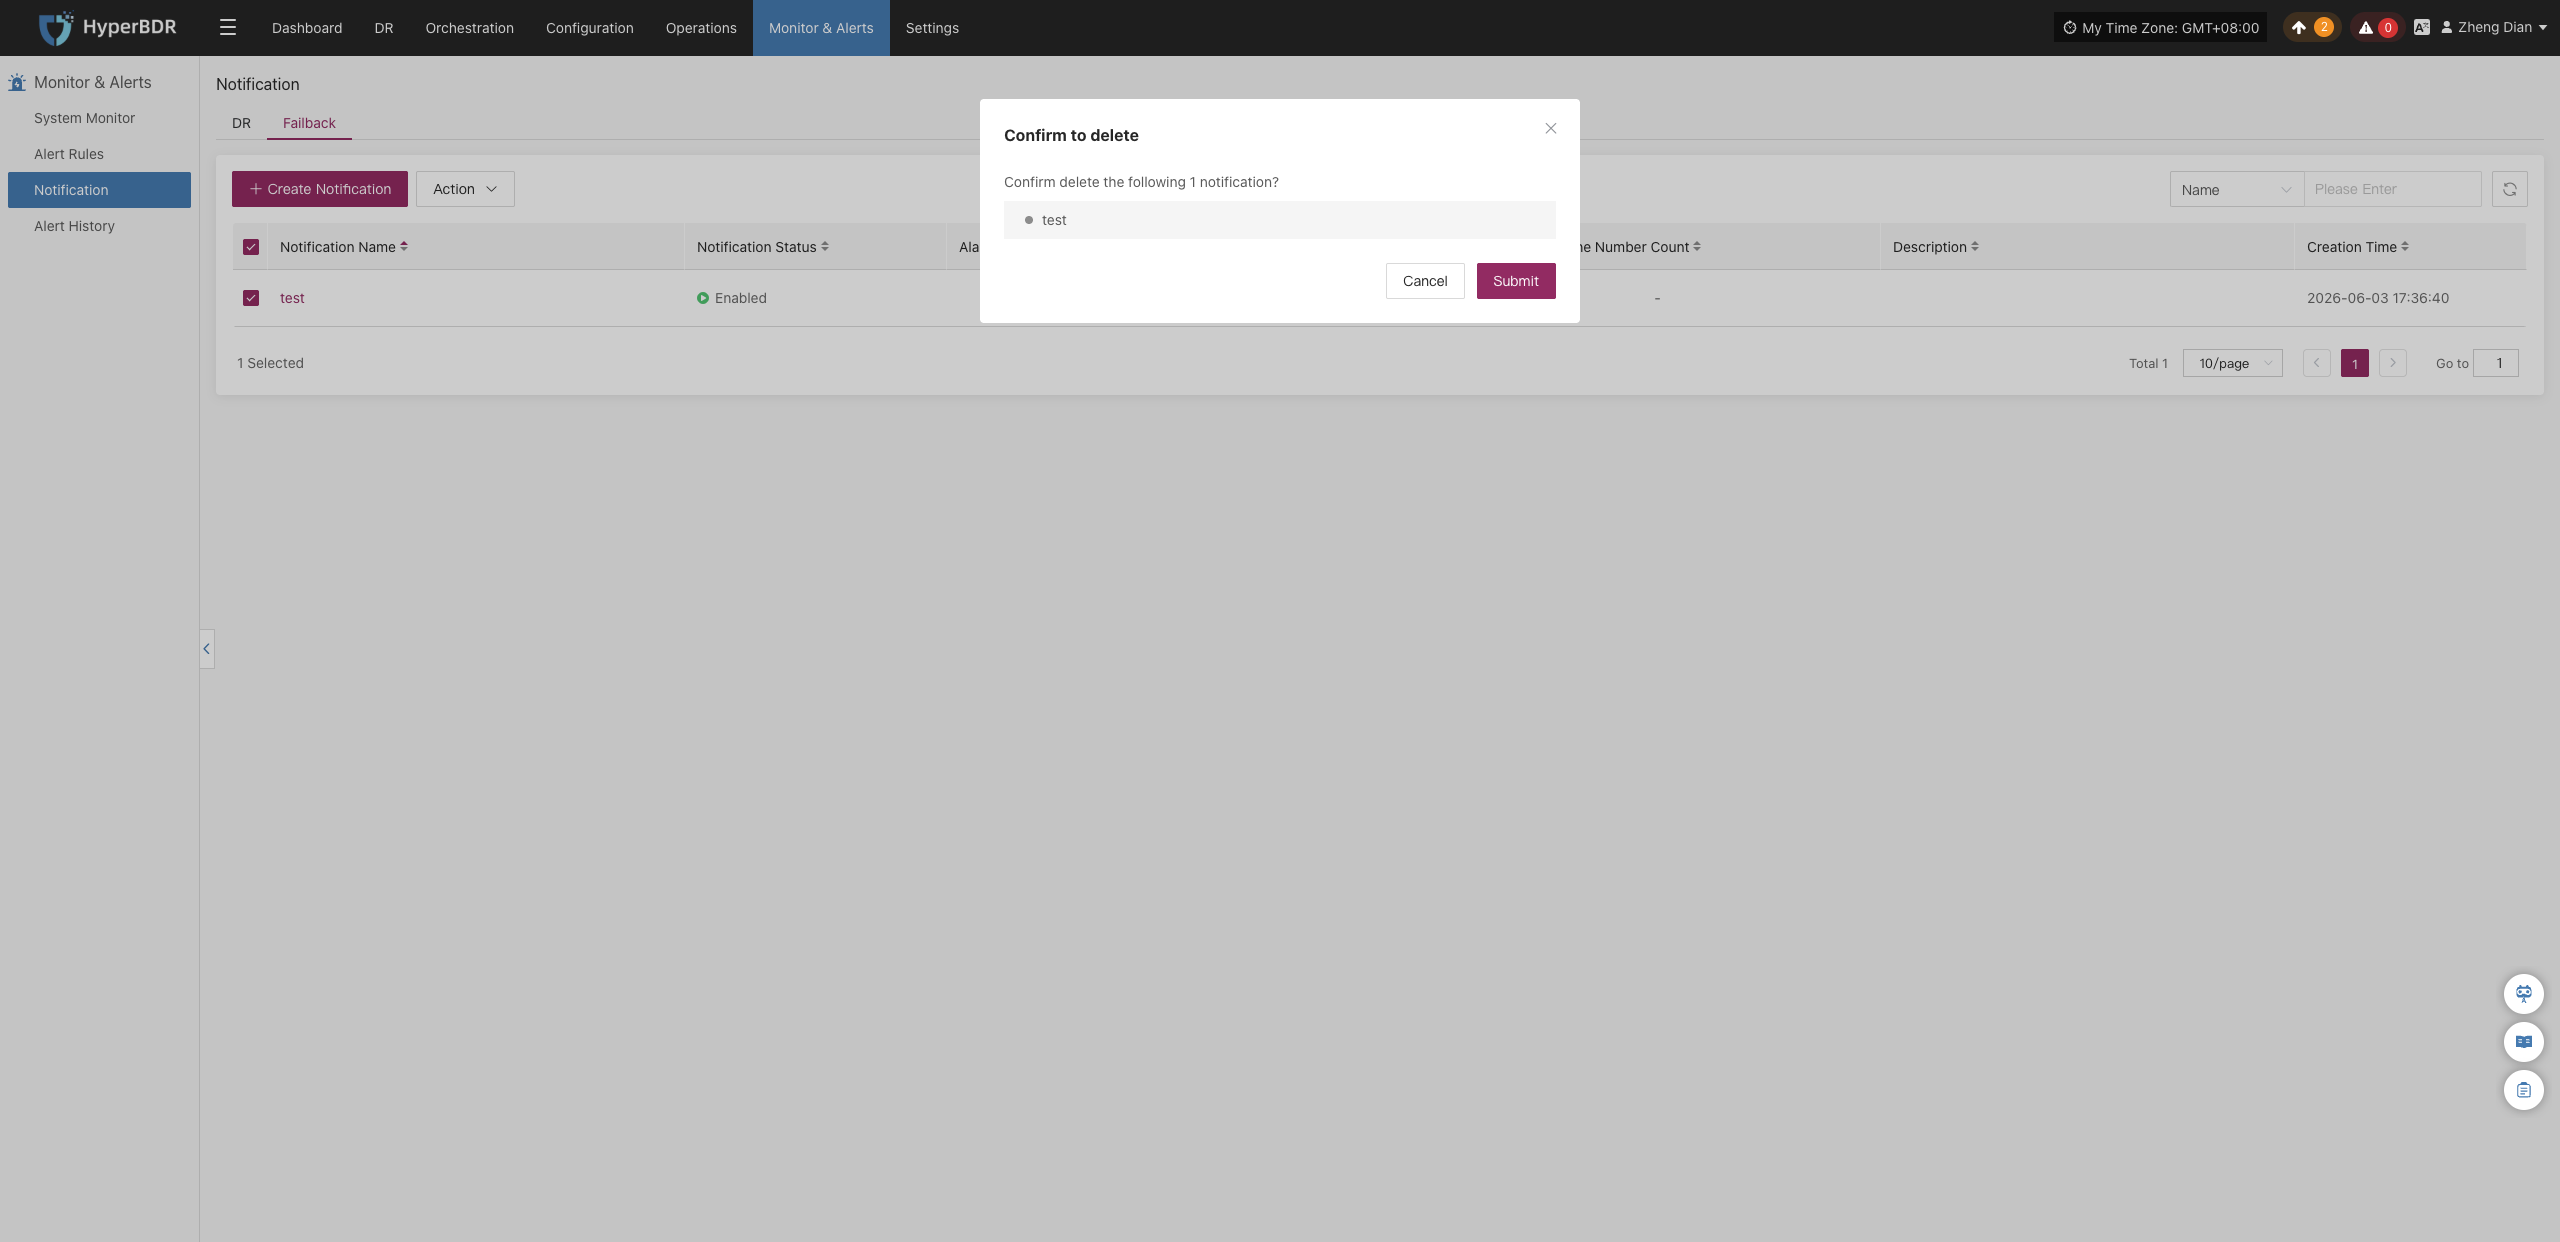
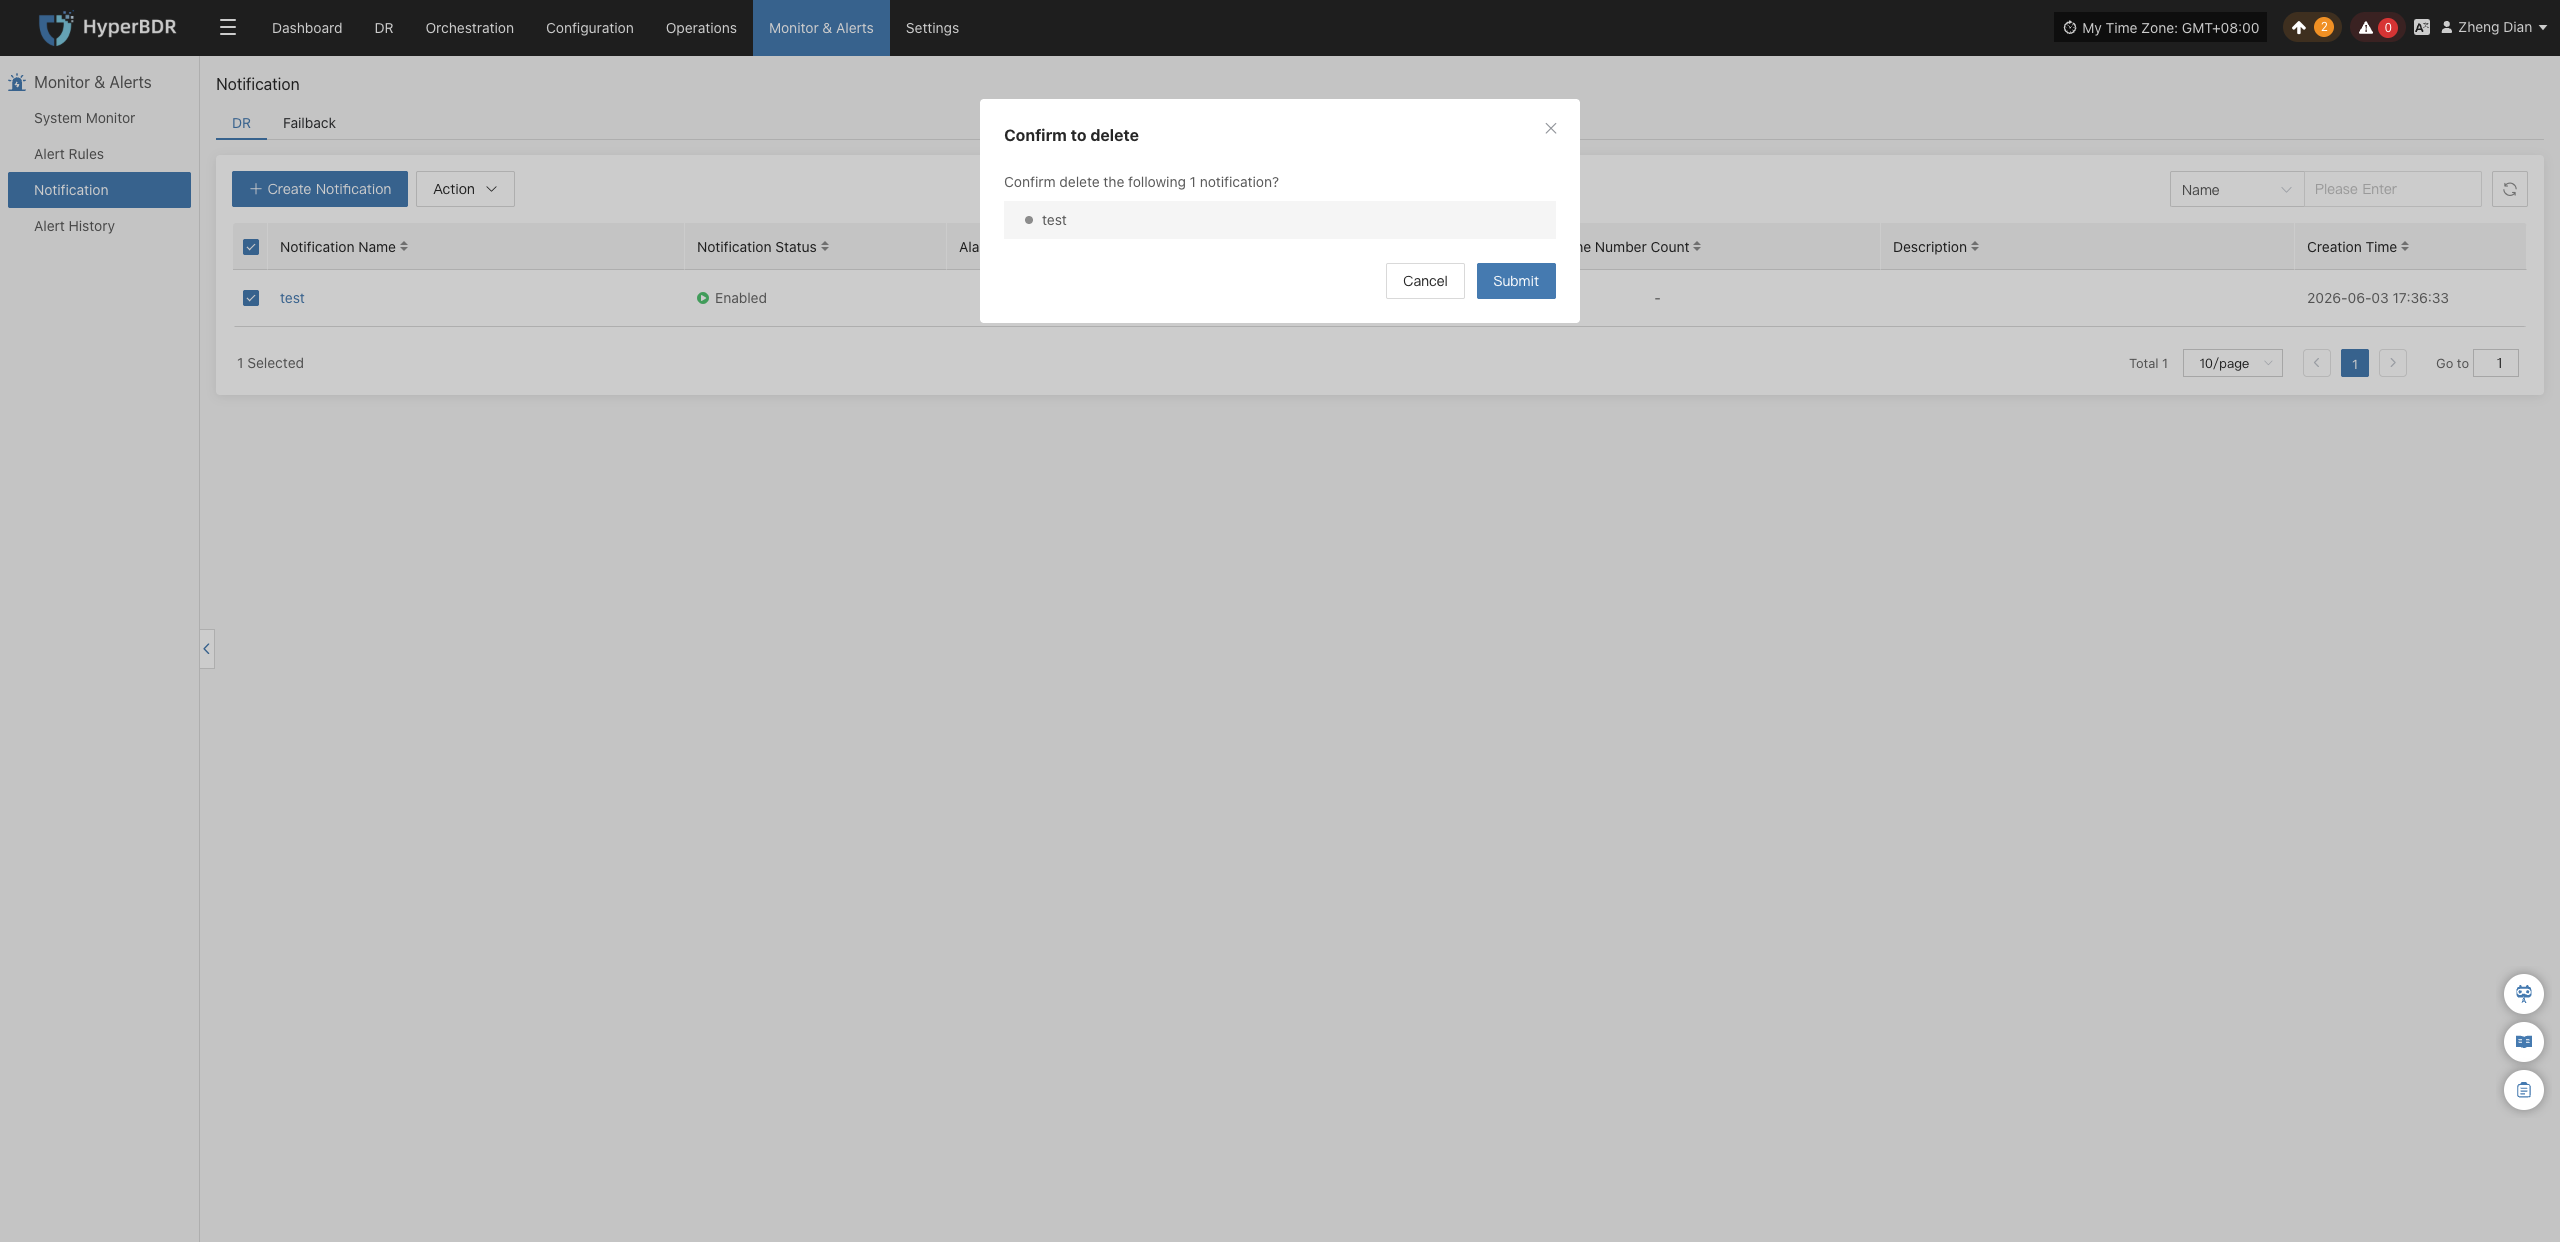
Click 【Remove】 to display a secondary confirmation dialog. After confirmation, the system will permanently delete the notification recipient and cancel its association with all related alert rules.
Warning
The remove operation completely unbinds the recipient from alert rules. Please verify that there are no active alert dependencies before proceeding.
Failback
Create Notification
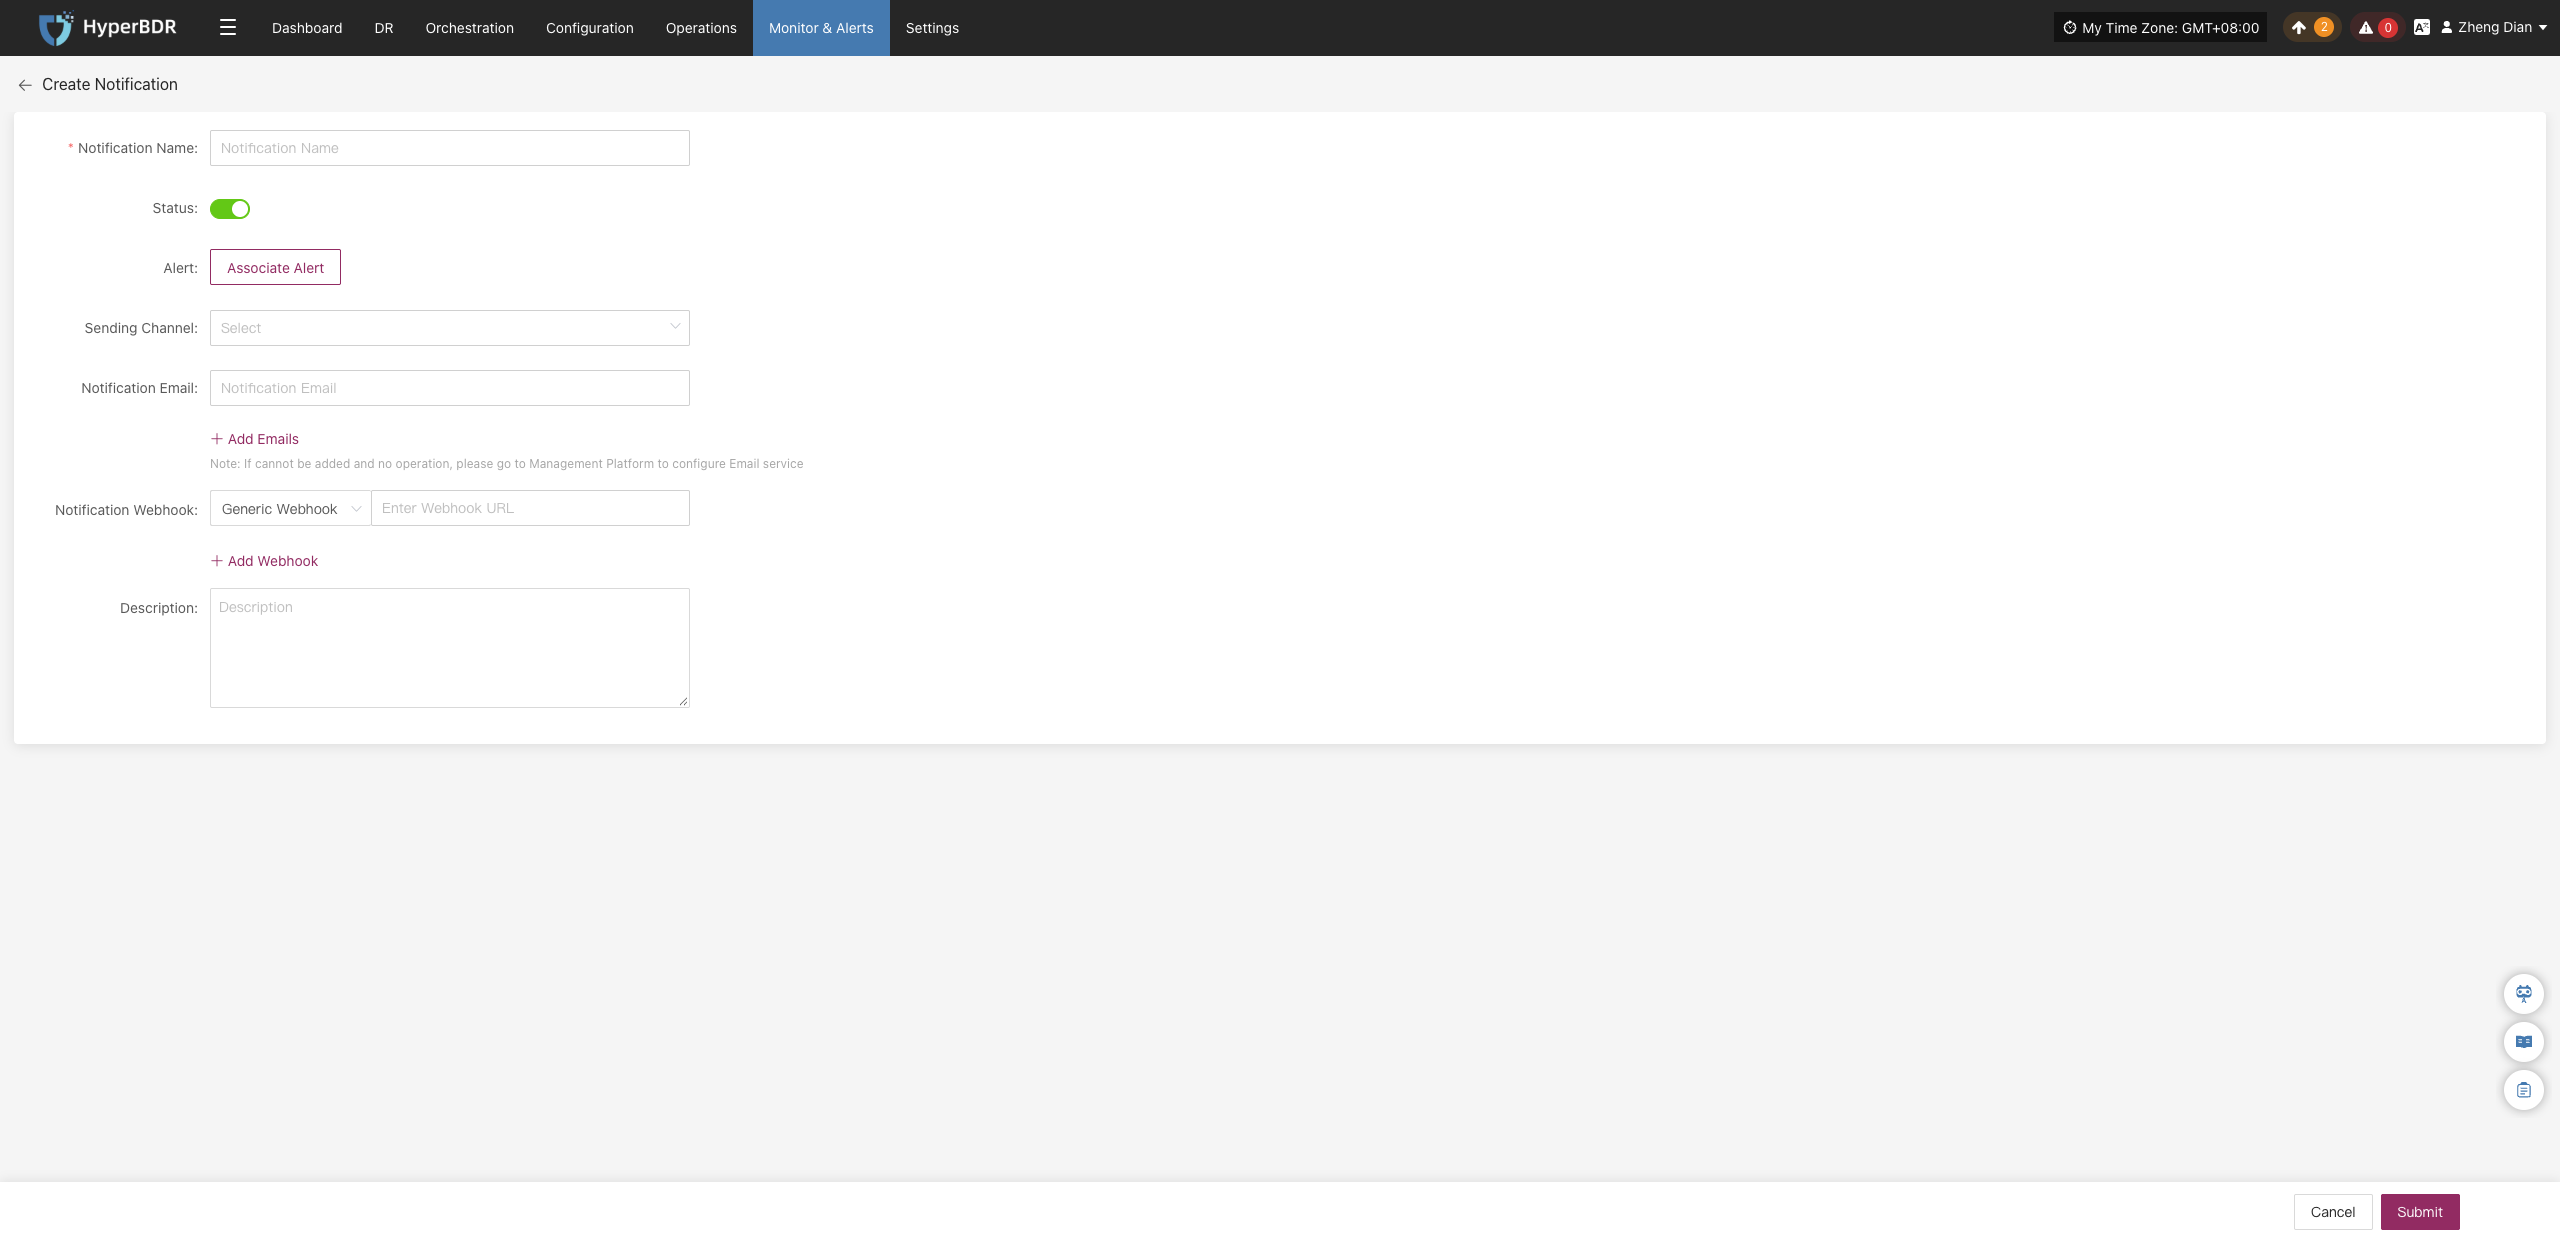
On the 【Monitoring & Alerts】>【Notification Recipients】 page, switch to the 【Failback】 tab, and click 【Create Notification Recipient】 to configure notification recipients for failback scenarios.
| Field Name | Example | Description |
|---|---|---|
| Notification Name | test | Custom name of the failback notification recipient, used to identify different notification configurations. |
| Status | Enabled | Sets whether the notification recipient is active. When enabled, the system sends alert notifications whenever the conditions of associated alert rules are met. |
| Alert Rules | Associated Alert Rules | Click 【Associate Alert Rules】 to select the alert rules to link in the popup selection dialog. The notification recipient will receive and send notifications based on the associated alert rules. |
| Sending Channel | xxx@qq.com | Select a configured notification sending channel from the dropdown list. If no email channel is available in the list, please configure the service based on your deployment model: for on-premises/private deployments, configure email services in the management platform; for SaaS users, please contact technical support to Get Support. |
| Notification Email | XXX@qq.com | Destination email address to receive alert notifications. Click 【+ Add Email】 on the page to add multiple email addresses. |
| Notification Webhook | https://example.com/webhook | Configure the Webhook URL to receive alert notifications. Click 【+ Add Webhook】 on the page to add multiple Webhook URLs. |
| Description | - | Additional remarks or notes for the notification recipient. |
Action
After selecting a failback notification recipient, click the 【Action】 button to expand the action menu, where you can perform modify, enable, disable, and remove operations:
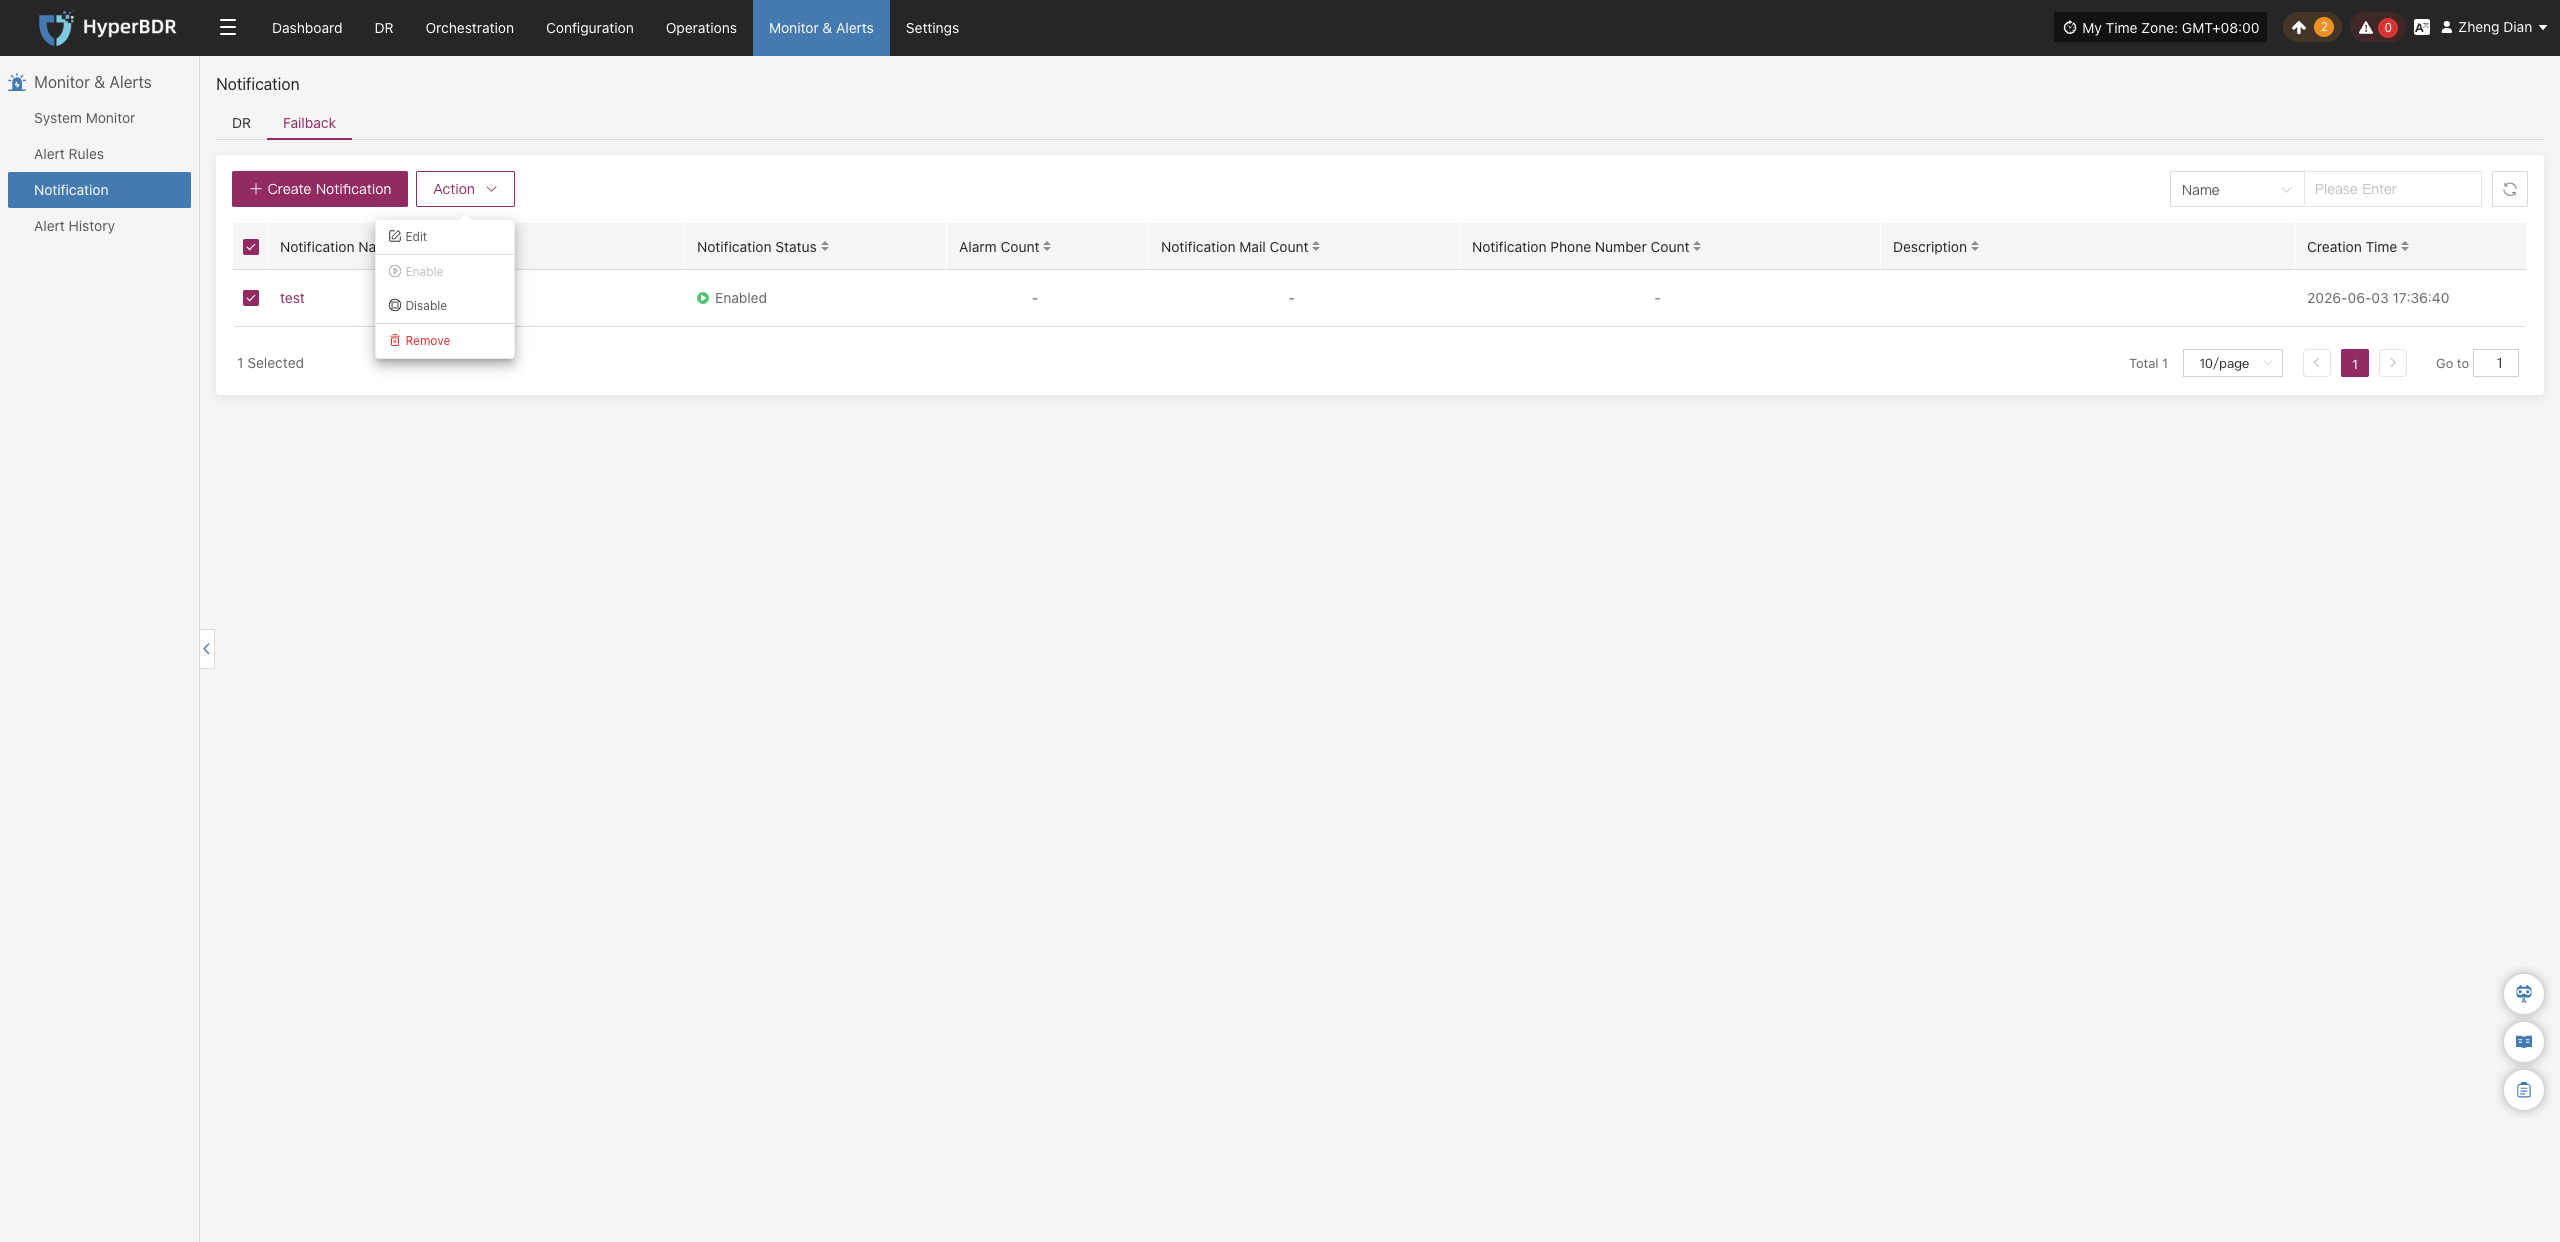
Modify
Click 【Modify】 to navigate to the editing page, where you can modify the configuration parameters of the created failback notification recipient.
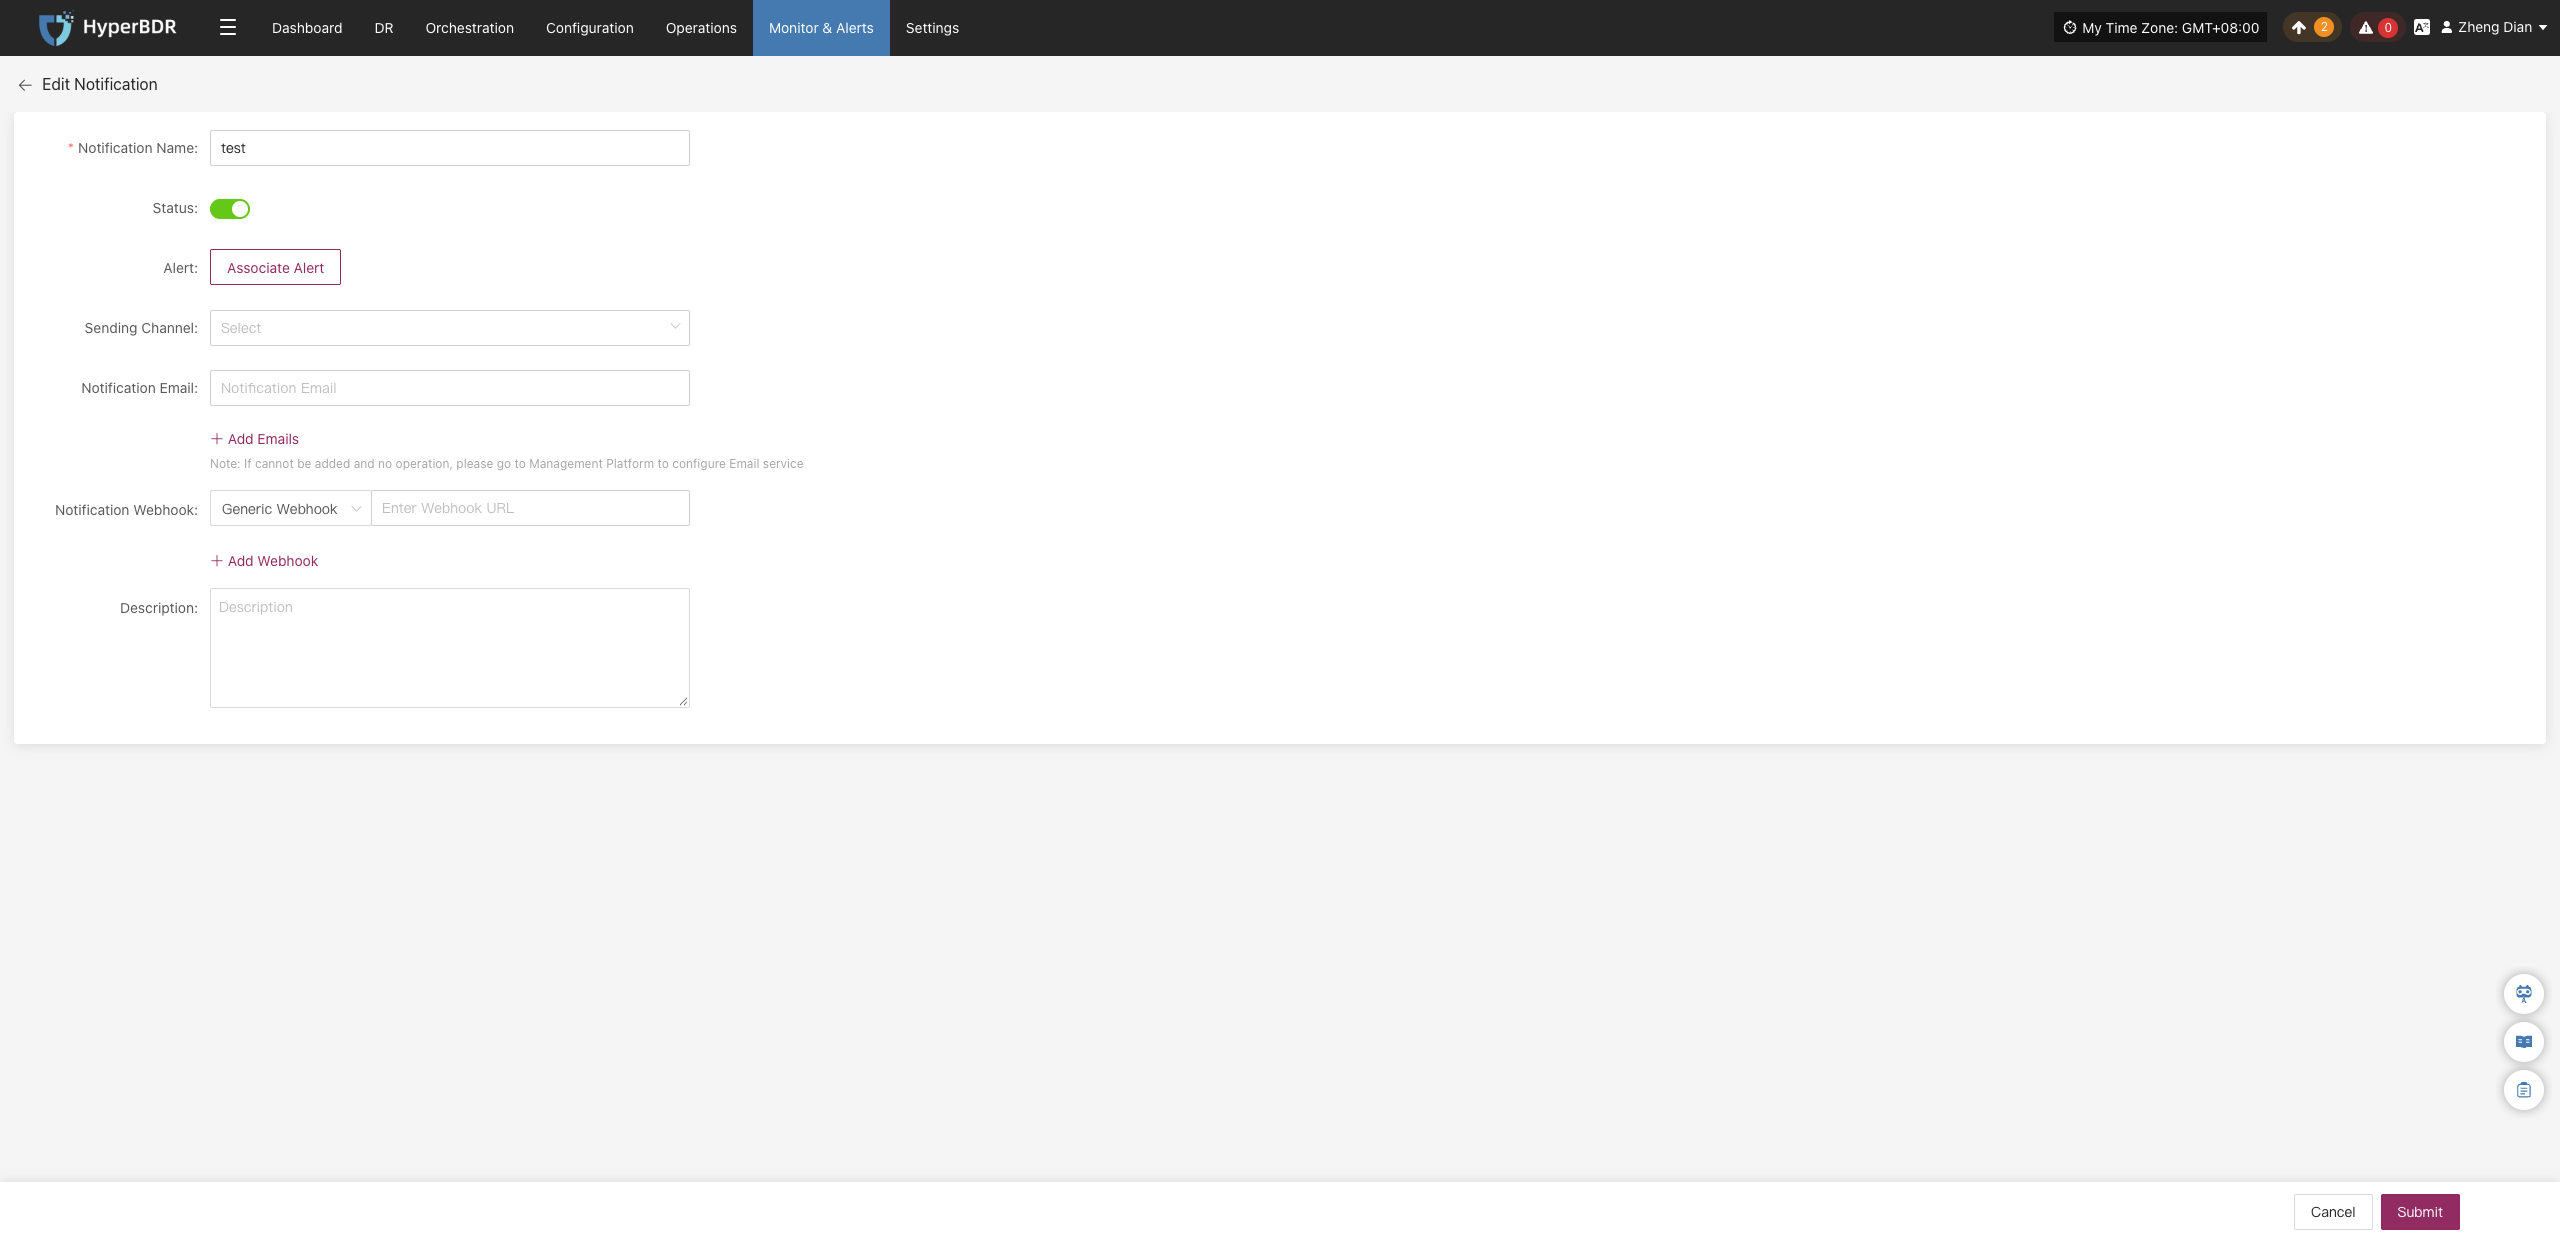
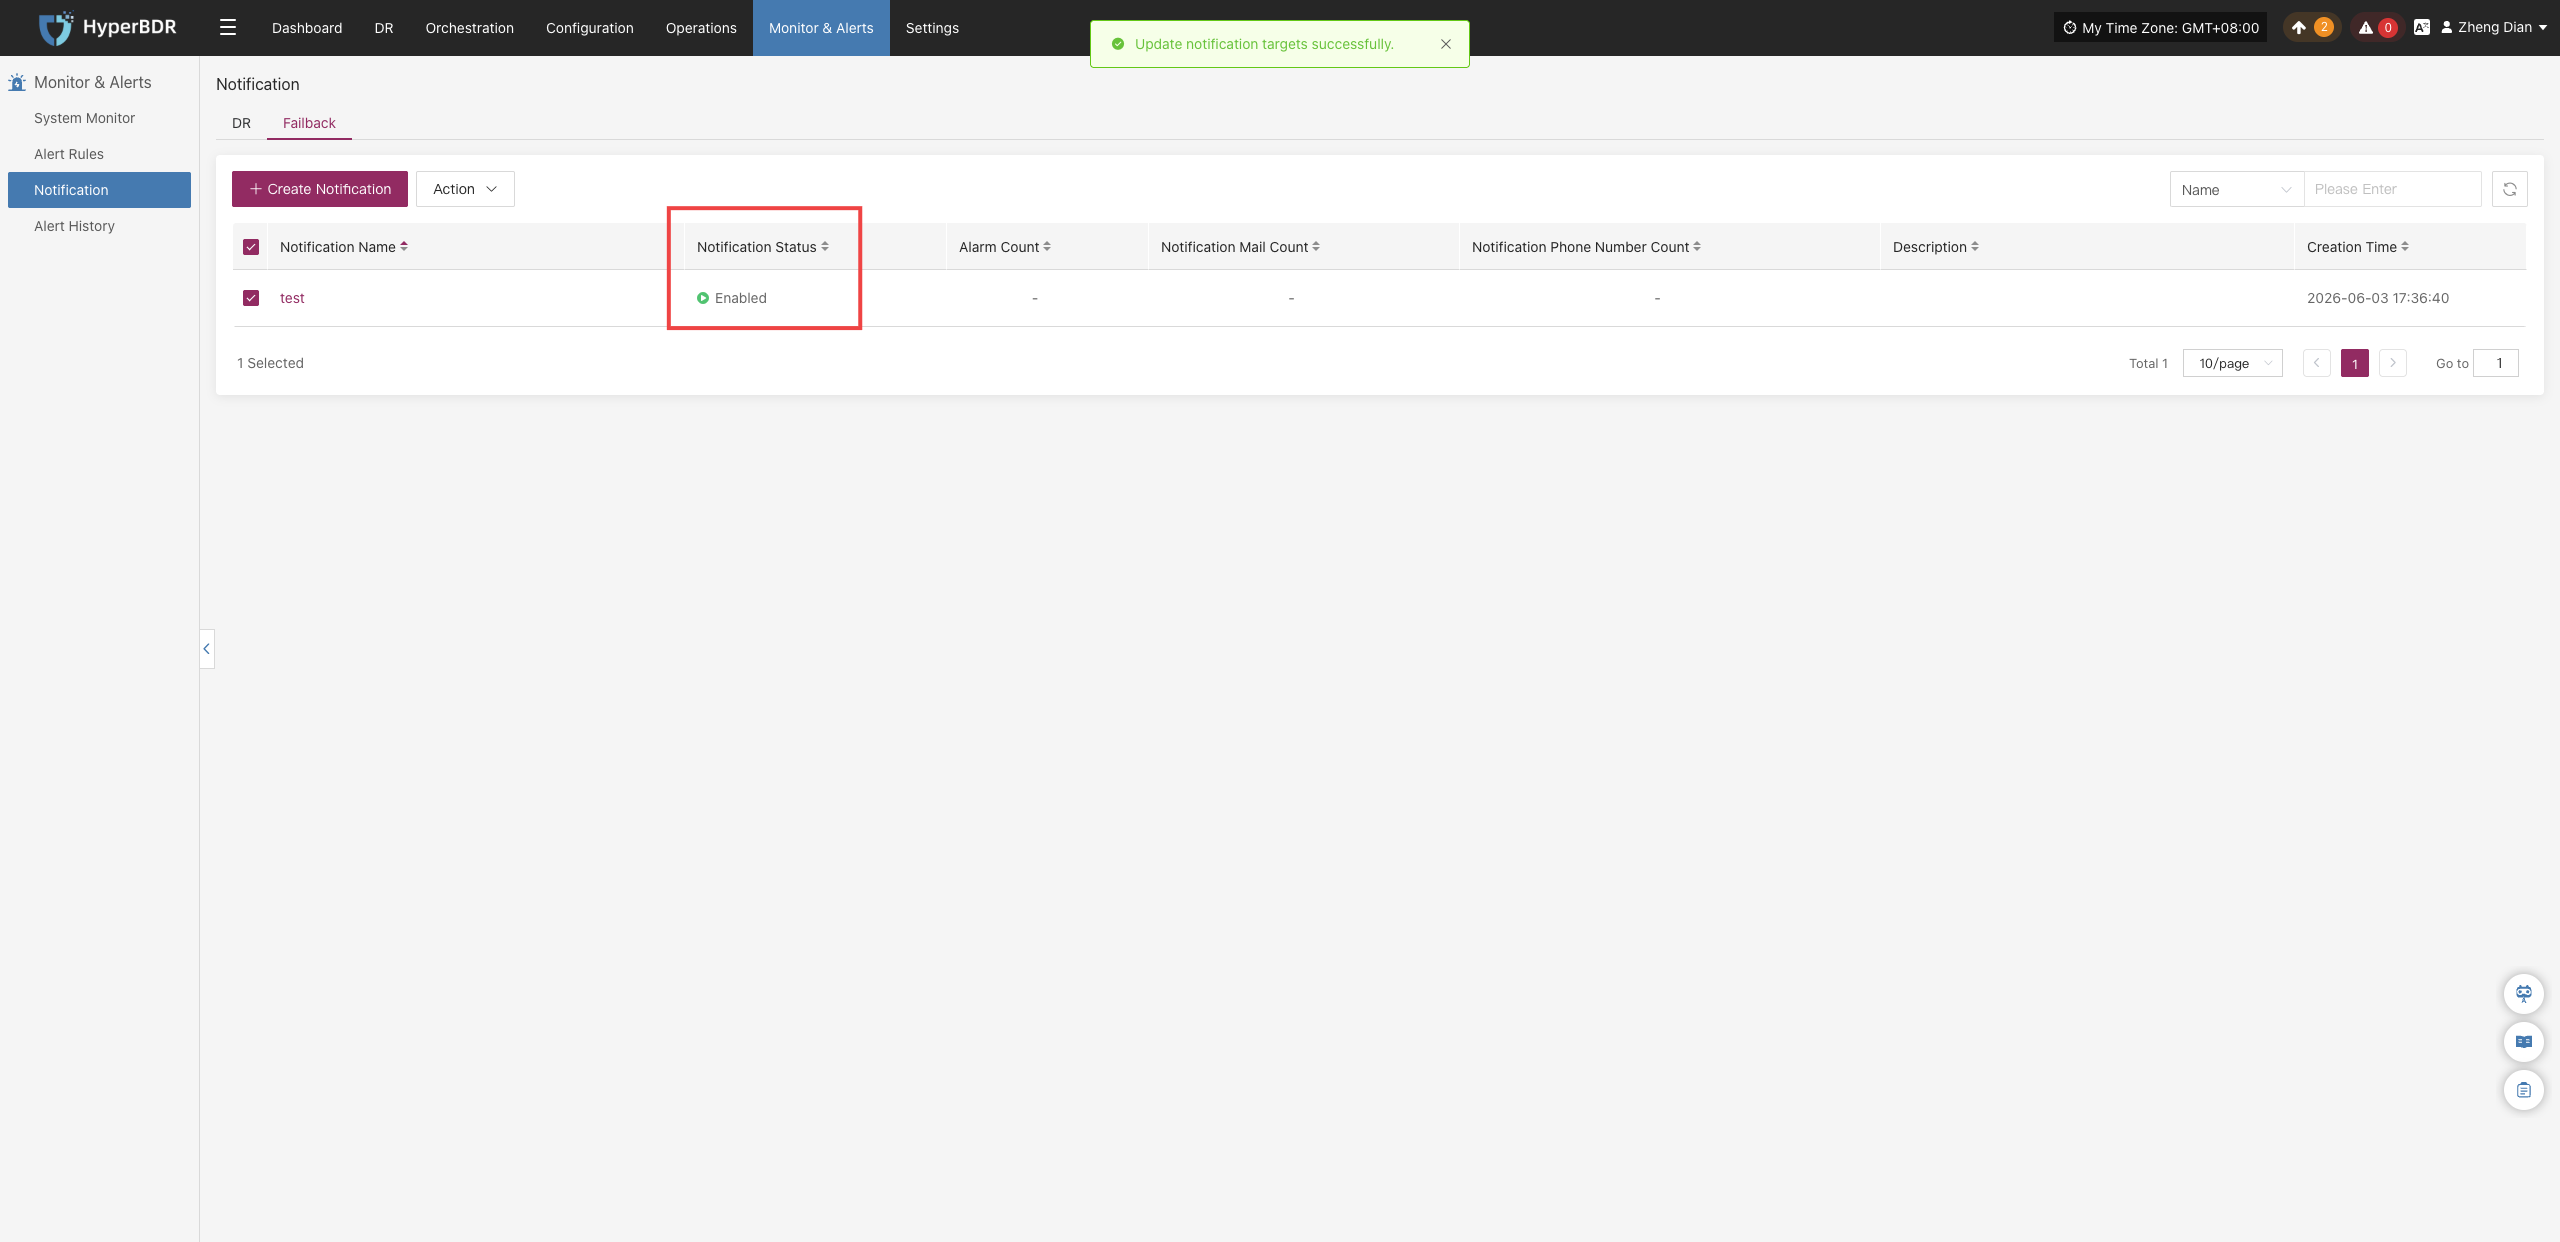
Enable
Click 【Enable】 to update the failback notification recipient status to "Enabled".
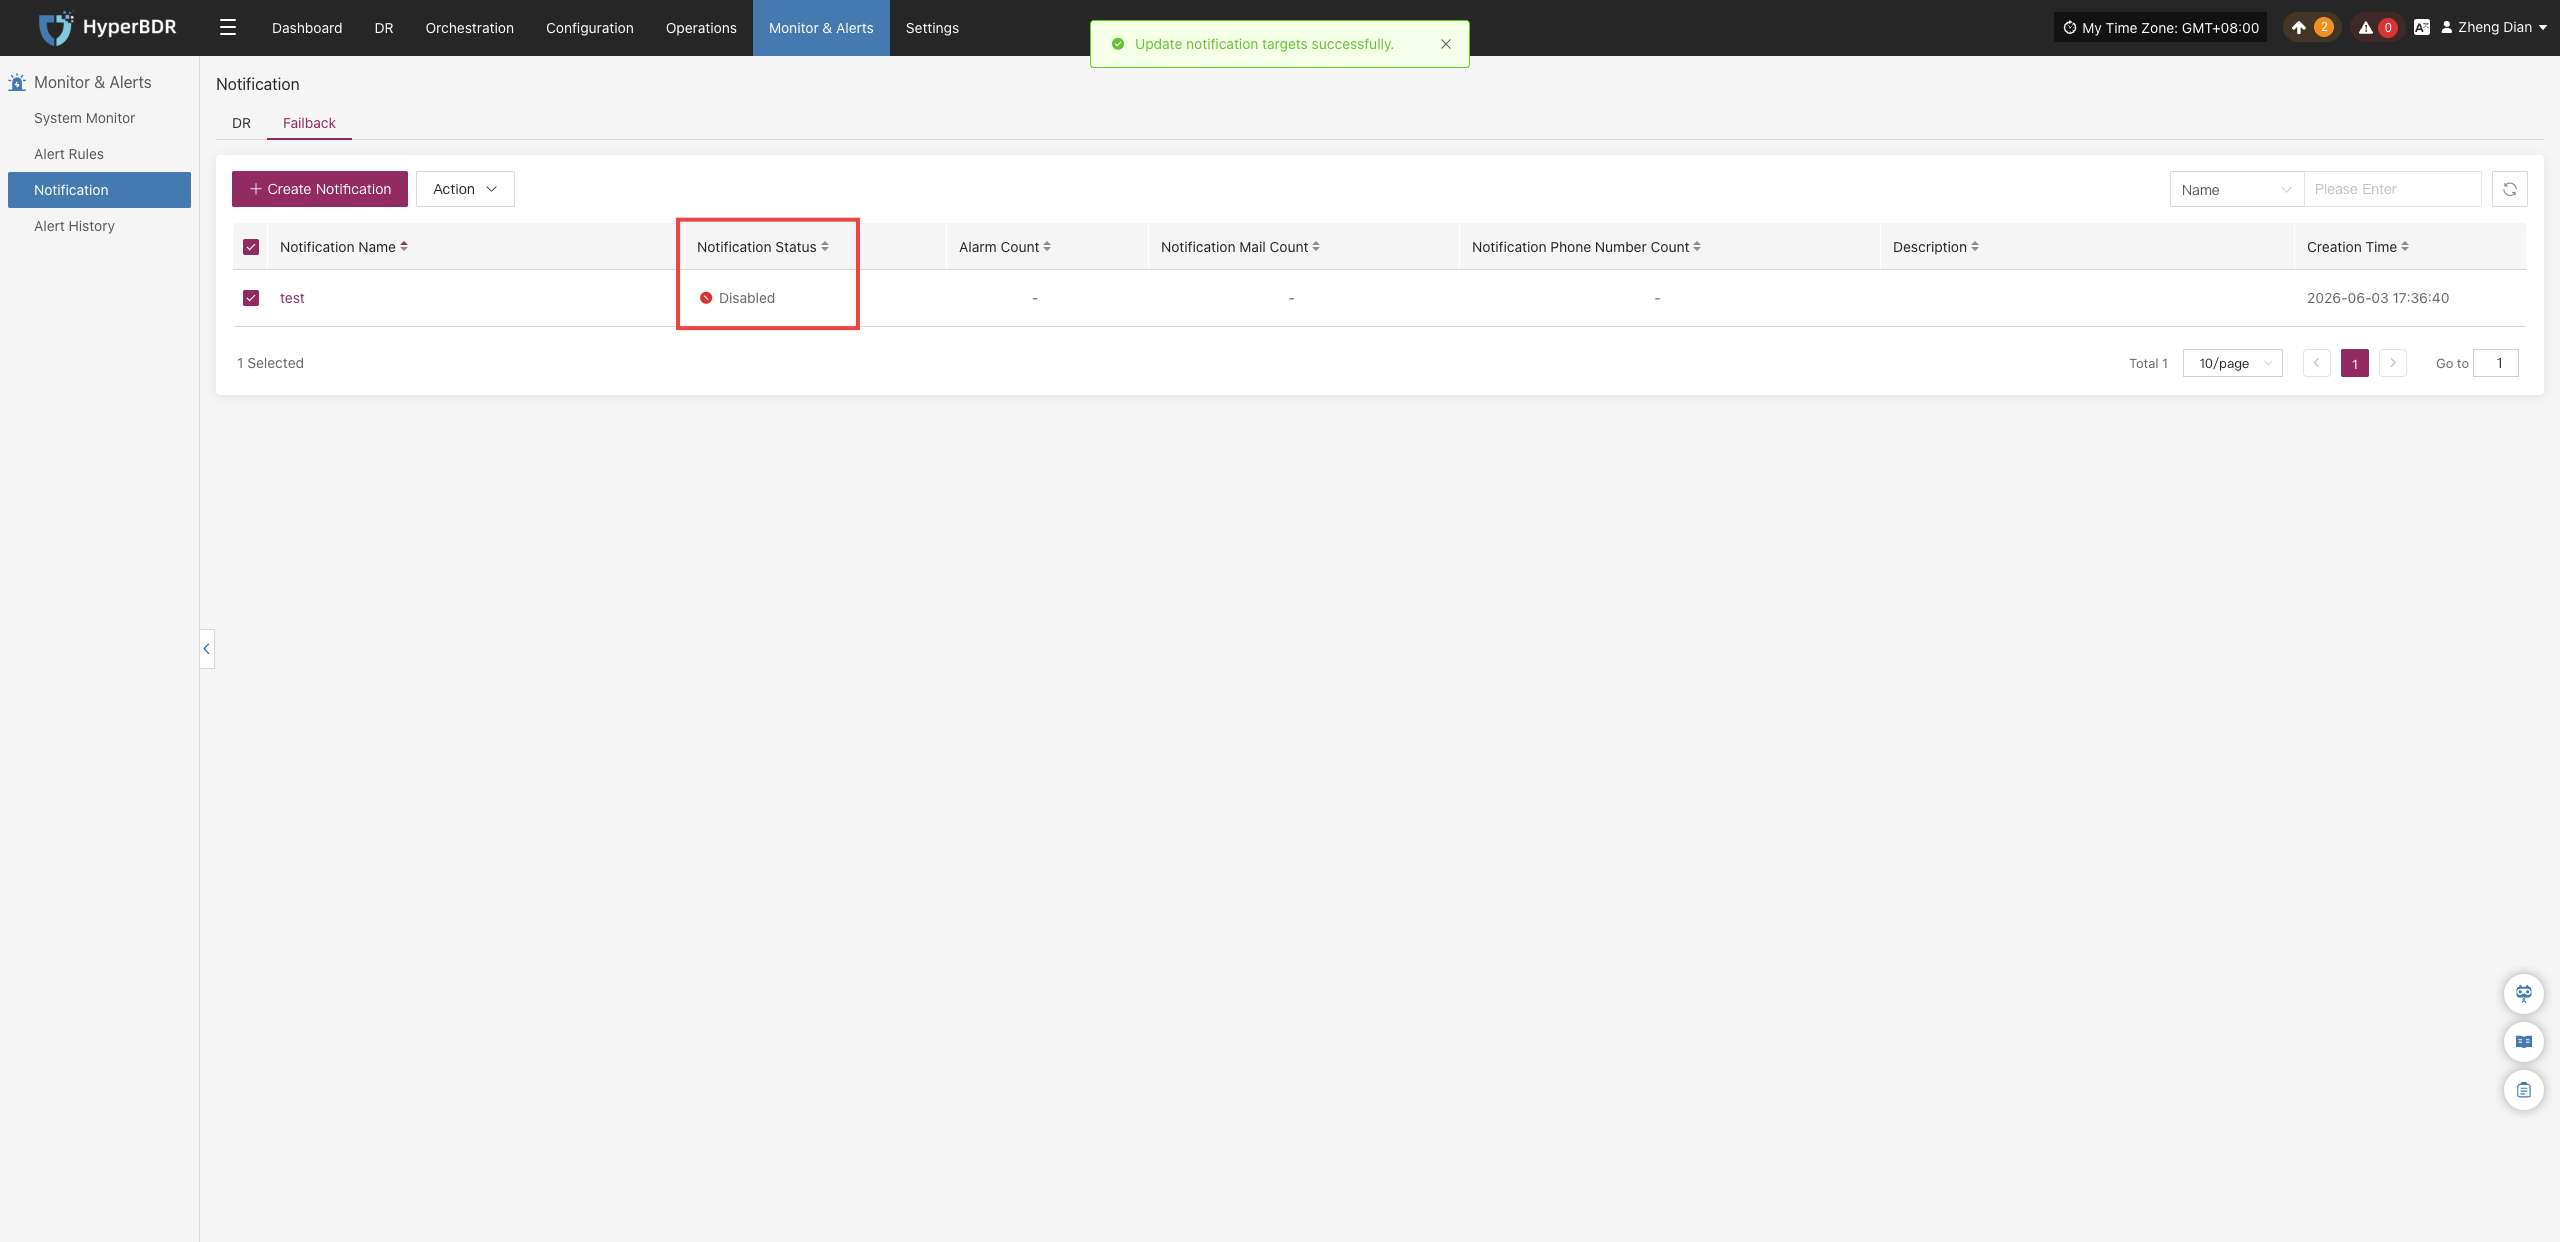
Disable
Click 【Disable】 to update the failback notification recipient status to "Disabled". No notifications will be sent while the recipient is in the disabled state.
Remove
Click 【Remove】 to display a secondary confirmation dialog. After confirmation, the system will permanently delete the notification recipient and cancel its association with all related alert rules.
Warning
The remove operation completely unbinds the recipient from alert rules. Please verify that there are no active alert dependencies before proceeding.